 Posted by Chanel Greco, Developer Advocate Google Workspace
Google Workspace offers tools for productivity and collaboration for the ways we work. It also offers a rich set of APIs, SDKs, and no-code/low-code tools to create apps and integrate workflows that integrate directly into the surfaces across Google Workspace.
Leading software makers like Atlassian, Asana, LumApps and Miro are building integrations with Google Workspace apps—like Google Docs, Meet, and Chat—to make it easier than ever to access data and act right in the tools relied on by more than 3 billion users and 9 million paying customers.
At I/O’23 we had some exciting announcements for new features that give developers more options when integrating apps with Google Workspace.
Third-party smart chips in Google Docs
We announced the opening up of smart chips functionality to our partners. Smart chips allow you to tag and see critical information to linked resources, such as projects, customer records, and more. This preview information provides users with context and critical information right in the flow of their work. These capabilities are now generally available to developers to build their own smart chips.
Some of our partners have built and launched integrations using this new smart chips functionality. For example, Figma is integrated into Docs with smart chips, allowing users to tag Figma projects which allows readers to hover over a Figma link in a doc to see a preview of the design project. Atlassian is leveraging smart chips so users can seamlessly access Jira issues and Confluence pages within Google Docs.
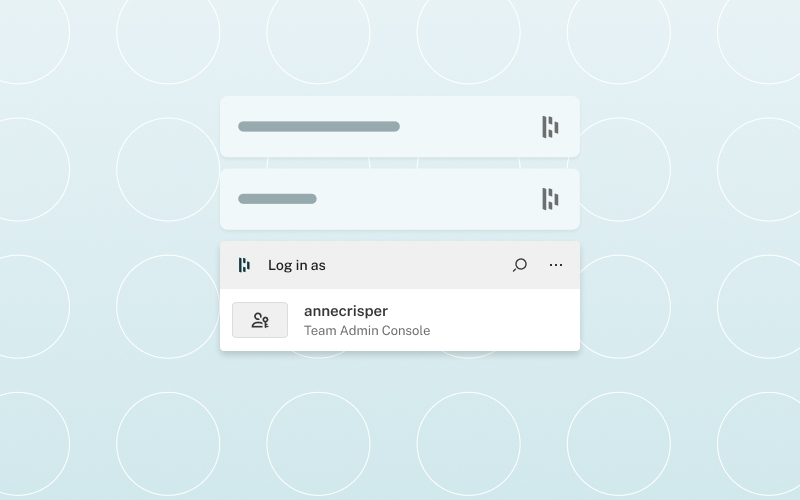
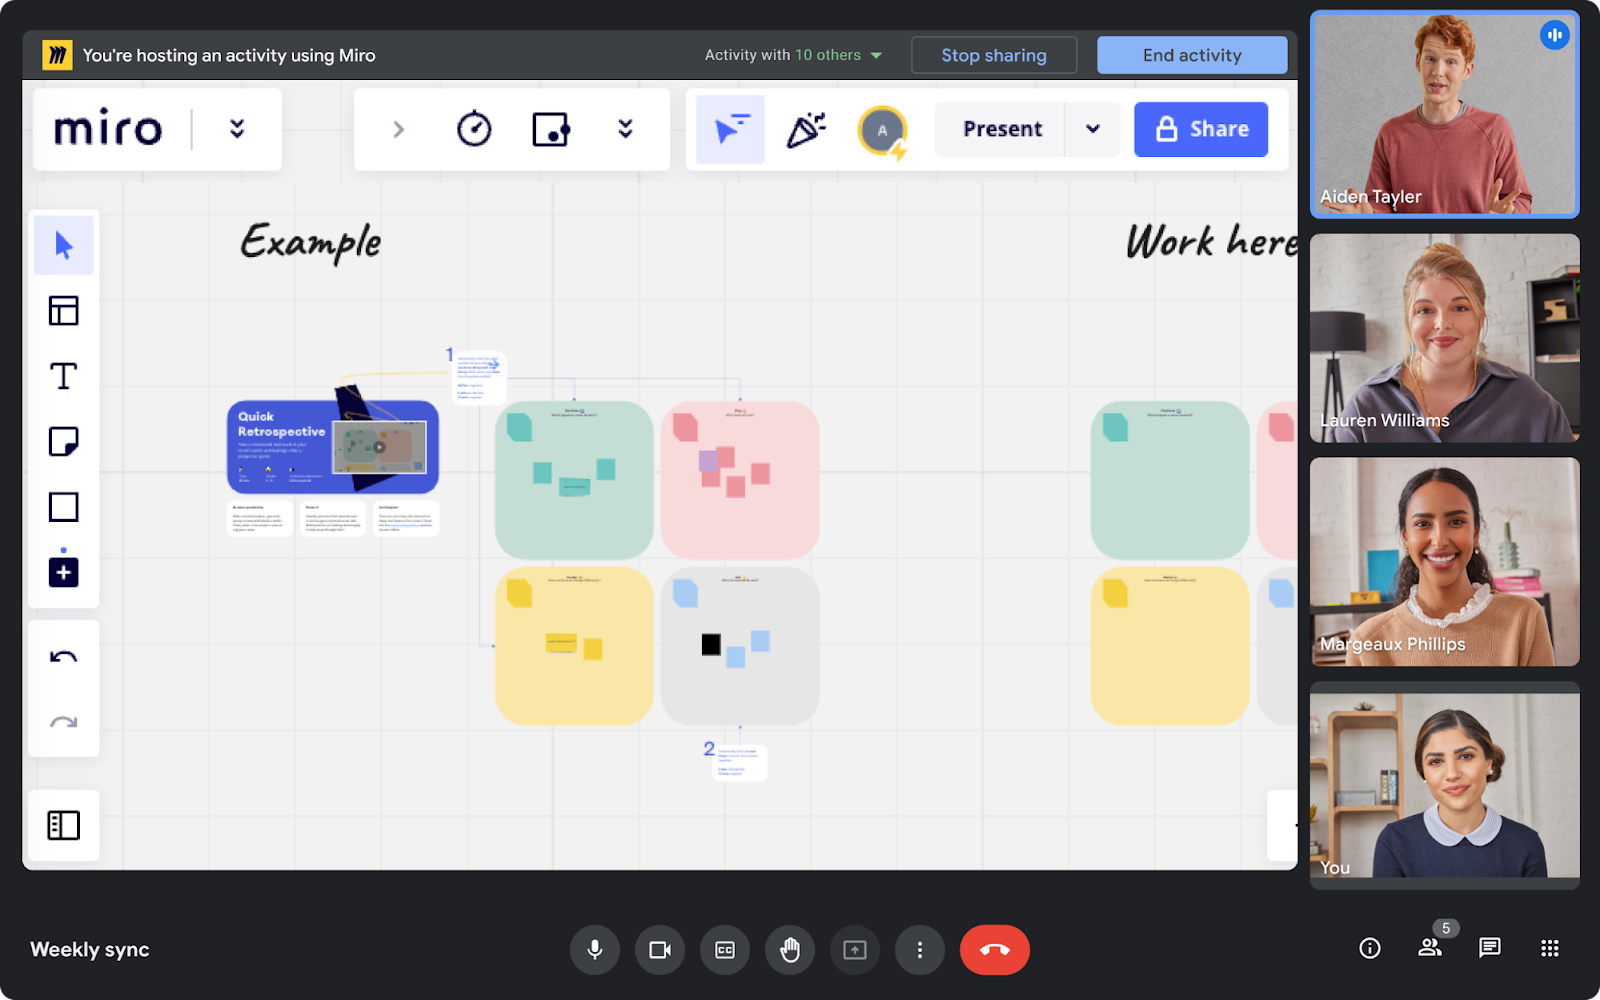
Tableau uses smart chips to show the user the Tableau Viz's name, last updated date, and a preview image. With the Miro smart chip solution users have an easy way to get context, request access and open a Miro board from any document. The Whimsical smart chip integration allows users to see up-to-date previews of their Whimsical boards.
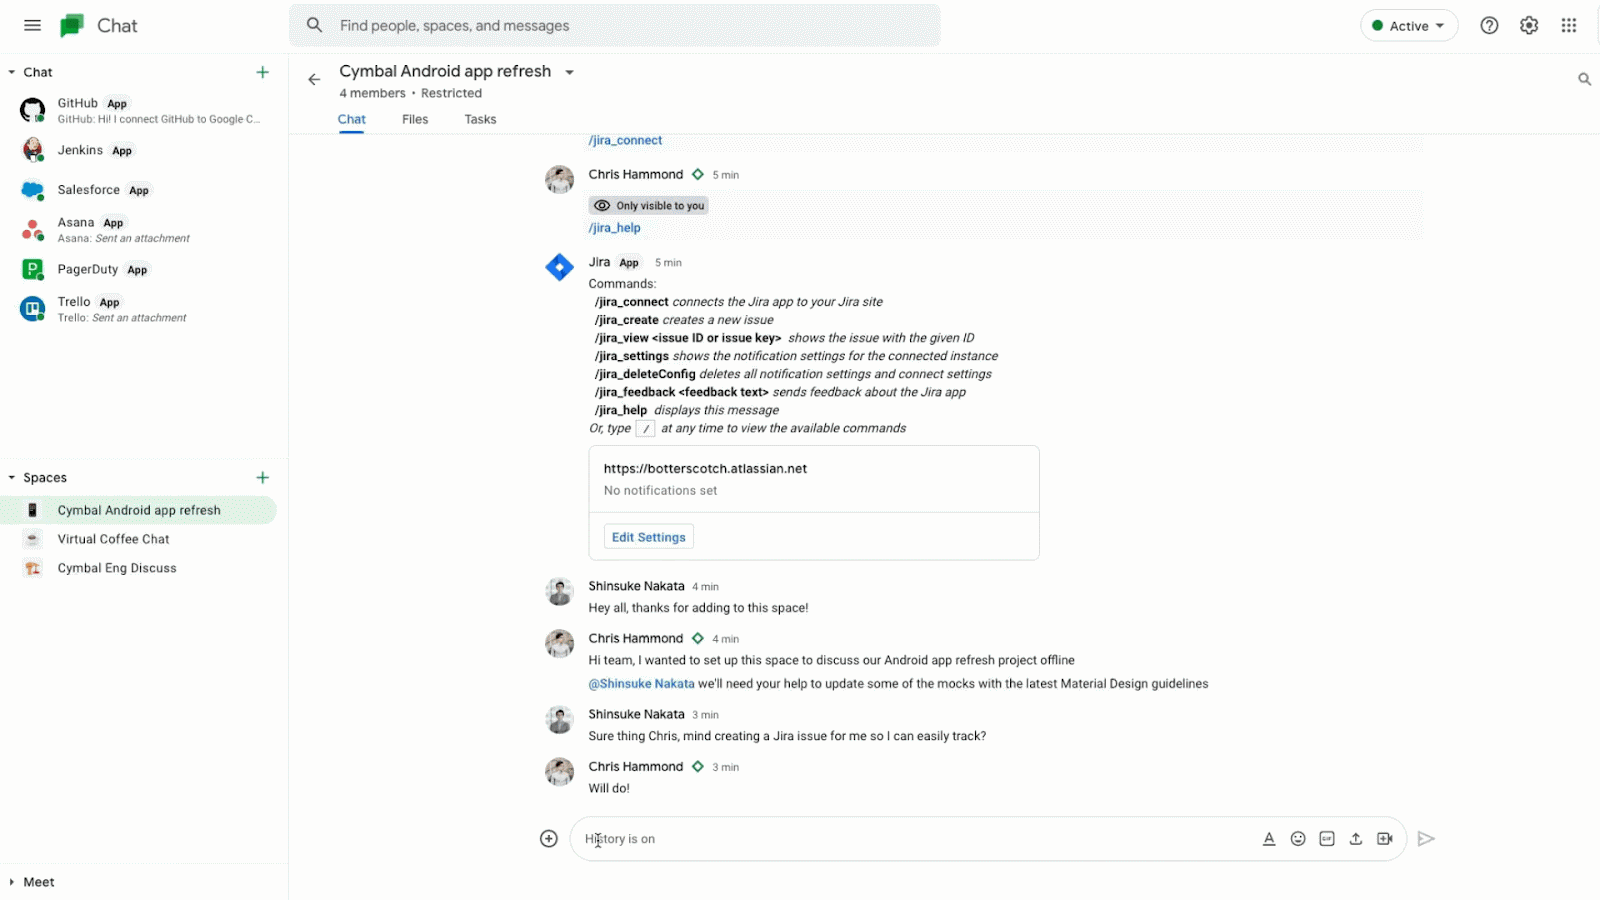
Google Chat REST API and Chat apps
Developers and solution builders can use the Google Chat REST API to create Chat apps and automate workflows to send alerts, create spaces, and share critical data right in the flow of the conversation. For instance, LumApps is integrating with the Chat APIs to allow users to start conversations in Chat right from within the employee experience platform.
The Chat REST API is now generally available.
Using the Chat API and the Google Workspace UI-kit, developers can build Chat apps that bring information and workflows right into the conversation. Developers can also build low code Chat apps using AppSheet.
There are already Chat apps available from partners like Atlassian’s Jira, Asana, PagerDuty and Zendesk. Jira for Google Chat to collaborate on projects, create issues, and update tickets – all without having to switch context.
Google Workspace UI-kit
We are continuing to evolve the Workspace UI-kit to provide a more seamless experience across Google Workspace surfaces with easy to use widgets and visual optimizations.
For example, there is a new date and time picker widget for Google Chat apps and there is the new two-column layout to optimize space and organize information.
Google Meet SDKs and APIs
There are exciting new capabilities which will soon be launched in preview for Google Meet.
For example, the Google Meet Live Sharing SDK allows for the building of new shared experiences for users on Android, iOS, and web. Developers will be able to synchronize media content across participant’s devices in real-time and offer shared content controls for everyone in the meeting.
The Google Meet Add-ons SDK enables developers to embed their app into Meet via an iframe, and choose between the main stage or the side panel. This integration can be published on the Google Workspace Marketplace for discoverability.
Partners such as Atlassian, Figma, Lucid Software, Miro and Polly.ai, are already building Meet add-ons, and we’re excited to see what apps and workflows developers will build into Meet’s highly-interactive surfaces.
With the Google Meet APIs developers can add the power of Google Meet to their applications by pre-configuring and launching video calls right from their apps. Developers will also be able to pull data and artifacts such as attendance reporting, recordings, and transcripts to make them available for their users post-meeting.
Google Calendar API
The ability to programmatically read and write the working location from Calendar is now available in preview. In the second half of this year, we plan to make these two capabilities, along with the writing of sub-day working locations, generally available.
These new capabilities can be used for integrating with desk booking systems and coordinating in-offices days, to mention just a few use cases. This information will help organizations adapt their setup to meet the needs of hybrid work.
Google Workspace API Dashboard and APIs Explorer
Two new tools were released to assist developers: the Google Workspace API Dashboard and the APIs Explorer.
The API Dashboard is a unified way to access Google Workspace APIs through the Google Cloud Console—APIs for Gmail, Google Drive, Docs, Sheets, Chat, Slides, Calendar, and many more. From there, you now have a central location to manage all your Google Workspace APIs and view all of the aggregated metrics, quotas, credentials, and more for the APIs in use.
The APIs Explorer allows you to explore and test Google Workspace APIs without having to write any code. It's a great way to get familiar with the capabilities of the many Google Workspace APIs.
Apps Script
The eagerly awaited project history capability for Google Apps Script will soon be generally available. This feature allows users to view the list of versions created for the script, their content, and different changes between the selected version and the current version.
It was also announced that admins will be able to add an allowlist for URLs per domain to help safer access controls and control where their data can be sent externally.
The V8 runtime for Apps Script was launched back in 2020 and it enables developers to use modern JavaScript syntax and features. If you still have legacy scripts on the old Rhino runtime, now is the time to migrate them to V8.
AppSheet
We have been further improving AppSheet, our no-code solution builder, and announced multiple new features at I/O.
Later this year we will be launching Duet AI in AppSheet to make it easier than ever to create no-code apps for Google Workspace. Using a natural-language and conversational interface, users can build an app in AppSheet by simply describing their needs as a step-by-step conversation in chat.
The no-code Chat apps feature for AppSheet is generally available which can be used to quickly create Google Chat apps and publish them with 1-click.
AppSheet databases are also generally available. With this native database feature, you can organize data with structured columns and references directly in AppSheet.
Check out the Build a no-code app using the native AppSheet database and Add Chat to your AppSheet apps codelabs to get you started with these two new capabilities.
Google Workspace Marketplace
The Google Workspace Marketplace is where developers can distribute their Workspace integrations for users to find, install, and use. We launched the Intelligent Apps category which spotlights the AI-enabled apps developers build and helps users discover tools to work smarter and be more productive (eligibility criteria here).
Start building today
If you want early access to the features in preview, sign up for the Developer Preview Program. Subscribe to the Google Workspace Developers YouTube channel for the latest news and video tutorials to kickstart your Workspace development journey.
We can’t wait to see what you will build on the Google Workspace platform.
 Posted by Amy Zeppenfeld – Developer Relations Engineer

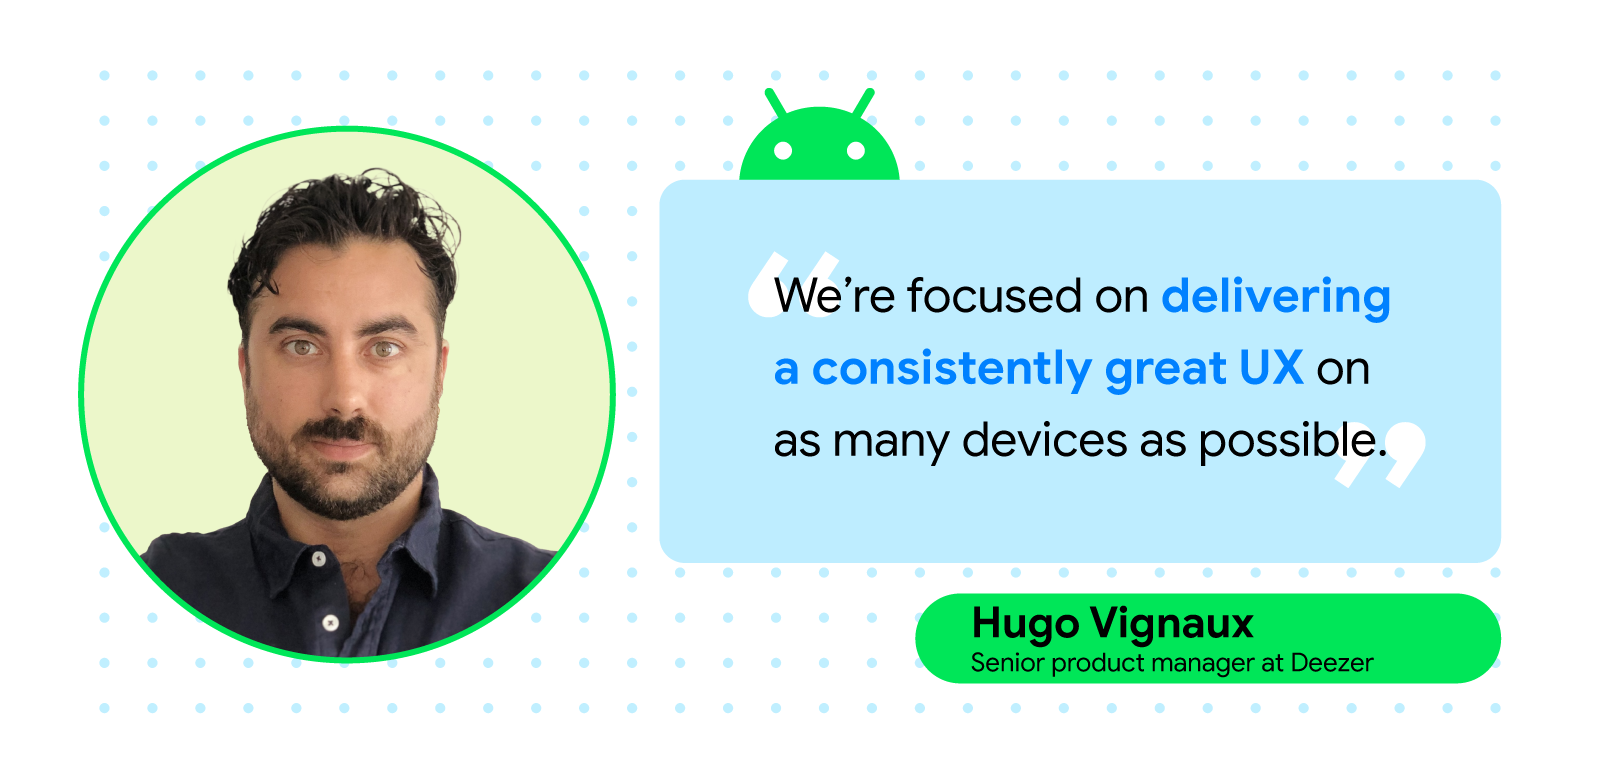
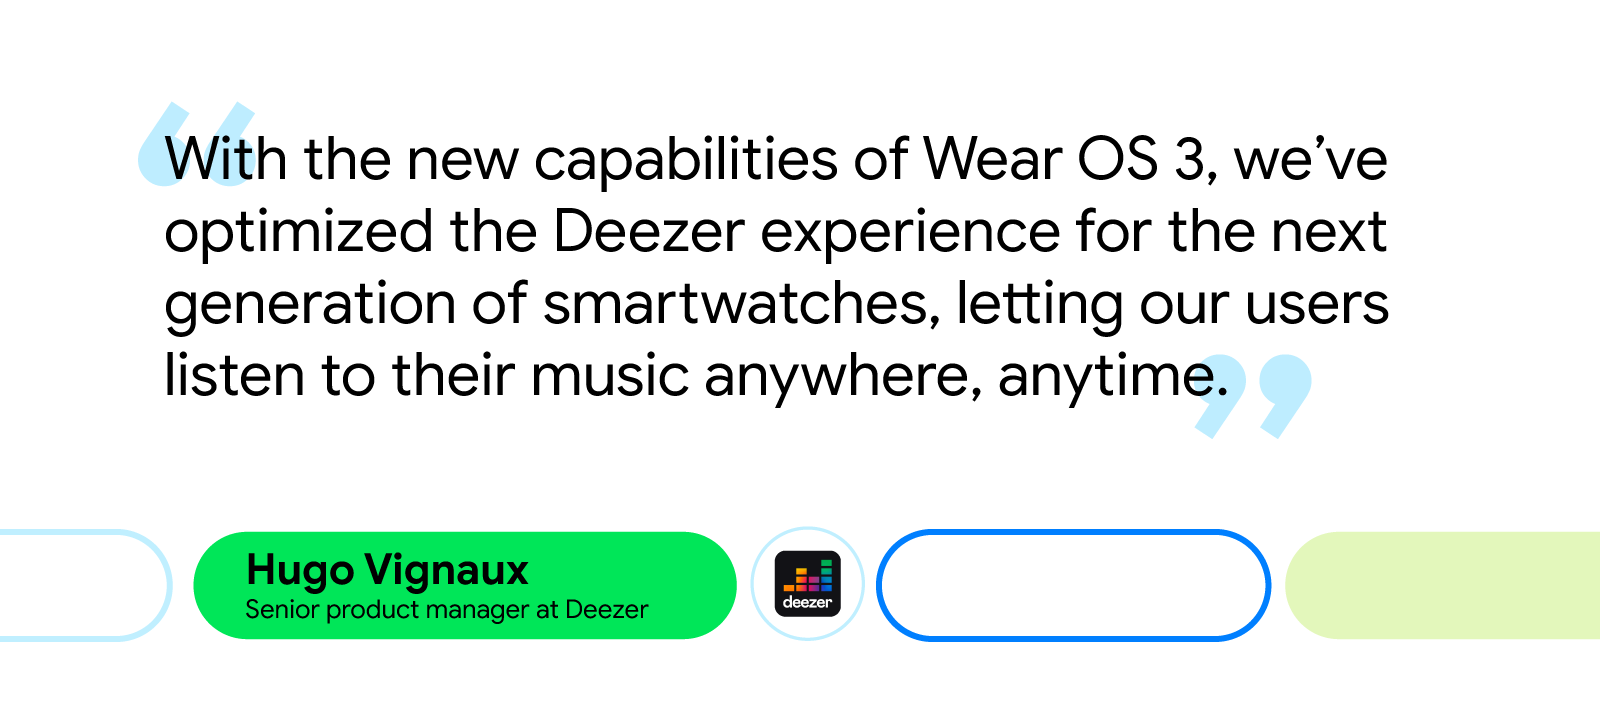
 Posted by Kateryna Semenova, Developer Relations Engineer, Android


 Posted by Milica Mihajlija, Technical Writer

 Posted by Paul Ruiz – Senior Developer Relations Engineer, and Kris Tonthat – Technical Writer


 Posted by Vikrant Rana, Product Manager


 Posted by Rob Simpson, Product Manager - Google Play & Joe Davis, Manager - Google Play Academy


 Posted by Márton Braun, Developer Relations Engineer
 Posted by
.png)
.png)
.png)


 Posted by the Android team