Tag Archives: Develop

10 things you might be doing wrong when using the SafetyNet Attestation API

Posted by Oscar Rodriguez, Developer Advocate

The SafetyNet Attestation API helps you assess the security and compatibility of the Android environments in which your apps run. Since it was introduced in March 2015, many developers have successfully integrated it into their Android apps to make more informed decisions based on the integrity and compatibility of the devices running their apps.

Throughout the years, the SafetyNet Attestation API has evolved, and its adoption has steadily increased. However, as with any security/anti-abuse related API, there are many common pitfalls that may lead developers into developing unstable systems, or worse, into a false sense of security.

In this post, we provide a list of the most common mistakes we have seen developers make when integrating the SafetyNet Attestation API.

1. Not getting an API key

Just like many other Google APIs, the SafetyNet Attestation API requires an API key in order to run. Furthermore, the SafetyNet Attestation API has a per-key usage quota. Although you can get this quota increased, you need to provide your API key to do so.

Getting an API key is easy and free of charge. There is no reason not to get an API key, so if you haven't already, get an API key now.

2. Not using the latest version of the API

The SafetyNet Attestation API has evolved throughout its history, and with it, there have been some interface changes. Most recently, with the release of Google Play services 11.0.0, we revamped the entire SafetyNet API to offer an interface that is easier and more streamlined to use: the new API uses SafetyNetClient instead of SafetyNetApi, which is now deprecated, so make sure you update your implementation to use the latest version of the API.

Most devices should have the latest version of Google Play services installed, but if a device doesn't have Google Play services installed, or doesn't have it up to date, using the SafetyNet Attestation API may lead to the app becoming unresponsive or crashing. You can prevent this by checking the installed version of Google Play services before using the API.

3. Using nonces incorrectly

The SafetyNet Attestation API lets you set a nonce to uniquely and globally identify each call to the API. Use this feature to prevent a malicious user from reusing a successful attestation result in place of an unsuccessful result (also known as a Replay Attack).

One good way to create a nonce is to create a large (16 bytes or longer) random number on your server using a cryptographically-secure random function. The SafetyNet attestation response includes the nonce you set, so make sure you verify that the returned nonce matches the one you included in the request you made.

4. Not checking the results on your server

SafetyNet can provide useful signals about the state of the device in which your app is running. However, if the logic that acts on these signals is only implemented and enforced directly on the device, an attacker could be able to modify your app and bypass any checks you perform.

To prevent this situation, you should run any logic that verifies the attestation result and enforces any actions based on them on a server that you control and trust.

5. Using the test attestation verification service for production

In order to simplify development and testing of the SafetyNet Attestation API, Google offers an online verification service that checks the digital signature of a SafetyNet Attestation result using a simple HTTPS request.

As useful as this service may seem, it is designed for test purposes only, and it has very strict usage quotas that will not be increased upon request. Instead, you should implement the digital signature verification logic on your server in a way that it doesn't depend on Google's servers. Most JWT libraries offer signature verification functionality, and we have code samples that show how to perform this verification in Java and C#. We plan to provide samples for more languages in the future.

6. Not checking the nonce, timestamp, APK name, and hashes

The SafetyNet Attestation API is most widely known for its integrity and compatibility checks, whose results are returned in ctsProfileMatch and basicIntegrity. Although these two values are indeed very useful, you should check the other values in the response, as they contain important information as well.

Use nonce to match a response to its request, as explained above, and use timestampMs to check how much time has passed since you made the request and you got the response. A delayed response that arrives several hours or days after the request may suggest suspicious activity.

Use apkPackageName to check the name of the APK that made the attestation request, and match apkDigestSha256 and apkCertificateDigestSha256 to those from your app's signed APK in Google Play, to get a signal about the integrity of the installed app.

Remember that the trustworthiness of the response as a whole is tied to the results of ctsProfileMatch and basicIntegrity. It is not unthinkable for a compromised device that fails basicIntegrity to have forged the rest of the values in the response.

7. Not understanding the differences between ctsProfileMatch and basicIntegrity

The SafetyNet Attestation API initially provided a single value called basicIntegrity to help developers determine the integrity of a device. As the API evolved, we introduced a new, stricter check whose results appear in a value called ctsProfileMatch, which allows developers to more finely evaluate the devices on which their app is running.

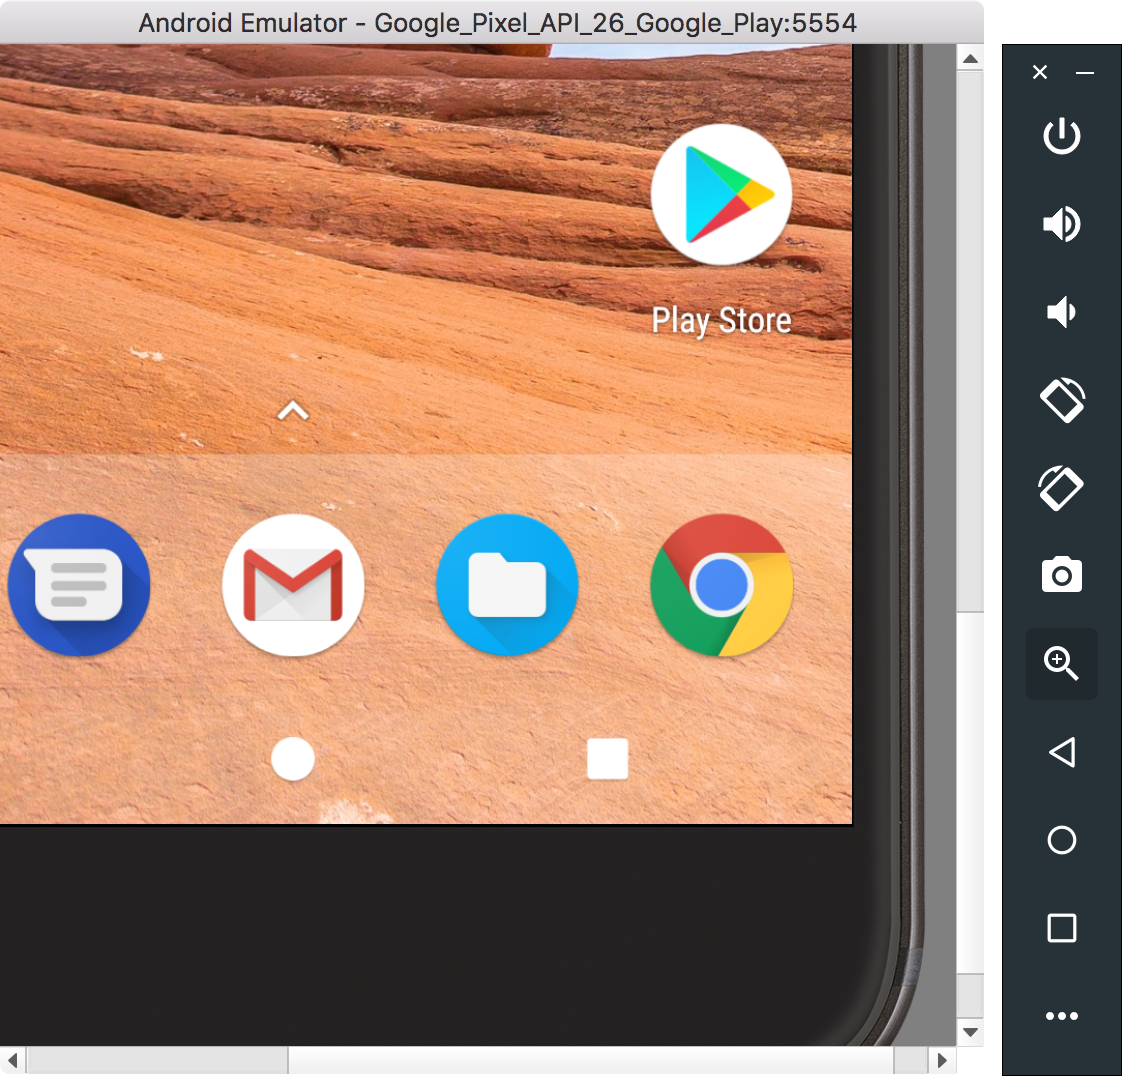
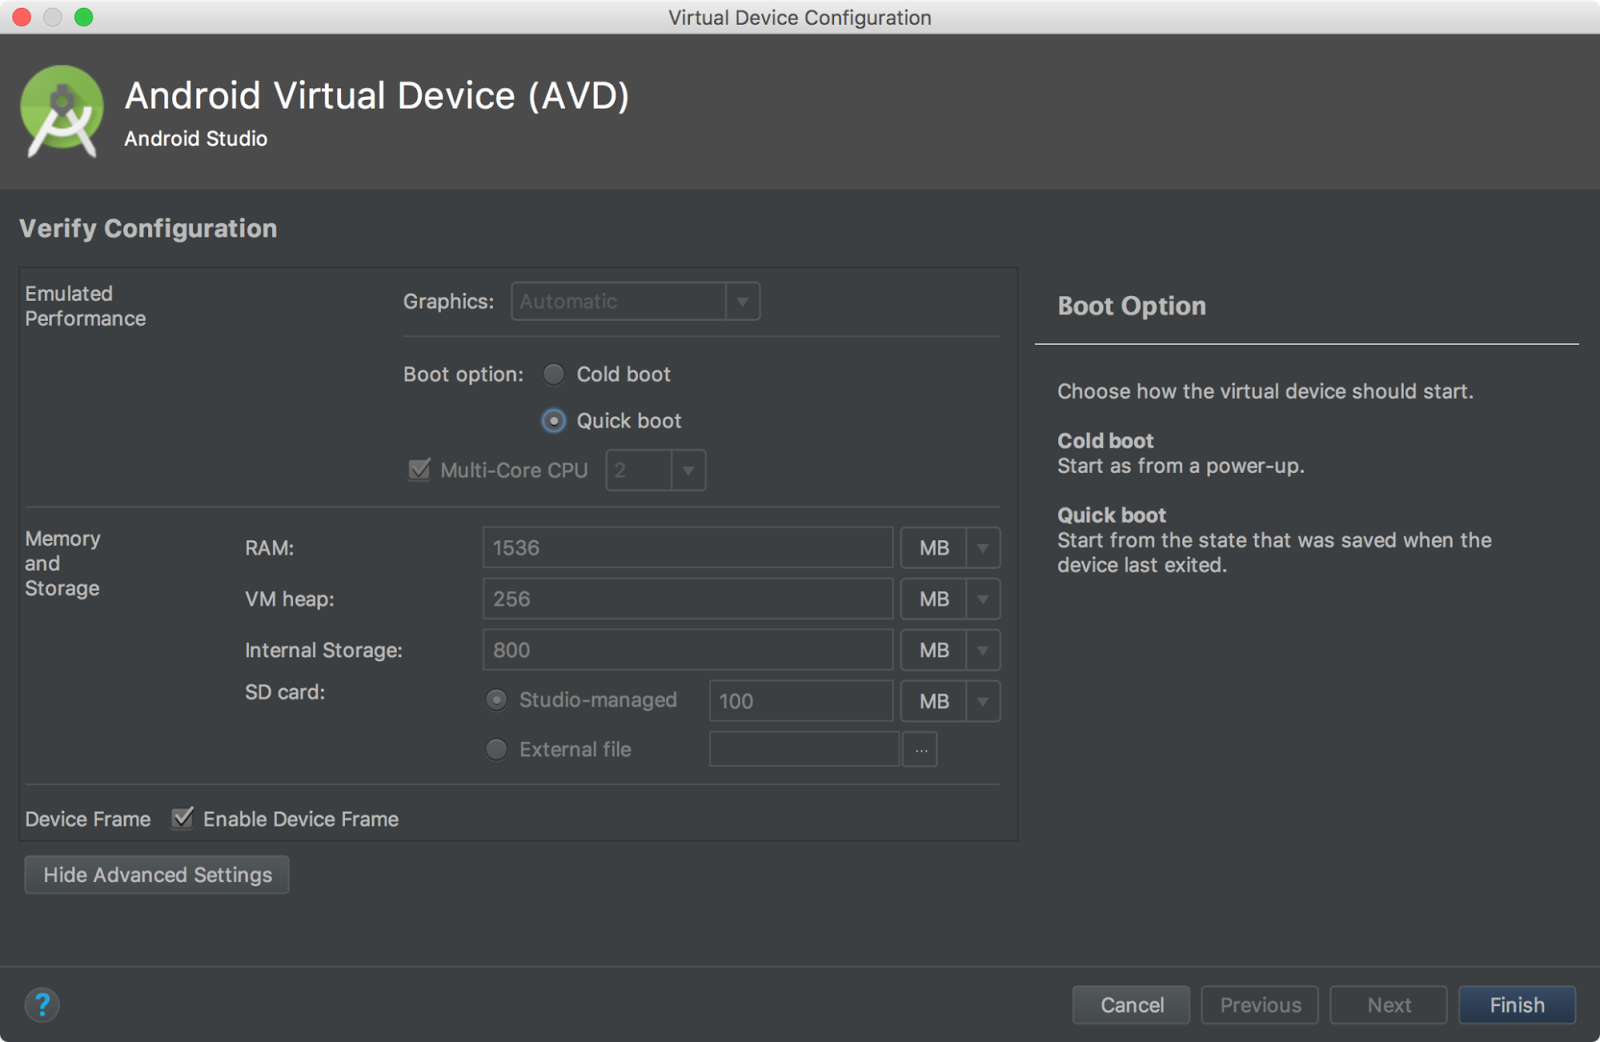
In broad terms, basicIntegrity gives you a signal about the general integrity of the device and its API. Rooted devices fail basicIntegrity, as do emulators, virtual devices, and devices with signs of tampering, such as API hooks.

On the other hand, ctsProfileMatch gives you a much stricter signal about the compatibility of the device. Only unmodified devices that have been certified by Google can pass ctsProfileMatch. Devices that will fail ctsProfileMatch include the following:

  • Devices that fail basicIntegrity
  • Devices with an unlocked bootloader
  • Devices with a custom system image (custom ROM)
  • Devices for which the manufactured didn't apply for, or pass, Google certification
  • Devices with a system image built directly from the Android Open Source Program source files
  • Devices with a system image distributed as part of a beta or developer preview program (including the Android Beta Program)

8. Not having a strategy for timing attestation checks

The SafetyNet Attestation API gives you a snapshot of the state of a device at the moment when the attestation request was made. A successful attestation doesn't necessarily mean that the device would have passed attestation in the past, or that it will in the future.

Because an attestation is just a spot check, you should plan a sensible strategy for choosing when to make attestation requests. You may choose to require successful attestations before users make in-app purchases, after a certain number of days have passed since the last successful attestation, each time your app is launched, after every reboot, or any other strategy that makes sense for your app.

Keep in mind that an attestation request is computationally expensive, consumes battery and bandwidth, and uses your quota. We recommend you plan a strategy to use the least amount of attestations required to satisfy your use case.

9. Using the SafetyNet Attestation API results as the only signal to attack abuse

It may be tempting to think that the SafetyNet Attestation API provides all the necessary signals for protecting an app against abusers, and use it as the only signal for building an anti-abuse system.

The SafetyNet Attestation API can only give signals about the state of a device, not the intent of a user, which is what an anti-abuse system should be designed to detect. Therefore, you might want to consider including other signals, such as access logs and behavioral patterns, to more accurately detect abusive users, and consider not blocking users solely on a failed attestation. Furthermore, there are many other conditions that cause an attestation to fail, such as network connection problems, quota issues, and other transient problems.

In other words, not all users who fail attestation are necessarily abusers, and not all abusers will necessarily fail attestation. By blocking users solely on their attestation results, you might be missing abusive users that don't fail attestations. Furthermore, you might also be blocking legitimate, loyal customers who fail attestations for reasons other than abuse.

10. Not monitoring and managing your usage quota

As mentioned before, the SafetyNet Attestation API is rate limited, and there is a default quota of 10,000 requests per day for each API key. Although this quota might be enough for most development, testing, and initial app launches, your app might reach the default limit as it increases in popularity.

To prevent inadvertently reaching your quota and getting attestation errors, you should build a system that monitors your usage of the API and warns you well before you reach your quota so you can get it increased. You should also be prepared to handle attestation failures because of an exceeded quota and avoid blocking all your users in this situation.

If you are close to reaching your quota, or expect a short-term spike that may lead you to exceed your quota, you can submit this form to request short or long-term increases to the quota for your API key. This process, as well as the additional quota, is free of charge.

Announcing Architecture Components 1.0 Stable

Posted by Lukas Bergstrom, Product Manager, Android Developer Frameworks Team

Android runs on billions of devices, from high-end phones to airplane seatbacks. The Android OS manages resources aggressively to perform well on this huge range of devices, and sometimes that can make building robust apps complicated. To make it easier, we launched a preview of Architecture Components at Google I/O to provide guidance on app architecture, with libraries for common tasks like lifecycle management and data persistence. Together, these foundational components make it possible to write modular apps with less boilerplate code, so developers can focus on innovating instead of reinventing the wheel - and we hope to keep building on this foundation in the future.

Today we're happy to announce that the Room and Lifecycle Architecture Components libraries have reached 1.0 stable. These APIs are ready for production apps and libraries, and are our recommendation for developers looking for help with app architecture and local storage (although they're only recommended, not required.) Lifecycles are now also integrated with the Support Library, so you can use them with standard classes like AppCompatActivity.

Although we're declaring them stable today, the beta components are already used in apps that together, have billions of installs. Top developers, like Zappos, have been able to spend more time on what's important thanks to Architecture Components:

Prior to the release of Android Architecture Components we had our own ViewModel implementation. We used Loaders and Dependency Injection to persist our ViewModel through config changes. We recently switched to the Architecture Components ViewModel implementation and all that boilerplate went away. We found that we were able to spend more time on design, business logic and testing, and less on writing boilerplate or worrying about Android lifecycle issues.

We've also started to use LiveData which hooks directly into the Activity lifecycle. We use it to retrieve and display network data and no longer have to concern ourselves with ​network call subscription management. - David Henry, Android Software Engineer, Zappos

Architecture Components provide a simple, flexible and practical approach that frees developers from some common problems so they can focus on building great experiences. This is based on core building blocks tied together by guidance on app architecture.

Lifecycles

Every Android developer has to deal with the operating system starting, stopping and destroying their Activities. That means managing the state of components - such as observables used to update UI - as you move through the lifecycle. Lifecycles enables the creation of lifecycle-aware components that manage their own lifecycles, reducing the possibility of leaks or crashes. The Lifecycle library is the foundation for other Architecture Components like LiveData.

LiveData

LiveData is a lifecycle-aware observable that holds data and provides updates. Your UI code subscribes to changes and provides LiveData a reference to its Lifecycle. Because LiveData is lifecycle-aware, it provides updates when its Lifecycle is started or resumed, but stops providing updates when the LifecycleOwner is destroyed. LiveData is a simple way to build reactive UIs that are safer and more performant.

ViewModel

ViewModel separates ownership of view data and logic from lifecycle-bound entities like Activities and Fragments. A ViewModel is retained until its associated Activity or Fragment is disposed of forever - that means view data survives events like a Fragment being recreated due to rotation. ViewModels not only eliminate common lifecycle issues, they help build UIs that are more modular and easier to test.

Room

Nearly all apps need to store data locally. While Android has bundled SQLite with the platform since version 1, using it directly can be painful. Room is a simple object-mapping layer that provides the full power of SQlite with less boilerplate. Features like compile-time query verification and built-in migration make it easier to build a robust persistence layer, while integration with LiveData lets Room provide database-backed, lifecycle-aware observables. Room blends of simplicity, power and robustness for managing local storage, and we hope you give it a try.

Guide to App Architecture and more

Last but not least, we created a Guide to App Architecture that provides core principles applicable to all developers, and specific guidance on using Architecture Components together. Because we've heard from you that clear and consistent guidance is important, today we're updating developer documentation to point to Architecture Components where appropriate. We also have a rich set of videos, codelabs and sample apps available at the Architecture Components site, with more to come.

Watch this space

Although the first set of Architecture Components is now stable, we know there's more work to do. Over the last few months, we've listened to your feedback and made improvements. We also recently launched a new Architecture Component, PagedList, to alpha, in response to your feedback that handling large datasets with RecyclerView is too difficult. This is just the beginning - we have more major components under development that we're looking to announce in the upcoming months.

Our hope with Architecture Components is to free developers to focus on providing unique new experiences for mobile devices. We're glad we can finally announce them as stable for production use. We'd like to thank the community, which has given such great feedback along the way, and we look forward to continuing the discussion in the comments of this post. Finally, for those of you who've been waiting for this stable launch, get started today.

Android 8.1 Developer Preview

Posted by Dave Burke, VP of Engineering

Today we're giving you an early look at Android 8.1. This update to Android Oreo includes a set of targeted enhancements including optimizations for Android Go (for devices with 1GB or less of memory) and a new Neural Networks API to accelerate on-device machine intelligence. We've also included a few smaller enhancements to Oreo in response to user and developer feedback.

We're bringing you this Developer Preview so you can get your apps ready; we've already been helping device makers prepare for this new version. We recommend starting soon -- we're expecting the final public version in December.

It's easy to get Android 8.1 Developer Preview on your Pixel or Nexus device. Just enroll in the Android Beta Program -- you'll soon receive an over-the-air update to Android 8.1 beta. If you enrolled previously, you're all set, there's no need to re-enroll. The Developer Preview will be available for Pixel 2 and Pixel 2 XL devices, as well as for Pixel, Pixel XL, Pixel C, Nexus 5X, Nexus 6P, and the Android emulator.

What's in Android 8.1?

Android 8.1 includes select new features and developer APIs (API level 27), along with the latest optimizations, bug fixes, and security patches. Some of the new APIs include:

  • Android Go memory optimizations and targeting -- Android 8.1 includes a set of memory optimizations for Android Go configurations (1GB or less of memory). We've added new hardware feature constants so you can now target the distribution of your apps and APK splits to normal or low-RAM devices running Android 8.1 and later.
  • Neural Networks API -- as part of our efforts to bring machine intelligence to Android, we've added a Neural Networks API via the NDK. It enables hardware-accelerated inference operations on supported devices. We designed the Neural Networks API as a foundational layer for ML frameworks like TensorFlow Lite -- Google's upcoming cross-platform ML framework for mobile -- as well as Caffe2 and others. Stay tuned for TensorFlow Lite announcements.
  • Autofill enhancements -- we've made it easier for password managers and other Autofill services to use the Autofill framework. For example, we've added support for more UI customization of the Save dialog, as well as setAutofillOptions() for users to set credit card expiration using a spinner.
  • Shared memory API -- this new API lets apps allocate shared memory for faster access to common data. Apps can map anonymous shared memory and manage protection controls using the SharedMemory API. The API is parcelable, AIDL friendly, and exposes useful features like removing write permissions.

Take a look at Android 8.1 site for more information, including the diff report and updated API reference docs.

Test your apps on Android 8.1

With the consumer launch coming in December, it's important to test your current app now. This gives users a seamless transition to Android 8.1 when it arrives on their devices.

Just enroll your eligible device in Android Beta to get the latest update, then install your app from Google Play and test. If you don't have a Pixel or Nexus device, you can set up an Android 8.1 emulator for testing instead. If you notice any issues, fix them and update your app in Google Play right away -- without changing the app's platform targeting.

Build with new features and APIs

When you're ready, take advantage of the new features and APIs in Android 8.1, which we've already finalized as API Level 27. For an overview of what's new, take a look at Android 8.1 for Developers. You can also extend your apps with established Android Oreo features as well, see the Android Oreo site for details.

If your app uses forms, make sure to test them with autofill so that users can take advantage of this convenient feature. Enable "Autofill with Google" or a similar service in Settings and test the form fills to make sure they work as expected. We strongly recommend providing explicit hints about your fields, and also associating your website and mobile app, so that logins can be shared between them.

If your app uses the Camera2 API and you have a Pixel 2 device, you can try an early version of Pixel Visual Core, Google's first custom-designed co-processor for image processing and machine learning on consumer products. To begin testing HDR+ through Pixel Visual Core, just enable the new developer option "Camera HAL HDR+" (and make sure that CONTROL_ENABLE_ZSL is "true").

Speed your development with Android Studio

To build with Android 8.1, we recommend updating to Android Studio 3.0, which is now available from the stable channel. On top of the new app performance profiling tools, support for the Kotlin programming language, and Gradle build optimizations, Android Studio 3.0 makes it easier to develop with Android Oreo features like Instant Apps, XML Fonts, downloadable fonts, and adaptive icons.

We also recommend updating to the Android Support Library 27.0.0, which is available from Google's Maven repository. New in this version are: a ContentPager library for efficiently loading "paged" data on a background thread; ViewCompat wrappers for Autofill methods; an AmbientMode headless fragment that improves Wear ambient mode support, fullscreen Trusted Web Activities, and more. See the version notes for more information.

You can update your project's compileSdkVersion to API 27 to compile against the official Android 8.1 APIs. We also recommend updating your app's targetSdkVersion to API 27 to test with compatibility behaviors disabled. See the this guide for details on how to set up your environment to build with Android 8.1.

Publish your updates to Google Play

The Android 8.1 APIs are already final, so we've opened Google Play for apps compiled against or targeting API level 27. When you're ready, you can publish your APK updates in your alpha, beta, or production channels. Make sure that your updated app runs well on Android 8.1 as well as older versions. We recommend using Google Play's beta testing feature to run an alpha test on small group of users, then run a much larger open beta test. When you're ready to launch your update, you can use a staged rollout. We're looking forward to seeing your app updates!

Give us your feedback!

As always, your feedback is crucial, so please let us know what you think. We've set up different hotlists where you report Android platform and tools issues, app compatibility issues, and third-party SDKs and tools issues. We also have a new hotlist for Neural Networks API issues.

You can also give us feedback through the Android Developer community or Android Beta community as we work towards the consumer release in December.

Android Studio 3.0

Posted by Jamal Eason, Product Manager, Android

Android Studio 3.0 is ready to download today. Announced at Google I/O 2017, Android Studio 3.0 is a large update focused on accelerating your app development on Android.

This release of Android Studio is packed with many new updates, but there are three major feature areas you do not want to miss, including: a new suite of app profiling tools to quickly diagnose performance issues, support for the Kotlin programming language, and a new set of tools and wizards to accelerate your development on the latest Android Oreo APIs.

We also invested time in improving stability and performance across many areas of Android Studio. Thanks to your feedback during the preview versions of Android Studio 3.0! If you are looking for high stability, want to build high quality apps for Android Oreo, develop with the Kotlin language, or use the latest in Android app performance tools, then you should download Android Studio 3.0 today.

Check out the the list of new features in Android Studio 3.0 below, organized by key developer flows.

What’s new in Android Studio 3.0

Develop

  • Kotlin Programming Language - As announced at Google I/O 2017, the Kotlin programming language is now officially supported for Android development. Kotlin is an expressive and concise language that is interoperable with existing Android languages and runtimes, which means you can use as little or as much of the language in your app as you want. Kotlin is a production-ready language used by many popular Android apps on Google Play today.

    This release of Android Studio is the first milestone of bundles the Kotlin language support inside the IDE. Many of your favorite features such as code completion and syntax highlighting work well this release and we will continue to improve the remaining editor features in upcoming release. You can choose to add Kotlin to your project using the built-in conversion tool found under CodeConvert Java File to Kotlin File, or create a Kotlin enabled project with the New Project Wizard. Lean more about Kotlin language support in Android Studio.

Kotlin Language Conversion in Android Studio

  • Java 8 Language features - In Android Studio 3.0, we are continuing to improve the support for Java 8 language features. With the migration to a javac based toolchain, using Java 8 language features in your project is even easier. To update your project to support the new Java 8 Language toolchain, simply update your Source and Target compatibility levels to 1.8 in the Project Structure dialog. Learn more.
  • Layout Editor - The component tree in the Layout Editor has with better drag-and-drop view insertions, and a new error panel. Learn more.
  • Adaptive Icon Wizard - The new wizard creates a set of launcher icon assets and provides previews of how your adaptive icon will look with different launcher screen icon masks. Support for VectorDrawable layers is new for this release. Learn more.
  • XML Fonts & Downloadable Fonts - If you target Android Oreo (API Level 26 and higher) for your Android app, you can now add custom fonts & downloadable fonts using XML with Android Studio 3.0.
  • Android Things Support - Android Studio 3.0 includes a new set of templates in the New Project wizard and the New Module wizard to develop for the Android Things platform. Learn more.
  • IntelliJ Platform Update: Android Studio 3.0 includes the IntelliJ 2017.1 release, which has features such as Java 8 language refactoring, parameter hints, semantic highlighting, draggable breakpoints, enhanced version control search, and more. Learn more.

Build

  • Build Speed Improvements - To further improve the speed of Gradle for larger scale projects with many modules, we introduced a rare breaking API change in the Android Gradle Plugin to improve scalability and build times. This change is one of reasons we jumped version numbers from Android Studio 2.4 to 3.0. If you depend on APIs provided by the previous Gradle plugin you should validate compatibility with the new plugin and migrate to the new APIs. To test, update the plugin version in your build.gradle file. Learn more.
  • Google's Maven Repository - To facilitate smaller and faster updates, Android Studio 3.0 utilizes Google's Maven Repository by default instead of using the Android SDK Manager to find updates to Android Support Library, Google Play Services, and Firebase Maven dependencies. Used in combination with the latest command line SDK Manager tool and Gradle, Continuous Integration builds should migrate to Google's Maven Repository for future Maven repository updates. Learn more.

Test & Debug

  • Google Play System Images - We also updated the emulator system images for Android Oreo to now include the Google Play Store. Bundling in the Google Play store allows you to do end-to-end testing of apps with Google Play, and provides a convenient way to keep Google Play services up-to-date in your Android Virtual Device (AVD). Just as Google Play services updates on physical devices, you can trigger the same updates on your AVDs.
    Google Play Store in Android Emulator

    To ensure app security and a consistent experience with physical devices, the emulator system images with the Google Play store included are signed with a release key. This means you will not be able to get elevated privileges. If you require elevated privileges (root) to aid with your app troubleshooting, you can use the Android Open Source Project (AOSP) emulator system images that do not include Google apps or services. Learn more.

  • OpenGL ES 3.0 Support in Android Emulator - The latest version of the Android Emulator has OpenGL ES 3.0 support for Android Oreo system images along with significant improvements in OpenGL ES 2.0 graphics performance for older emulator system images. Learn more.
  • App Bug Reporter in Android Emulator - To help in documenting bugs in your app, we have added an easier way to generate a bug report with the Android Emulator with all the necessary configuration settings and space to capture your repro steps. Learn more.
  • Proxy Support in Android - If you use a proxy to access the Internet, we have added a user interface to manage the HTTP proxy settings used by the emulator. Lean more.
  • Android Emulator Quick Boot (Canary) - One of the most common pain points we hear is that the emulator takes too long to boot. To address this concern, we are excited to preview a new feature to solve this called Quick Boot, which significantly speeds up your emulator start time. Once enabled, the first time you start an AVD a cold boot will occur (just like powering on a device), but all subsequent starts are fast and the system is restored to the state at which you closed the emulator (similar to waking a device). If you want to try it out, ensure you are on the canary update release channel and then you will find v26.2.0 of the Android Emulator in the SDK Manager. Learn more.
  • APK Debugging - Android Studio 3.0 allows you to debug an arbitrary APK. This functionally is especially helpful for those who develop your Android C++ code in another IDE, but want to debug and analyze the APK in the context of Android Studio. As long as you have a debuggable version of your APK, you can use the new APK Debugging features to analyze, profile & debug the APK. Moreover, if you have access to the sources of your APK, you can link the source to the APK debugging flow for a higher fidelity debugging process. Get started by simply selecting Profile or debug APK from the Android Studio Welcome Screen or File → Profile or debug APK. Learn More.
APK Debugging
  • Layout Inspector - In this release we have added a few additional enhancements for the Layout Inspector including better grouping of properties into common categories, as well as search functionality in both the View Tree and Properties Panels. Learn more.
  • Device File Explorer - The new Device File Explorer in Android Studio 3.0 allows you to view the file and directory structure of your Android device or emulator. As you are testing your app, you can now quickly preview and modify app data files directly in Android Studio. Learn more.
  • Android Test Orchestrator Support - When used with AndroidJUnitRunner 1.0 or higher, the Android Gradle plugin 3.0 supports the use of the Android Test Orchestrator. The Android Test Orchestrator allows each of your app's tests to run within its own Instrumentation. Learn more.

Optimize

  • Android Profiler - Android Studio 3.0 includes a brand new suite of tools to help debug performance problems in your app. We completely rewrote the previous set of Android Monitor tools, and replaced them with the Android Profiler. Once you deploy your app to a running device or emulator, click on the Android Profiler tab and you will now have access to a real-time & unified view of the CPU, Memory, & Network activity for your app. Each of the performance events are mapped to the UI event timeline which highlights touch events, key presses, and activity changes so that you have more context on when and why a certain event happened. Click on each timeline to dig into each performance aspect of your app. Learn more.
Android Profiler - Combined timeline view.

CPU Profiler
Memory Profiler
Network Profiler
  • APK Analyzer Improvements - We also updated APK Analyzer with additional enhancements to help you further optimize the size of your APK. Learn more.

To recap, Android Studio 3.0 includes these new major features:

If you are using a previous version of Android Studio, you can upgrade to Android Studio 3.0 today or you can download the update from the official Android Studio Preview download page. As mentioned in this blog, there are some breaking Gradle Plugin API changes to support new features in the IDE. Therefore, you should also update your Android Gradle plugin version to 3.0.0 in your current project to test and validate your app project setup.

We appreciate any feedback on things you like, issues or features you would like to see. If you find a bug or issue, feel free to file an issue. Connect with us -- the Android Studio development team ‐ on our Google+ page or on Twitter

Introducing Android Instant Apps SDK 1.1

Jichao Li, Software Engineer; Shobana Ravi, Software Engineer

Since our public launch at Google I/O, we've been working hard to improve the developer experience of building instant apps. Today, we're excited to announce availability of the Android Instant Apps SDK 1.1 with some highly-requested features such as improved NDK support, configuration APKs for binary size reduction, and a new API to maintain user's context when they transition from an instant app to the installed app.

Introducing configuration APKs

For a great instant app experience, app binaries need to be lean and well structured. That's why we're introducing configuration APKs.

Configuration APKs allow developers to isolate device-specific resources and native libraries into independent APKs. For an application that uses configuration APKs, the Android Instant Apps framework will only load the resources and native libraries relevant to the user's device, thereby reducing the total size of the instant app on the device.

We currently support configuration APKs for display density, CPU architecture (ABI), and language. With these, we have seen an average reduction of 10% in the size of the binaries loaded. Actual savings for a given app depend on the number of resource files and native libraries that can be configured.

As an example, a user on an ARM device with LDPI screen density and language set to Chinese would then receive device-agnostic code and resources, and then only get the configuration APKs that have ARM native libraries, the Chinese language, and LDPI resources. They would not receive any of the other configuration APKs such as the x86 libraries, Spanish language strings, or HDPI resources.

Setting up configuration APKs for your app is a simple change to your gradle setup. Just follow the steps in our public documentation.

Persistent user context after installation

On Android Oreo, the internal storage of the instant version of the app is directly available to the installed version of the app. With this release of the SDK, we are enabling this functionality on older versions of the Android Framework, including Lollipop, Marshmallow, and Nougat devices.

To extract the internal storage of the instant app, installed apps can now call InstantAppsClient.getInstantAppData() using the Instant Apps Google Play Services API and get a ZIP file of the instant app's internal storage.

Check out our code sample and documentation for more details on how to use this API.

Start building your Android Instant App

It's simple to start building your instant app on the latest SDK. Just open the SDK Manager in Android Studio and update your Instant Apps Development SDK to 1.1.0. We can't wait to see what instant app experiences you build with these new features.

Video Playback with the Google Assistant on Android TV

Posted by Benjamin Baxter, Developer Programs Engineer

How to integrate the Google Assistant in a TV app

Earlier this year, we announced that the Google Assistant will be coming to Android TV and it has arrived. The Google Assistant on Android TV will allow users to discover, launch and control media content, control smart devices like light bulbs, and much more. Your Assistant also understands that you're interacting on a TV, so you'll get the best experience possible while watching your favorite movies and TV shows.

The Google Assistant has a built-in capability to understand commands like "Watch The Incredibles", and media controls, like pause, fast forward, etc. This article will walk through how to integrate the Google Assistant into your application.

There are no new APIs needed to integrate with the Google Assistant. You just need to follow the pattern that the Google Assistant expects from your app. If you want to experiment and play with the APIs and the Assistant, you can download this sample from github.

Discovery

The Google Assistant has made some changes to improve finding information on Android TV.

There are a few ways to expose your content to users through the Google Assisant.

Server side integration. (Requires registration and onboarding)

You need to provide your content catalog to Google. This data is ingested and available to the Google Assistant outside of your app.

This is not specific for Google Assistant. It will also enable other Google services such as search and discovery on Google Search, Google Play, Google Home App, and Android TV.

Client side integration. (Available to all apps)

If your app is already searchable, then you only need to handle the EXTRA_START_PLAYBACK flag, which we go into more detail later. Content will auto-play if the app name is explicitly specified in the search results or if the user is already in your app.

Once your app is searchable, you can test by asking the Assistant or, if you are in a loud area, test quietly by running the following adb command:

adb shell am start -a "android.search.action.GLOBAL_SEARCH" --es query \"The Incredibles\" 

Each app that responds to the search query will have a row displaying their search results. Notice that YouTube and the sample app, Assistant Playback, each receive their own rows for content that match the search query.

For specific searches such as "Play Big Buck Bunny", the Assistant will present a card with a button for each app that exactly matched the search query. In the screenshot below, you can see the sample app, Assistant Playback, shows up as an option to watch Big Buck Bunny.

There are times when the Google Assistant will launch an app directly to start playing content. An example of when this occurs is when content is exclusive to the app; "Play the Netflix original House of Cards".

Launching

When the user selects a video from search results, an intent is sent to your app. The priority order for the intent actions are as follows:

  1. Intent specified in the cursor returned from the search (SUGGEST_COLUMN_INTENT_ACTION).
  2. Intent specific in the searchable.xml file with the searchSuggestIntentAction value.
  3. Defaults to ACTION_VIEW.

In addition, the Assistant will also pass an extra to signal if playback should begin immediately. You app should be able to handle the intent and expect a boolean extra called EXTRA_START_PLAYBACK.

import static android.support.v4.content.IntentCompat.EXTRA_START_PLAYBACK;

public class SearchableActivity extends Activity {

   @Override
   protected void onCreate(@Nullable Bundle savedInstanceState) {
       super.onCreate(savedInstanceState);
       if (getIntent() != null) {
           // Retrieve video from getIntent().getData().

           boolean startPlayback = getIntent().getBooleanExtra(EXTRA_START_PLAYBACK, false);
           Log.d(TAG, "Should start playback? " + (startPlayback ? "yes" : "no"));

           if (startPlayback) {
               // Start playback.
               startActivity(...);
           } else {
               // Show details for movie.
               startActivity(...);
           }
       }
       finish();
   }
}

You can test this by modifying and running the following adb command. If your app has a custom action, then replace android.intent.action.VIEW with the custom action. Replace the value of the -d argument with the URI you return from the Assistant's query.

adb shell 'am start -a android.intent.action.VIEW --ez
android.intent.extra.START_PLAYBACK true -d <URI> -f 0x14000000'

The -f argument is the logical OR value from FLAG_ACTIVITY_NEW_TASK | FLAG_ACTIVITY_CLEAR_TOP. This will force your activity to be freshly launched.

For example, in the sample app, you can run the following command to launch playback of "Big Buck Bunny" as if the assistant had launched it.

adb shell 'am start -a android.intent.action.VIEW --ez
android.intent.extra.START_PLAYBACK true -d 
content://com.example.android.assistantplayback/video/2 -n
com.example.android.assistantplayback/.SearchableActivity -f 0x14000000'

The URI above is defined by the value of android:searchSuggestIntentData in searchable.xml (content://com.example.android.assistantplayback/video/) in addition to the value of SearchManager.SUGGEST_COLUMN_INTENT_DATA_ID (2) returned from the query.

Note that intents may be cached by the Google Assistant up to 7 days. Your app could receive a request to play content that is no longer available. The intent handler should be designed to be stateless and not rely on any previously knowledge to handle the deep link. Your app should gracefully handle this situation. One solution would be to show an error message and let the user land on your main activity or another relevant activity.

Playback

If your app implements MediaSession correctly, then your app should work right away with no changes.

The Google Assistant assumes that your app handles transport controls. The Assistant uses the TransportControls to send media commands to your app's MediaSession. Video apps must support the following controls wherever possible:

  • Play/Pause/Stop
  • Previous/Next
  • Rewind/Fast Forward (implemented with seekTo())

You can easily get a hook for these controls by implementing a MediaSession.Callback. If you play videos using PlaybackTransportControlGlue, then all your callback needs to do it sync the glue and the MediaSession. Otherwise use this callback to sync your player.

public class MyMediaSessionCallback extends MediaSessionCompat.Callback {

   private final PlaybackTransportControlGlue<?> mGlue;

   public MediaSessionCallback(PlaybackTransportControlGlue<?> glue) {
       mGlue = glue;
   }

   @Override
   public void onPlay() {
       Log.d(TAG, "MediaSessionCallback: onPlay()");
       mGlue.play();
       updateMediaSessionState(...);
   }

   @Override
   public void onPause() {
       Log.d(TAG, "MediaSessionCallback: onPause()");
       mGlue.pause();
       updateMediaSessionState(...);
   }

   @Override
   public void onSeekTo(long position) {
       Log.d(TAG, "MediaSessionCallback: onSeekTo()");
       mGlue.seekTo(position);
       updateMediaSessionState(...);
   }

   @Override
   public void onStop() {
       Log.d(TAG, "MediaSessionCallback: onStop()");
       // Handle differently based on your use case.
   }

   @Override
   public void onSkipToNext() {
       Log.d(TAG, "MediaSessionCallback: onSkipToNext()");
       playAndUpdateMediaSession(...);
   }

   @Override
   public void onSkipToPrevious() {
       Log.d(TAG, "MediaSessionCallback: onSkipToPrevious()");
       playAndUpdateMediaSession(...);
   }
}

Continue learning

Check out the following articles and training documents to continue learning about MediaSession and Video apps.

To play around with the Google Assistant on Android TV, download the sample app and run it on Nvidia Shield running Android M or above.

If you would like to continue the discussion, leave a response or talk to me on Twitter.

Android Excellence: congratulations to the new apps and games for Fall 2017

Posted by Kacey Fahey, Developer Marketing, Google Play

Android Excellence recognizes some of the highest quality apps and games on Google Play. With a strong focus on great design, an engaging user experience, and strong app performance, this set of apps and games show the diversity of content on Google Play. Whether you're trying to better manage personal finances with Money Lover or want to experience the thrill of stunt-racing with stunning graphics and real-time challenges in Asphalt 8, there's something for everyone to enjoy.

One new awardee is Bring!, a simple-to-use app that helps manage your grocery lists. Use the existing catalog of items or add your own product photos, then share your lists and message in-app to let others know when it's time to shop. If you're looking for a new game to play, Karma. Incarnation 1. is a "wonderfully weird, puzzle-filled indie adventure game." With beautiful hand-drawn art, you guide the story's hero through moments of humor and challenge to be reunited with his love.

Congratulations to the new Android Excellence apps and games for Fall 2017.

New Android Excellence apps New Android Excellence games
Agoda Asphalt 8
AlarmMon Bubble Witch 3 Saga
Bring! Castle Creeps
CastBox Crab War
Email by Edison Crash of Cars
Eve Dan the Man
Fotor Dawn of Titans
Mint Dream Defense
Money Lover Iron Marines
Onefootball Karma. Incarnation 1.
Robinhood Postknight
Viki Sky Force Reloaded
Zombie Age 3

Explore other great apps and games in the Editors’ Choice section on Google Play.

How useful did you find this blogpost?

Google Play Billing Library 1.0 released

Posted by Neto Marin, Developer Advocate

In June we announced the developer preview for a new Google Play Billing Library. Today, we are pleased to announce the official release of the Play Billing Library 1.0. This library simplifies the development process for Google Play Billing, allowing you to focus your efforts on your app.

Thank you for your valuable feedback and suggestions that helped us reach the 1.0 release. Watch the video below for a quick overview of the library's features.

Before you start

With Play Billing, you can receive payments from users around the world via a payment system they trust and you can take advantage of features and reports in the Play Console to manage and earn more revenue.

If you have never implemented in-app billing in your apps, or you want to know what you can offer using Play Billing Library, read the In-app Billing Overview to familiarize yourself with concepts and terminology that make it easier for you to implement In-app Billing using the Play Billing Library.

Getting started

Play Billing Library is available through Maven repository, and adding Play Billing Library to your project is simple as adding the following dependency into your app's build.gradle file:

dependencies {
    ...
    compile 'com.android.billingclient:billing:1.0'
}

The Play Billing Library 1.0 automatically adds the com.android.vending.BILLING permission to your APK. This means you no longer need to manually include it in your application module's manifest.

BillingClient and PurchasesUpdatedListener

These classes are the most important pieces when integrating the library into your Android app. The BillingClient is the bridge between your app and Google Play. You will use it for listing available products, starting the billing flow for in-app products or subscriptions (i.e. opening the payment interface), getting user purchases, and creating or modifying subscriptions.

When creating your BillingClient instance, you'll need to set a PurchasesUpdatedListener. This allows your app to receive updates from the In-app Billing API, including transaction results after the billing flow, as well as purchases completed outside of your app, e.g. user redeemed a Promo Code or bought a product on another device.

The following code demonstrates how you could override the )">onPurchasesUpdated() method of your PurchasesUpdatedListener:

@Override
void onPurchasesUpdated(@BillingResponse int responseCode,
        List<Purchase> purchases) {
    if (responseCode == BillingResponse.OK
            && purchases != null) {
        for (Purchase purchase : purchases) {
            handlePurchase(purchase);
        }
    } else if (responseCode == BillingResponse.USER_CANCELED) {
        // Handle an error caused by a user canceling the purchase flow.
    } else {
        // Handle any other error codes.
    }
}

You can implement the PurchasesUpdatedListener in your Activity or in any other class you want, according to your app's architecture. And here's the code for creating the BillingClient instance, and setting the PurchasesUpdatedListener:

mBillingClient = BillingClient.newBuilder(mContext)
                              .setListener(mPurchasesUpdatedListener)
                              .build();

Listing and selling products

To sell products in your app, first, you need to add them using the Play Console. For more details about how to add in-app products see the page Administering In-app Billing.

Attention: If this is a brand new app, before adding the products you must publish it to the alpha or beta distribution channel. For more information, see Draft Apps are No Longer Supported.

To get a list of product details with prices for current user, call , com.android.billingclient.api.SkuDetailsResponseListener)">querySkuDetailsAsync(). You must also specify a listener which implements the SkuDetailsResponseListener interface. You can then override the onSkuDetailsResponse() method which notifies the listener when the query finishes, as illustrated by the following sample code:

List<String> skuList = new ArrayList<> ();
skuList.add("premiumUpgrade");
skuList.add("gas");
mBillingClient.querySkuDetailsAsync(SkuType.INAPP , skuList,
    new SkuDetailsResponseListener() {
        @Override
        public void onSkuDetailsResponse(SkuDetailsResult result) {
            // Process the result.
        }
    })

After the user chooses a product to buy, you'll need to start the billing flow and handle the transaction result. To start a purchase request from your app, call the launchBillingFlow() method on the Play Billing Library client. You must call the launchBillingFlow() method (and all the other methods from BillingClient) from the UI thread.

The launchBillingFlow() method needs BillingFlowParams object that contains relevant data for completing the purchase, such as the product ID of the item to purchase and the product type (in this case, SkuType.INAPP). To get an instance of BillingFlowParams, construct it with newBuilder() method:

BillingFlowParams.Builder builder = BillingFlowParams
                                       .newBuilder()
                                       .setSku(skuId).setType(SkuType.INAPP);
int responseCode = mBillingClient.launchBillingFlow(builder.build());

As we mentioned earlier, the transaction result will be sent to the )">onPurchasesUpdated() method. For details how to process the data received on )">onPurchasesUpdated() and how to handle a purchase, check the section Purchase an item in our training guide.

Consuming products

By default, all in-app products are managed. It means that Google Play tracks the product ownership and doesn't allow to buy multiple times. To be able to buy a product again, you must consume the product before it becomes available again.

It's common to implement consumption for in-app products which users may want to purchase multiple times, such as in-game currency or equipment. You typically don't want to implement consumption for in-app products that user purchases once and provide a permanent effect, such as a premium upgrade.

To consume a product, call the consumeAsync() method on the Play Billing Library client and pass in the purchaseToken String value returned when you made the purchase. The consumption result is returned via onConsumeResponse() method of the ConsumeResponseListener interface, that you must override to handle the consumption result.

The following example illustrates consuming a product using the associated purchaseToken:

ConsumeResponseListener listener = new ConsumeResponseListener() {
    @Override
    public void onConsumeResponse(@BillingResponse int responseCode, 
                                  String outToken) {
        if (responseCode == BillingResponse.OK) {
            // Handle the success of the consume operation.
            // For example, increase the number of player's coins,
            // that provide temporary benefits
        }
    }
};
mBillingClient.consumeAsync(purchaseToken, listener);

Sample updated: Trivial Drive V2

With a new library comes a refreshed sample! To help you to understand how to implement in-app billing in your app using the new Play Billing Library, we've rewritten the Trivial Drive sample from the ground up.

Since we released Trivial Drive back in 2013, many new features, devices, and platforms have been added to the Android ecosystem. To reflect this evolution, the Trivial Drive v2 sample now runs on Android TV and Android Wear.

What's next?

Before integrating within your app, you can try the Play Billing Library with the codelab published during Google I/O 2017: Buy and Subscribe: Monetize your app on Google Play.

In this codelab, you will start with a simplified version of Trivial Drive V2 that lets users to "drive" and then you will add in-app billing to it. You'll learn how to integrate purchases and subscriptions as well as the best practices for developing reliable apps that handle purchases.

Get more info on the Play Billing Library and the official reference for classes and methods documentation on the Android Developers website. For a step-by-step guide to implementing the Play Billing Library in your project, visit the library's training class.

We still want your feedback

If you have issues or questions, file a bug report on the Google Issue Tracker, and for issues and suggestions on the sample (like a bug or a new feature), contact us on the Trivial Drive issues page.

For technical questions on implementation, library usage, and best practices, you can use the tags google-play and play-billing-library on StackOverflow or visit the communities on our Google+ page.

Introducing Android Native Development Kit r16

Posted by Dan Albert, Android NDK Tech Lead

The latest version of the Android Native Development Kit (NDK), Android NDK r16 Beta 1, is now available for download. It is also available in the SDK manager via Android Studio.

NDK r16 is a big milestone for us, because it's the first release that we're ready to recommend that people start migrating to libc++! More on this later.

We've also updated libc++ and its related projects, so this release has improved support for C++1z. Keep in mind that until C++1z becomes C++17, everything included is subject to change.

You can find the release notes for this release here.

libc++ and libandroid_support

The NDK has a library called libandroid_support that backports libc APIs that libc++ depends on that weren't available on older releases. The reason we've been unable to endorse libc++ (as implemented in the NDK) until now has been a lack of confidence in this library. The focus of r16 was to rewrite this library for improved stability.

Since libandroid_support is now a smaller library, your app's behavior should more closely match the behavior of the system. As an example, libandroid_support previously included an alternative implementation of part of stdio. While some features got backported to ICS, it also meant that any bugs in the alternate implementation would be present on all OS releases since the bug was baked into your app. In the new version of libandroid_support, we've removed this so you'll be missing some features on older devices (almost exclusively things that no one uses, like %a support in format strings), but your apps using libc++ will be smaller and more reliable for not having these features.

Switching to libc++

So, why should you switch to libc++? First and foremost, the other STLs will not be supported going forward (this has been noted in our roadmap for quite some time). We've been using libc++ for the Android platform since Lollipop, and that's been a change that our engineers have been overwhelmingly happy with. We were able to make this transition in the platform earlier than we could in the NDK because we didn't need libandroid_support, and could instead just update libc in place.

In contrast to the other STLs currently available in the NDK, libc++ fully supports C++11, C++14, and most of C++1z! Stlport hasn't had an update since 2008, and gnustl (what we call GNU's libstdc++, to avoid confusion with Bionic's libstdc++, which isn't an STL) historically hasn't worked very well with Clang, particularly in headers that are closely tied to compiler builtins like and .

We'll most likely be making libc++ the default in the next NDK release, but for now you can opt-in if you're not using it already by following the instructions below.

Like the other STLs, libc++ is available as both a static and shared library. Which one you should use depends on your specific circumstances as described in our docs, but tl;dr use the static version if you have one and only one shared library in your application, and use the shared one in all other cases.

ndk-build

Add the following to your Application.mk file:

APP_STL := c++_shared
CMake

Pass the following when invoking CMake:

-DANDROID_STL=c++_shared

If you're using CMake via Gradle, add the following to your build.gradle:

externalNativeBuild {
    cmake {
        arguments "-DANDROID_STL=c++_shared"
    }
}
Standalone Toolchain

When you create your standalone toolchain, pass --stl=libc++.

The Future of libandroid_support

If you've read our roadmap, you've seen that we've planned to expand libandroid_support to backport as much of libc/libm as possible. Whenever we've spoken with people about this, we've received lukewarm responses at best. Given that this doesn't seem to be a thing that people are interested in, and that it would be something that increases library size (and therefore APK size, which is something everyone seems very interested in), we no longer plan to do this.

If we've misinterpreted your response or if we haven't heard from you and this is something you want, please let us know!

_FILE_OFFSET_BITS=64

tl;dr: Don't set _FILE_OFFSET_BITS=64 if you want to keep the behavior present in old NDKs.

Historically, setting _FILE_OFFSET_BITS=64 in the NDK did nothing. This feature was not present in the deprecated headers at all. With unified headers, the NDK now has up to date headers with support for this feature.

_FILE_OFFSET_BITS=64 is a macro you can define in your application to get support for a 64-bit off_t in 32-bit code. This works by both making off_t 64-bit (by default it is 32-bit in 32-bit code) and by implicitly replacing calls to APIs like lseek with calls to lseek64.

Support for _FILE_OFFSET_BITS=64 was not added to Android in a single release. One API, lseek64, has always been in bionic. Most APIs were added in Lollipop, and a few more were not added until later releases.

If you're targeting a release that does not support the 64-bit off_t variant of a function you are using and have set _FILE_OFFSET_BITS=64, the function will not be available. This is in contrast to the behavior for r15 and r15b (but matches r15c) where the functions were wrongly exposed with a 32-bit off_t that would be silently truncated.

Note that the 64-bit off_t APIs are still available without _FILE_OFFSET_BITS=64 under different names. For example, instead of lseek, call lseek64. Instead of off_t, use off64_t.

Finally, since this feature is new to the NDK with unified headers, if you just want to return to the pre-unified headers behavior, all you need to do is stop setting _FILE_OFFSET_BITS=64.

For more information about off_t ABI details in bionic, see the Bionic 32-bit ABI bugs doc.

Understanding the performance benefits of using ConstraintLayout

Posted by Takeshi Hagikura, Developer Programs Engineer

Since announcing ConstraintLayout at Google I/O last year, we've continued to improve the layout's stability and layout editor support. We've also added new features specific to ConstraintLayout that help you build various type of layouts, such as introducing chains and setting size as a ratio. In addition to these features, there is a notable performance benefit by using ConstraintLayout. In this post, we'll walk through how you can benefit from these performance improvements.

How Android draws views?

To better understand the performance of ConstraintLayout, let's take a step back and see how Android draws views.

When a user brings an Android view into focus, the Android framework directs the view to draw itself. This drawing process comprises 3 phases:

  1. Measure

    The system completes a top-down traversal of the view tree to determine how large each ViewGroup and View element should be. When a ViewGroup is measured, it also measures its children.

  2. Layout

    Another top-down traversal occurs, with each ViewGroup determining the positions of its children using the sizes determined in the measure phase.

  3. Draw

    The system performs yet another top-down traversal. For each object in the view tree, a Canvas object is created to send a list of drawing commands to the GPU. These commands include the ViewGroup and View objects' sizes and positions, which the system determined during the previous 2 phases.

Figure 1. Example of how the measure phase traverses a view tree

Each phase within the drawing process requires a top-down traversal of the view tree. Therefore, the more views you embed within each other (or nest) into the view hierarchy, the more time and computation power it takes for the device to draw the views. By keeping a flat hierarchy in your Android app layouts, you can create a fast and responsive user interface for your app.

The expense of a traditional layout hierarchy

With that explanation in mind, let's create a traditional layout hierarchy that uses LinearLayout and RelativeLayout objects.

Figure 2. Example layout

Let's say we want to build a layout like the image above. If you build it with traditional layouts, the XML file contains an element hierarchy similar to the following (for this example, we've omitted the attributes):

<RelativeLayout>
  <ImageView />
  <ImageView />
  <RelativeLayout>
    <TextView />
    <LinearLayout>
      <TextView />
      <RelativeLayout>
        <EditText />
      </RelativeLayout>
    </LinearLayout>
    <LinearLayout>
      <TextView />
      <RelativeLayout>
        <EditText />
      </RelativeLayout>
    </LinearLayout>
    <TextView />
  </RelativeLayout>
  <LinearLayout >
    <Button />
    <Button />
  </LinearLayout>
</RelativeLayout>

Although there's usually room for improvement in this type of view hierarchy, you'll almost certainly still need to create a hierarchy with some nested views.

As discussed before, nested hierarchies can adversely affect performance. Let's take a look at how the nested views actually affect the UI performance using Android Studio's Systrace tool. We called the measure and layout phases for each ViewGroup (ConstraintLayout and RelativeLayout) programmatically and triggered Systrace while the measure and layout calls are executing. The following command generates an overview file that contains key events, such as expensive measure/layout passes, that occur during a 20-second interval:

python $ANDROID_HOME/platform-tools/systrace/systrace.py --time=20 -o ~/trace.html gfx view res

For more details about how you can use Systrace, see the Analyzing UI Performance with Systrace guide.

Systrace automatically highlights the (numerous) performance problems with this layout, as well as suggestions for fixing them. By clicking the "Alerts" tab, you will find that drawing this view hierarchy requires 80 expensive passes through the measure and layout phases!

Triggering that many expensive measure and layout phases is far from ideal; such a large amount of drawing activity could result in skipped frames that users notice. We can conclude that the layout has poor performance due to the nested hierarchy as well as the characteristic of RelativeLayout, which measures each of its children twice.

Figure 3. Looking at the alerts from Systrace for the layout variant that uses RelativeLayout

You can check the entire code on how we performed these measurements in our GitHub repository.

The benefits of a ConstraintLayout object

If you create the same layout using ConstraintLayout, the XML file contains an element hierarchy similar to the following (attributes again omitted):

<android.support.constraint.ConstraintLayout>
  <ImageView />
  <ImageView />
  <TextView />
  <EditText />
  <TextView />
  <TextView />
  <EditText />
  <Button />
  <Button />
  <TextView />
</android.support.constraint.ConstraintLayout>

As this example shows, the layout now has a completely flat hierarchy. This is because ConstraintLayout allows you to build complex layouts without having to nest View and ViewGroup elements.

For example, let's look at the TextView and EditText in the middle of the layout:

When using a RelativeLayout, you need to create a new ViewGroup to align the EditText vertically with the TextView:
<LinearLayout
    android:id="@+id/camera_area"
    android:layout_width="match_parent"
    android:layout_height="wrap_content"
    android:orientation="horizontal"
    android:layout_below="@id/title" >

    <TextView
        android:text="@string/camera"
        android:layout_width="wrap_content"
        android:layout_height="wrap_content"
        android:layout_gravity="center_vertical"
        android:id="@+id/cameraLabel"
        android:labelFor="@+id/cameraType"
        android:layout_marginStart="16dp" />

    <RelativeLayout
        android:layout_width="match_parent"
        android:layout_height="wrap_content">

        <EditText
            android:id="@+id/cameraType"
            android:ems="10"
            android:inputType="textPersonName"
            android:text="@string/camera_value"
            android:layout_width="match_parent"
            android:layout_height="wrap_content"
            android:layout_centerVertical="true"
            android:layout_marginTop="8dp"
            android:layout_marginStart="8dp"
            android:layout_marginEnd="8dp" />
    </RelativeLayout>
</LinearLayout>

By using ConstraintLayout instead, you can achieve the same effect just by adding a constraint from the baseline of the TextView to the baseline of the EditText without creating another ViewGroup:

Figure 4. Constraint between EditText and TextView
<TextView
      android:layout_width="wrap_content"
      android:layout_height="wrap_content"
      app:layout_constraintLeft_creator="1"
      app:layout_constraintBaseline_creator="1"
      app:layout_constraintLeft_toLeftOf="@+id/activity_main_done"
      app:layout_constraintBaseline_toBaselineOf="@+id/cameraType" />

When running the Systrace tool for the version of our layout that uses ConstraintLayout, you see far fewer expensive measure/layout passes during the same 20-second interval. This improvement in performance makes sense, now that we're keeping the view hierarchy flat!

Figure 5. Looking at the alerts from Systrace for the layout variant that uses ConstraintLayout

On a related note, we built the ConstraintLayout variant of our layout using just the layout editor instead of editing the XML by hand. To achieve the same visual effect using RelativeLayout, we probably would have needed to edit the XML by hand.

Measuring the performance difference

We analyzed how long every measure and layout pass took for two type of layouts, ConstraintLayout and RelativeLayout, by using OnFrameMetricsAvailableListener, which was introduced in Android 7.0 (API level 24). This class allows you to collect frame-by-frame timing information about your app's UI rendering.

By calling the following code, you can start recording per-frame UI actions:

window.addOnFrameMetricsAvailableListener(
        frameMetricsAvailableListener, frameMetricsHandler);

After timing information becomes available, the app triggers the frameMetricsAvailableListener() callback. We are interested in the measure/layout performance, so we call FrameMetrics.LAYOUT_MEASURE_DURATION when retrieving the actual frame duration.

Window.OnFrameMetricsAvailableListener {
        _, frameMetrics, _ ->
        val frameMetricsCopy = FrameMetrics(frameMetrics);
        // Layout measure duration in nanoseconds
        val layoutMeasureDurationNs = 
                frameMetricsCopy.getMetric(FrameMetrics.LAYOUT_MEASURE_DURATION);

To learn more about the other types of duration information that FrameMetrics can receive, see the FrameMetrics API reference.

Measurement results: ConstraintLayout is faster

Our performance comparison shows that ConstraintLayout performs about 40% better in the measure/layout phase than RelativeLayout:

Figure 6. Measure / Layout (unit: ms, average of 100 frames)

As these results show, ConstraintLayout is likely to be more performant than traditional layouts. Moreover, ConstraintLayout has other features that help you build complex and performant layouts, as discussed in the benefits of a ConstraintLayout object section. For details, see the Build a Responsive UI with ConstraintLayout guide. We recommend that you use ConstraintLayout when designing your app's layouts. In almost all cases when you would have previously need a deeply-nested layout, ConstraintLayout should be your go-to layout for optimal performance and ease of use.

Appendix: Measurement environment

All the measurements above were performed in the following environment.

Device Nexus 5X
Android Version 8.0
ConstraintLayout version 1.0.2

What's next

Check out the developer guide, the API reference documentation, and the article on Medium to fully understand what ConstraintLayout can provide for you. And once again, thank you to all who submitted feedback and issues over the months since our alpha release of ConstraintLayout. We're truly grateful that we were able to release the production-ready 1.0 version of ConstraintLayout earlier this year. As we continue to improve ConstraintLayout, please continue to send us feedback using the Android issue tracker.