Tag Archives: Develop

Advanced in-app billing: handling alternative purchase flows

Posted by Oscar Rodriguez, Developer Advocate

When designing and developing an app or game, at some point you may ask yourself if you want to monetize it.

If you choose to do so by selling products via Google Play, you will most likely have a store screen that shows available items for sale, and use the Google Play Billing Library to display dialogs that allow your users to complete their purchase.

While there is a more detailed explanation in the documentation and in the Billing Library TrivialDrive samples, the general flow is as follows:

  1. Call the launchBillingFlow() method from the UI thread to launch the Google Play purchase dialog.
  2. If the purchase was successful, Google Play calls the onPurchasesUpdated() method to deliver the result of the purchase operation.
  3. If your app has a server, we strongly recommend that you verify the purchase from your server by using the Subscriptions and In-App Purchases API.
  4. Acknowledge the purchase either with consumeAsync() for consumable items or with acknowledgePurchase() for non-consumable items.
  5. Finally, grant entitlement to the purchased item inside the app.

If your app is still using the Google Play Billing AIDL API, it is also possible to perform the same task. Keep in mind that the AIDL API is now deprecated, so we strongly recommend you migrate to the Google Play Billing Library as soon as possible.

If you are using the AIDL API, the flow is very similar:

  1. Send a getBuyIntent() or getBuyIntentExtraParams() request to specify the item to purchase, and then call startIntentSenderForResult() to launch the Google Play purchase dialog.
  2. When the purchase dialog finishes, Google Play sends a response Intent to your onActivityResult() method, where you can verify if the purchase was successful.
  3. If your app has a server, we strongly recommend that you verify the purchase from your server by using the Subscriptions and In-App Purchases API.
  4. If the purchase was successful, call the getPurchases() method to retrieve a list of owned items that are still not consumed. For consumable items, call the consumePurchase() method to make the item available for purchase again.
  5. Finally, grant entitlement to the purchased item inside the app.

Nevertheless, just implementing the above mentioned flow is not enough to correctly handle all types of purchases. There are two main cases in which purchases will not be correctly handled by this flow.

The first case happens when the purchase flow is interrupted before it finishes. The app may have crashed, the user may have killed the app, or the user’s Internet connection may have been lost. In any case, it is possible for the app not to have delivered the item to the user even though Google Play has already processed the payment. In this case, the item is in limbo, because Google Play will not allow an item to be re-purchased until it is consumed, but the app or game won’t consume the item outside of the flow mentioned above.

The second case happens during alternative purchase flows, such as in-app promotions, the recently announced out-of-app subscription surfaces, promo codes for subscriptions, or other promotions in collaboration with Google. In these cases, a user gets an item directly on the Play Store app, while the target app or game may be paused, not running, or even not installed.

For these cases, the Google Play Billing Library and the Google Play Billing AIDL API offer a mechanism to detect purchases that are not acknowledged or consumed.

When using the Google Play Billing API, do the following:

  1. In your app’s onResume() callback, call the queryPurchases() method to retrieve a list of items, so you can determine which ones are unacknowledged.
  2. If your app has a server, we strongly recommend that you verify the purchase from your server by using the Subscriptions and In-App Purchases API.
  3. If there are owned but unacknowledged items, acknowledge the purchase either with consumeAsync() for consumable items or with acknowledgePurchase() for non-consumable items.
  4. Grant entitlement to the purchased item inside the app.

For the Google Play Billing AIDL API, do the following:

  1. In your app’s onResume() callback, call the getPurchases() method to retrieve a list of owned items that are still not consumed.
  2. If your app has a server, we strongly recommend that you verify the purchase from your server by using the Subscriptions and In-App Purchases API.
  3. For consumable items, call the consumePurchase() method to make the item available for purchase again.
  4. Finally, grant entitlement to the purchased item inside the app.

In either case, when you detect and process an unconsumed item in this manner, users will expect the app or game to communicate about it. We suggest that you display a dialog, message box, or notification that tells the user that they have successfully received their item.

Keep in mind that your app’s onResume() callback will be called when its process is started, as well as when it is brought to the foreground, regardless of which screen the app or game was in before it was paused. For example, a game with a home screen, a store screen, and a game screen might get its onResume() called from any of those screens. For an optimal user experience, we suggest you make it so your app or game handles unacknowledged or unconsumed items regardless of the screen you display when onResume() gets called. Thorough testing of this process in each screen is crucial to deliver a great user experience.

Finally, there is one more case your app must handle: when a user acquires an item from the Play Store app, and both the Play Store app and your app are visible at the same time with multi-window mode.

To support this scenario with the Google Play Billing Library, do the following:

  1. Google Play calls the onPurchasesUpdated() method to notify your app that there is a new pending item.
  2. If your app has a server, we strongly recommend that you verify the purchase from your server by using the Subscriptions and In-App Purchases API.
  3. Acknowledge the purchase either with consumeAsync() for consumable items or with acknowledgePurchase() for non-consumable items.
  4. Finally, grant entitlement to the purchased item inside the app.

For the Google Play Billing AIDL API, do the following:

  1. In your app’s onResume() callback, register a PurchasesUpdatedListener to receive the com.android.vending.billing.PURCHASES_UPDATED intent. Also, in your app’s onPause() callback, unregister the listener.
  2. If your app has a server, we strongly recommend that you verify the purchase from your server by using the Subscriptions and In-App Purchases API.
  3. Google Play calls your listener to notify your app that there is a new pending item. Inside it, call the getPurchases() method to retrieve a list of owned items that are still not consumed. For consumable items, call the consumePurchase() method to make the item available for purchase again.
  4. Finally, grant entitlement to the purchased item inside the app.

Just as before, you should display a dialog, message box, or notification that tells the user that they have successfully received their item.

If you follow these steps, your app or game will be better prepared to robustly handle purchase flow interruptions and alternative purchase flows.

Get your apps ready for the 64-bit requirement

Posted by Vlad Radu, Product Manager, Play and Diana Wong, Product Manager, Android

64-bit CPUs deliver faster, richer experiences for your users. Adding a 64-bit version of your app provides performance improvements, makes way for future innovation, and sets you up for devices with 64-bit only hardware.

We want to help you get ready and know you need time to plan. We’ve supported 64-bit CPUs since Android 5.0 Lollipop and in 2017 we first announced that apps using native code must provide a 64-bit version (in addition to the 32-bit version). Today we’re providing more detailed information and timelines to make it as easy as possible to transition in 2019.

The 64-bit requirement: what it means for developers

Starting August 1, 2019:

  • All new apps and app updates that include native code are required to provide 64-bit versions in addition to 32-bit versions when publishing to Google Play.
  • Extension: Google Play will continue to accept 32-bit only updates to existing games that use Unity 5.6 or older until August 2021.

Starting August 1, 2021:

  • Google Play will stop serving apps without 64-bit versions on 64-bit capable devices, meaning they will no longer be available in the Play Store on those devices.
  • This will include games built with Unity 5.6 or older.

The requirement does not apply to:

  • APKs or app bundles explicitly targeting Wear OS or Android TV, which are form factors that do not currently support 64-bit code.
  • APKs or app bundles that are not distributed to devices running Android 9 Pie or later.

We are not making changes to our policy on 32-bit support. Play will continue to deliver apps to 32-bit devices. This requirement means that apps with 32-bit native code will need to have an additional 64-bit version as well.

Preparing for the 64-bit requirement

We anticipate that for most developers, the move to 64-bit should be straightforward. Many apps are written entirely in non-native code (e.g. the Java programming language or Kotlin) and do not need code changes.

All developers: Here is an overview of the steps you will need to take in order to become 64-bit compliant. For a more detailed outline of this process refer to our in-depth documentation.

Inspect your APK or app bundle for native code. You can check for .so files using APK Analyzer. Identify whether they are built from your own code or are imported by an SDK or library that you are using. If you do not have any .so files in your APK, you are already 64-bit compliant.

Enable 64-bit architectures and rebuild native code (.so files) imported by your own code. See the documentation for more details.

  • Upgrade any SDKs and libraries to 64-bit compliant versions, if needed. Reach out to the SDK or library owner if one is not available. We’re working with top library owners on their 64-bit compatibility.
  • Test for issues locally once you’ve rebuilt your app.
  • Rollout to your testers using testing tracks for thorough testing.

Game developers: The three most used engines all currently support 64-bit (Unreal & Cocos2d since 2015, Unity since 2018). We understand that migrating a 3rd party game engine is an intensive process with long lead times.

Since Unity only recently began providing 64-bit support in versions 2017.4 and 2018.2, we are granting an automatic extension to existing games using versions 5.6 or older until August 2021. Unity provides guides that can help you through the process of upgrading to a 64-bit compliant version.

SDK and library owners: Update for 64-bit compliance as soon as possible to give app developers time to adapt, and let your developers know. Sign up and register your SDK to receive updates about the latest tools and information that can help you serve your customers.

Going forward

For those that already support 64-bit - thank you and great work! If you haven’t yet, we encourage you to begin any work for the 64-bit requirement as soon as possible. As we move closer to the deadline, we’ll be updating our developer documentation with more information on how to check if your app is compliant.

We’re excited about the future that 64-bit CPUs bring in areas such as artificial intelligence, machine learning, and immersive mobile. Supporting 64-bit prepares the ecosystem for the innovation enabled by the advanced compute capabilities of 64-bit devices, and for future Android devices that only support 64-bit code.

How useful did you find this blog post?

Google Play services discontinuing updates for API levels 14 and 15

Posted by Sam Spencer, Technical Program Manager, Google Play

The Android Ice Cream Sandwich (ICS) platform is seven years old and the active device count has been below 1% for some time. Consequently, we are deprecating support for ICS in future releases of Google Play services. For devices running ICS, the Google Play Store will no longer update Play Services APK beyond version 14.7.99.

What does this mean as an Application developer:

The Google Play services SDK contains the interfaces to the functionality provided by the Google Play services APK, running as background services. The functionality required by the current, released SDK versions is already present on ICS devices with Google Play services and will continue to work without change.

With the SDK version changes earlier this year, each library can be independently released and may update its own minSdkVersion. Individual libraries are not required to change based on this deprecation. Newer SDK components may continue to support API levels 14 and 15 but many will update to require the higher API level. For applications that support API level 16 or greater, you will not need to make any changes to your build. For applications that support API levels 14 or 15, you may continue to build and publish your app to devices running ICS, but you will encounter build errors when updating to newer SDK versions. The error will look like this:

Error:Execution failed for task ':app:processDebugManifest'.
> Manifest merger failed : uses-sdk:minSdkVersion 14 cannot be smaller than version 16 declared in library [com.google.android.gms:play-services-FOO:16.X.YY]
        Suggestion: use tools:overrideLibrary="com.google.android.gms:play_services" to force usage

Unfortunately, the stated suggestion will not help you successfully run your app on older devices. In order to use the newer SDK, you will need to use one of the following options:

1. Target API level 16 as the minimum supported API level.

This is the recommended course of action. To discontinue support for API levels that will no longer receive Google Play services updates, simply increase the minSdkVersion value in your app's build.gradle to at least 16. If you update your app in this way and publish it to the Play Store, users of devices with less than that level of support will not be able to see or download the update. However, they will still be able to download and use the most recently published version of the app that does target their device.

A very small percentage of all Android devices are using API levels less than 16. You can read more about the current distribution of Android devices. We believe that many of these old devices are not actively being used.

If your app still has a significant number of users on older devices, you can use multiple APK support in Google Play to deliver an APK that uses Google Play services 14.7.99. This is described below.

2. Build multiple APKs to support devices with an API level less than 16.

Along with some configuration and code management, you can build multiple APKs that support different minimum API levels, with different versions of Google Play services. You can accomplish this with build variants in Gradle. First, define build flavors for legacy and newer versions of your app. For example, in your build.gradle, define two different product flavors, with two different compile dependencies for the stand-in example play-services-FOO component:

productFlavors {
    legacy {
        minSdkVersion 14
        versionCode 1401  // Min API level 14, v01
    }
    current {
        minSdkVersion 16
        versionCode 1601  // Min API level 16, v01
    }
}

dependencies {
    legacyCompile 'com.google.android.gms:play-services-FOO:16.0.0'
    currentCompile 'com.google.android.gms:play-services-FOO:17.0.0'
}

In the above situation, there are two product flavors being built against two different versions of play-services-FOO. This will work fine if only APIs are called that are available in the 16.0.0 library. If you need to call newer APIs made available with 17.0.0, you will have to create your own compatibility library for the newer API calls so that they are only built into the version of the application that can use them:

  1. Declare a Java interface that exposes the higher-level functionality you want to perform that is only available in current versions of Play services.
  2. Build two Android libraries that implement that interface. The "current" implementation should call the newer APIs as desired. The "legacy" implementation should no-op or otherwise act as desired with older versions of Play services. The interface should be added to both libraries.
  3. Conditionally compile each library into the app using "legacyCompile" and "currentCompile" dependencies as illustrated for play-services-FOO above.
  4. In the app's code, call through to the compatibility library whenever newer Play APIs are required.

After building a release APK for each flavor, you then publish them both to the Play Store, and the device will update with the most appropriate version for that device. Read more about multiple APK support in the Play Store.

Improve media and messaging app integrations with Android Auto

Posted by John Posavatz, Product Manager, Android Auto

At Google I/O this past May, we provided a sneak preview of several new media and messaging features for Android Auto. We are happy to announce that these features are now ready in our latest version of Android Auto, and we encourage you to update your Android Auto implementations to take advantage of them!

New Media Features

Several new features make it easier for users to find the media content that they're looking for. Check out the full documentation for them on our Android developer site.

Search results

After performing an Assistant-based search (e.g. "OK Google, play [artist / album / playlist / book / song / genre]"), music auto-plays as before, and in addition you can now provide your own list of categorized results. First, you'll need to declare support for onSearch() in your MediaBrowserServiceCompat implementation, and then override it. Android Auto forwards a user's search terms to this method whenever a user invokes the "Show more results" affordance.

Android Auto calls onSearch with the same Bundle of extras as the one defined for Android Auto's playFromSearch() calls. Unlike playFromSearch(), onSearch() includes a Result> that can be used to return multiple MediaItems back to Android Auto for display.

You can then categorize search results using title items. For example, music apps may include categories such as "Artists", "Albums" and "Songs".

Improved browse

Content has been "brought forward" out of the drawer, and now resides within the main view of the media screen. Within this new layout, you now have an option of either displaying your browse trees as a simple list, or you can optionally display large grids of album art / icons. We recommend using lists wherever the text description is most useful in describing content (e.g. a list of track names or podcast episodes), whereas the larger grid view is most appropriate where the album / icon aids in quick identification and selection.

To start applying content styles, you should set a global default for how your media items are displayed by applying specific constants in the BrowserRoot extras bundle returned by the onGetRoot() function. Android Auto reads the extras associated with each item in the browse tree and looks for specific constants (detailed in our documentation), and then use the presence/value of each key to add the appropriate indicator.

In order to change the default behavior for a specific node, the Content Style API supports overriding the default global hint for any browsable node's children. The same extras as above can be supplied as extras in the MediaDescription. If these extras are present, then the children of that browsable node will have the new Content Style hint.

Finally, you can organize content using title items to group media in a list. To do this, every media item in the group needs to declare an extra in their media description with the same string value, which you can localize. This value is used as the group title. You also need to pass the media items together and in the order you want them displayed.

Additional metadata icons

In both browsing and playback views, you are now able to show icons next to media items which have explicit language, have been downloaded to the user's device, and which are unplayed / partially played / completed (e.g. for audiobooks and podcasts).

Android Auto inspects extras for each item in the browse tree and looks for the specific keys for the indicators, and then uses the presence/value of each key to add the appropriate indicator.

You should add these extras to content returned by your MediaBrowse Service. "Explicit" and "Downloaded" are boolean extras (set to true to show the indicator), while "Completion State" is an integer extra set to the appropriate value. Apps should create an extras bundle that includes one or more of these keys and pass that to MediaDescription.Builder.setExtras().

Updates to Messaging

We are deprecating CarExtender, in favor of the more robust and broadly beneficial MessagingStyle API. Migrating to MessagingStyle is very straightforward, and not only extends messaging support beyond Android Auto (for example, to Google Assistant), but it also brings the following immediate benefits for Android Auto:

Group messaging

Formerly, Android Auto's support for group messages was lacking - in most cases, notifications were never shown. MessagingStyle addresses that, so that your users never miss a message.

MMS / RCS support

Android Auto only supports SMS natively through the system SMS broadcast. MessagingStyle allows support for SMS apps that themselves support RCS and MMS.

To enable your app to provide messaging service for Auto devices, your app must do the following:

  1. Build and send NotificationCompat.MessagingStyle objects that contain reply and mark-as-read Action objects.
  2. Handle replying and marking a conversation as read with a Service.
  3. Configure your manifest to indicate the app supports Android Auto.

By moving to MessagingStyle, your app will not only gain automotive support, but also gain a richer mobile notification experience including inline replying, image preview, and conversation history; all within the notification shade.

An in-depth guide to implementing (or updating to) MessagingStyle can be found in our online developer documentation.

Thanks for continuing to support Android Auto!

Verifying your Google Assistant media action integrations on Android

Posted by Nevin Mital, Partner Developer Relations

The Media Controller Test (MCT) app is a powerful tool that allows you to test the intricacies of media playback on Android, and it's just gotten even more useful. Media experiences including voice interactions via the Google Assistant on Android phones, cars, TVs, and headphones, are powered by Android MediaSession APIs. This tool will help you verify your integrations. We've now added a new verification testing framework that can be used to help automate your QA testing.

The MCT is meant to be used in conjunction with an app that implements media APIs, such as the Universal Android Music Player. The MCT surfaces information about the media app's MediaController, such as the PlaybackState and Metadata, and can be used to test inter-app media controls.

The Media Action Lifecycle can be complex to follow; even in a simple Play From Search request, there are many intermediate steps (simplified timeline depicted below) where something could go wrong. The MCT can be used to help highlight any inconsistencies in how your music app handles MediaController TransportControl requests.

Timeline of the interaction between the User, the Google Assistant, and the third party Android App for a Play From Search request.

Previously, using the MCT required a lot of manual interaction and monitoring. The new verification testing framework offers one-click tests that you can run to ensure that your media app responds correctly to a playback request.

Running a verification test

To access the new verification tests in the MCT, click the Test button next to your desired media app.

MCT Screenshot of launch screen; contains a list of installed media apps, with an option to go to either the Control or Test view for each.

The next screen shows you detailed information about the MediaController, for example the PlaybackState, Metadata, and Queue. There are two buttons on the toolbar in the top right: the button on the left toggles between parsable and formatted logs, and the button on the right refreshes this view to display the most current information.

MCT Screenshot of the left screen in the Testing view for UAMP; contains information about the Media Controller's Playback State, Metadata, Repeat Mode, Shuffle Mode, and Queue.

By swiping to the left, you arrive at the verification tests view, where you can see a scrollable list of defined tests, a text field to enter a query for tests that require one, and a section to display the results of the test.

MCT Screenshot of the right screen in the Testing view for UAMP; contains a list of tests, a query text field, and a results display section.

As an example, to run the Play From Search Test, you can enter a search query into the text field then hit the Run Test button. Looks like the test succeeded!

MCT Screenshot of the right screen in the Testing view for UAMP; the Play From Search test was run with the query 'Memories' and ended successfully.

Below are examples of the Pause Test (left) and Seek To test (right).

MCT Screenshot of the right screen in the Testing view for UAMP; a Pause test was run successfully. MCT Screenshot of the right screen in the Testing view for UAMP; a Seek To test was run successfully.

Android TV

The MCT now also works on Android TV! For your media app to work with the Android TV version of the MCT, your media app must have a MediaBrowserService implementation. Please see here for more details on how to do this.

On launching the MCT on Android TV, you will see a list of installed media apps. Note that an app will only appear in this list if it implements the MediaBrowserService.

Android TV MCT Screenshot of the launch screen; contains a list of installed media apps that implement the MediaBrowserService.

Selecting an app will take you to the testing screen, which will display a list of verification tests on the right.

Android TV MCT Screenshot of the testing screen; contains a list of tests on the right side.

Running a test will populate the left side of the screen with selected MediaController information. For more details, please check the MCT logs in Logcat.

Android TV MCT Screenshot of the testing screen; the Pause test was run successfully and the left side of the screen now displays selected MediaController information.

Tests that require a query are marked with a keyboard icon. Clicking on one of these tests will open an input field for the query. Upon hitting Enter, the test will run.

Android TV MCT Screenshot of the testing screen; clicking on the Seek To test opened an input field for the query.

To make text input easier, you can also use the ADB command:

adb shell input text [query]

Note that '%s' will add a space between words. For example, the command adb shell input text hello%sworld will add the text "hello world" to the input field.

What's next

The MCT currently includes simple single-media-action tests for the following requests:

  • Play
  • Play From Search
  • Play From Media ID
  • Play From URI
  • Pause
  • Stop
  • Skip To Next
  • Skip To Previous
  • Skip To Queue Item
  • Seek To

For a technical deep dive on how the tests are structured and how to add more tests, visit the MCT GitHub Wiki. We'd love for you to submit pull requests with more tests that you think are useful to have and for any bug fixes. Please make sure to review the contributions process for more information.

Check out the latest updates on GitHub!

Introducing Android 9 Pie

Posted by Dave Burke, VP of Engineering

After more than a year of development and months of testing by early adopters, we're ready to launch Android 9 Pie, the latest release of Android, to the world.

Android 9 harnesses the power of machine learning to make your phone smarter, simpler, and tailored to you. Read all about the new consumer features here. For developers, Android 9 includes many new ways to enhance your apps and build new experiences to drive engagement.

You've given us tons of feedback along the way--over a thousand bugs and feature requests--thank you! More than 140,000 of you tried our preview builds through the Android Beta program, and seven of our device maker partners also brought our Beta to their flagship devices, enabling users around the world to give their feedback too.

Today we're pushing the source code to Android Open Source Project (AOSP), and starting the Android 9 rollout to all Pixel users worldwide, with Android 9 coming to many more devices in the coming months.

We continue to move Android forward as the premier open platform for developers worldwide to build their businesses. With Android 9 -- together with the powerful new capabilities in Google Play for apps and games -- we're committed to helping you build great experiences, as well as reach and engage the right users safely and cost-effectively around the world.

What's in Android 9?

A smarter smartphone, with machine learning at the core

Android 9 helps your phone learn as you use it, by picking up on your preferences and adjusting automatically. Everything from helping users get the most out of their battery life to surfacing the best parts of the apps they use all the time, right when they need it most, Android 9 keeps things running smoother, longer.

Adaptive Battery

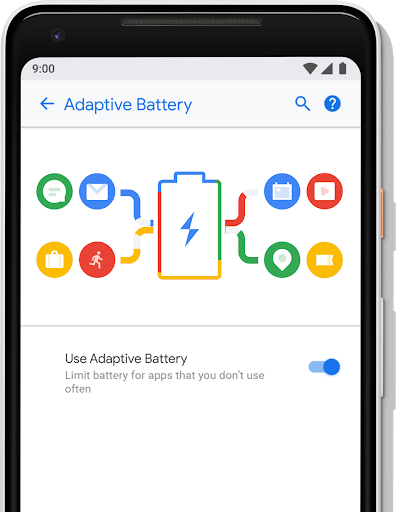
We partnered with DeepMind on a feature called Adaptive Battery that uses machine learning to prioritize system resources for the apps the user cares about most. If your app is optimized for Doze, App Standby, and Background Limits, Adaptive Battery should work well for you right out of the box. If you haven't yet taken optimized your app, make sure to check out the details in the power documentation to see how it works.

Slices

Slices can help users perform tasks faster by enabling engagement outside of the fullscreen app experience. It does this by using UI templates that can display rich, dynamic, and interactive content from your app from within the Google Search app and later in other places like the Google Assistant. You can learn more about building Slices to enhance your app here.
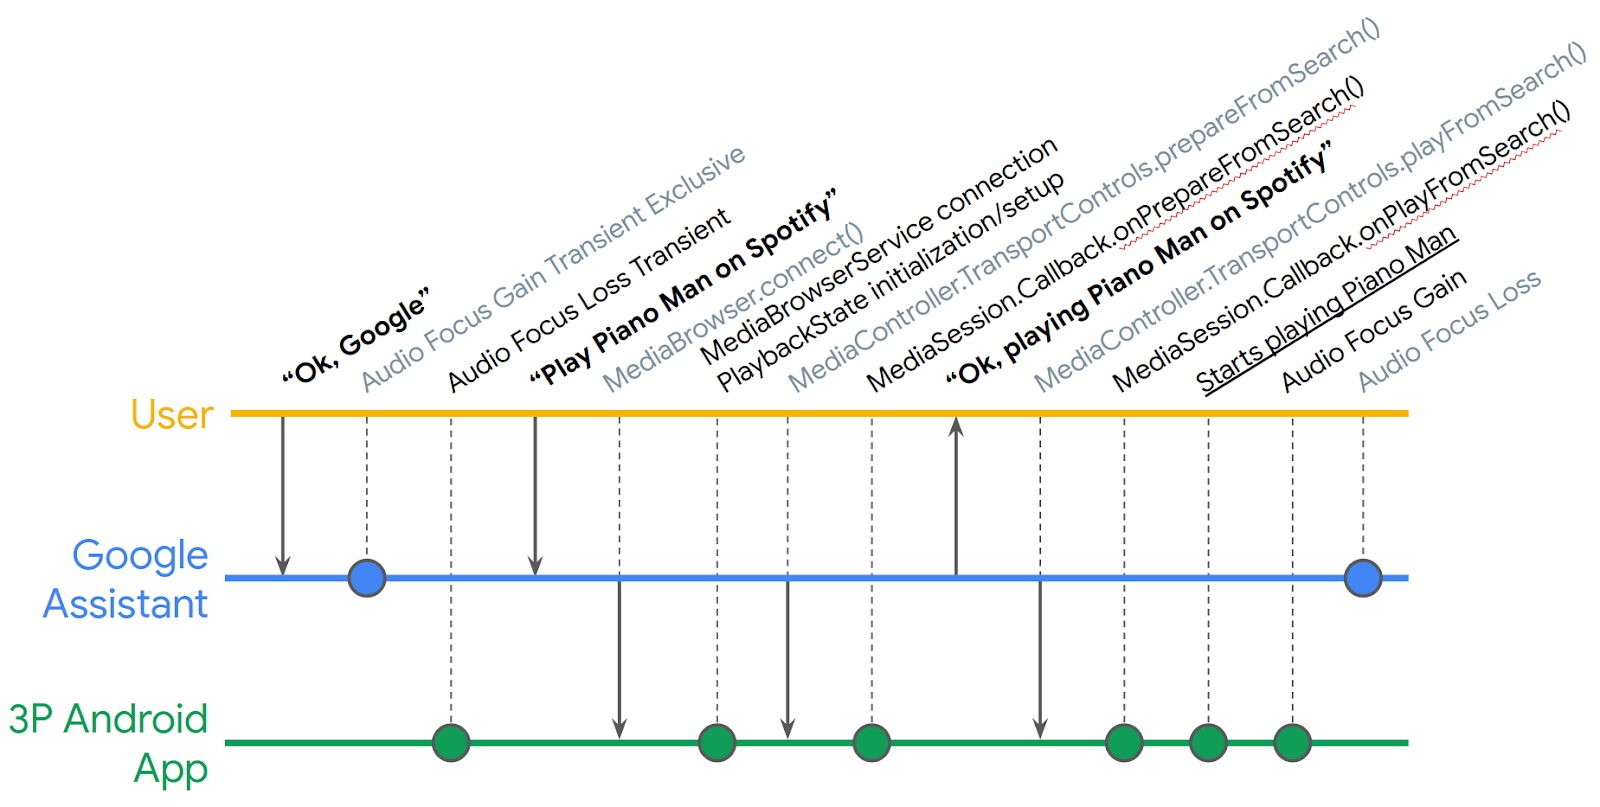
App Actions

App Actions is a new way to raise the visibility of your app and drive engagement. Actions take advantage of machine learning to surface your app to the user at just the right time, based on your app's semantic intents and the user's context.

We'll be sharing more details in the coming weeks on registering your app to handle one or more user intents, so your apps can be enabled for App Actions and surfaced across multiple Google and Android surfaces in response to user queries.

Text Classifier and Smart Linkify

We've extended the ML models that identify entities in content or text input to support more types like Dates and Flight Numbers through the TextClassifier API. Smart Linkify lets you take advantage of the TextClassifier models through the Linkify API, including enriched options for quick follow-on user actions. Smart Linkify also delivers significant improvements in accuracy of detection as well as performance.

Neural Networks API 1.1

Android 9 adds an updated version of the Neural networks API, to extend Android's support for accelerated on-device machine learning. Neural Networks 1.1 adds support for nine new ops -- Pad, BatchToSpaceND, SpaceToBatchND, Transpose, Strided Slice, Mean, Div, Sub, and Squeeze. A typical way to take advantage of the APIs is through TensorFlow Lite.

Getting the most from your phone -- more easily

We're excited about making your smartphone more intelligent. But it's also important that the technology fades to the back for users. In Android 9, we've evolved Android's UI to be simpler and more approachable -- for developers, these changes help improve the way users find, use, and manage your apps.

New system navigation

Android 9 introduces a new system navigation that we've been working on for more than a year. The new design helps make Android's multitasking more approachable and makes discovering apps much easier. You can swipe up from anywhere to see full-screen previews of recently used apps and simply tap to jump back into one of them.
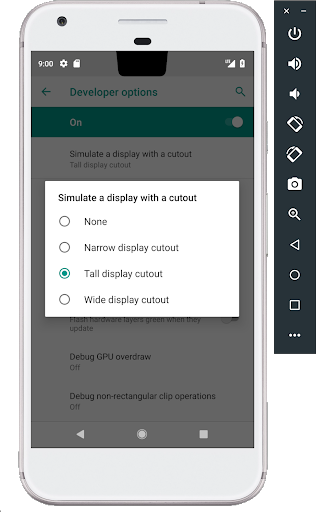
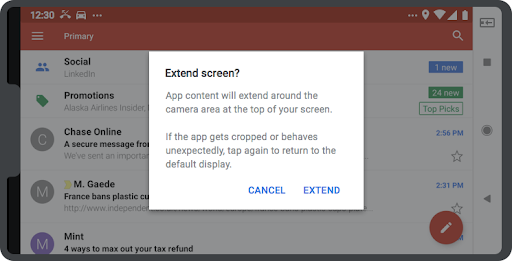
Display cutout

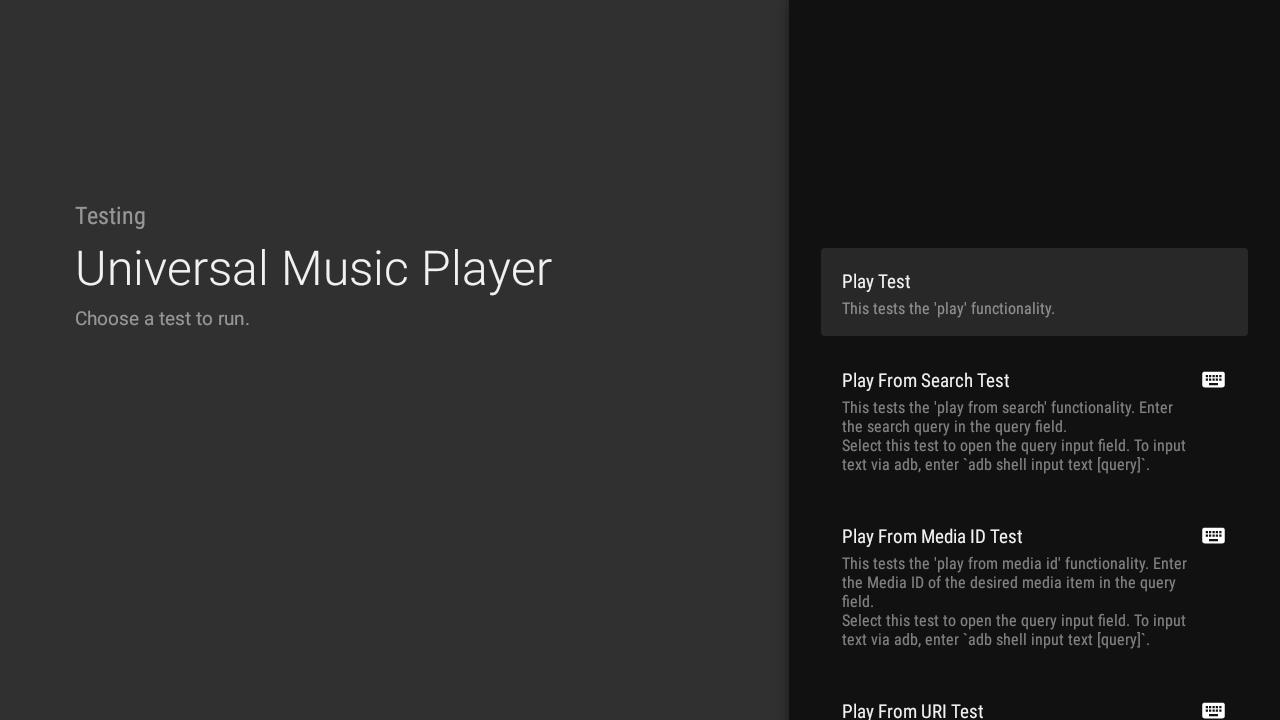
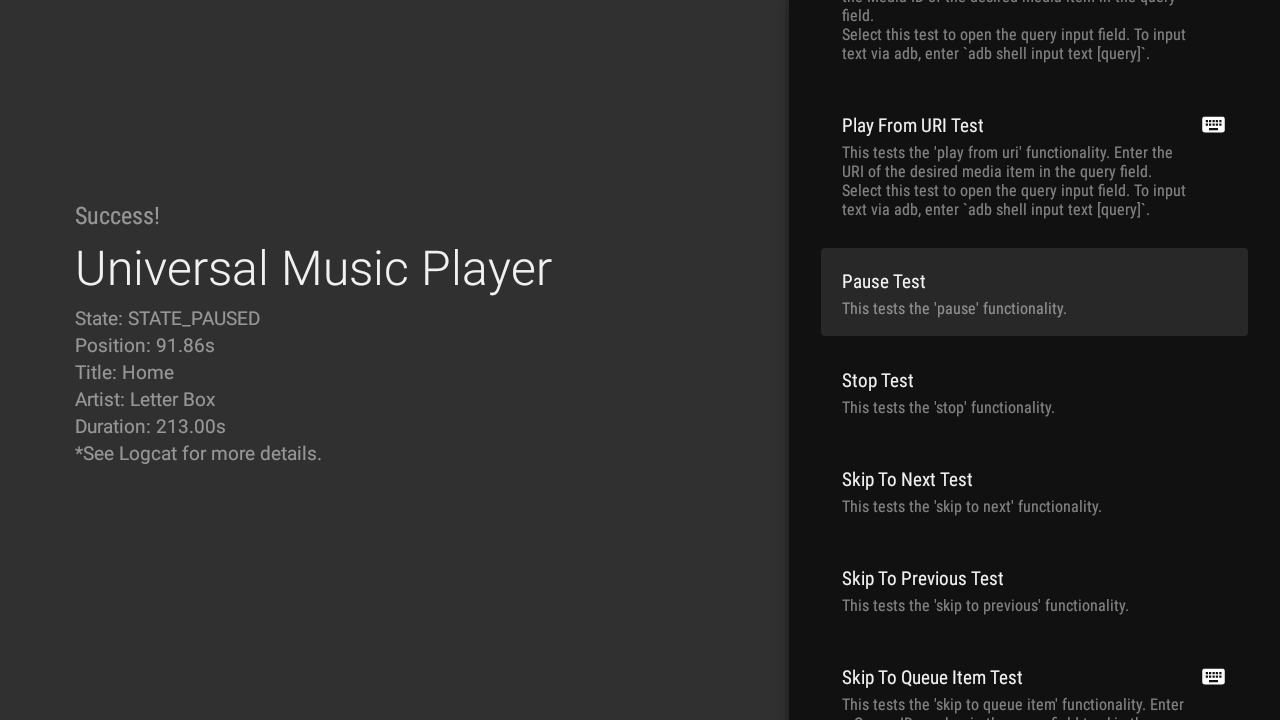
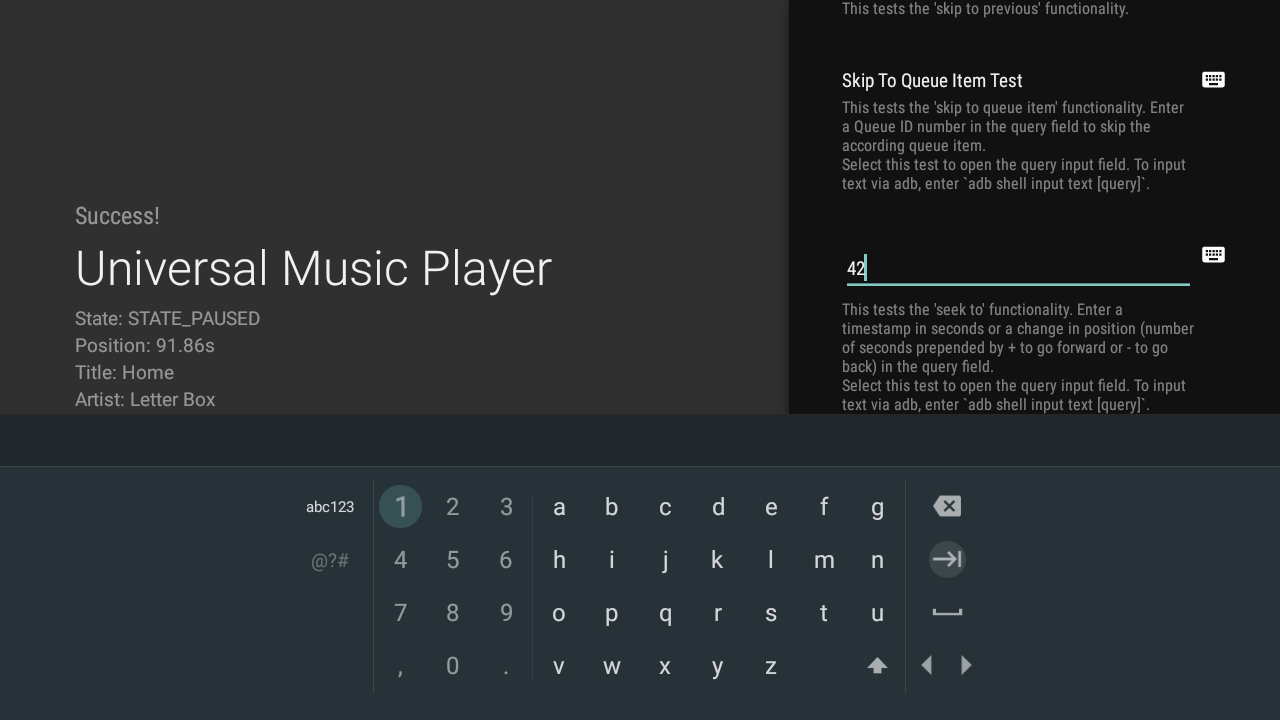
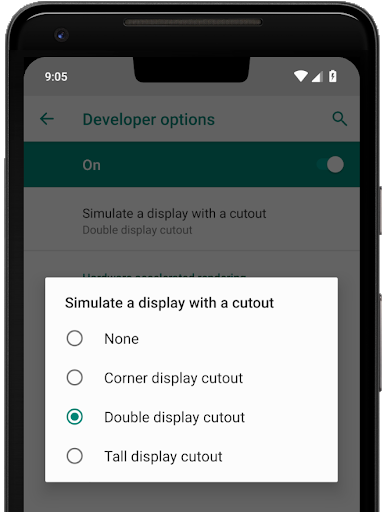
Now your app can take full advantage of the latest edge-to-edge screens through display cutout support in Android 9. For most apps, supporting display cutout is seamless, with the system managing status bar height to separate your content from the cutout. If you have immersive content, you can use the display cutout APIs to check the position and shape of the cutout and request full-screen layout around it. To help with development and testing, we've added a Developer Option that simulates several cutout shapes on any device.

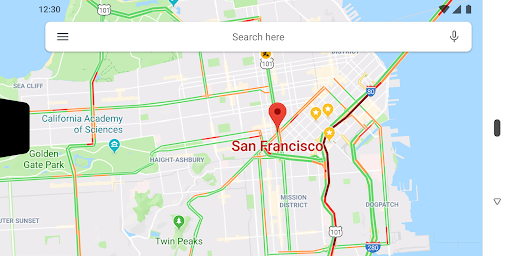
Apps with immersive content can display content fullscreen on devices with a display cutout.

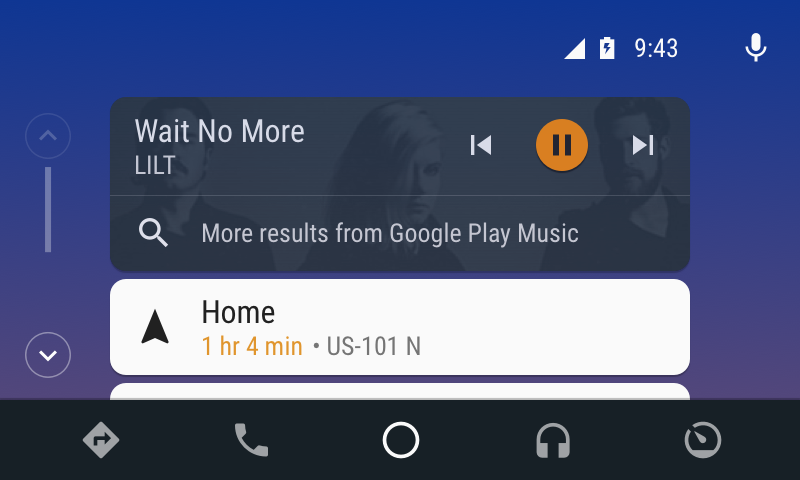
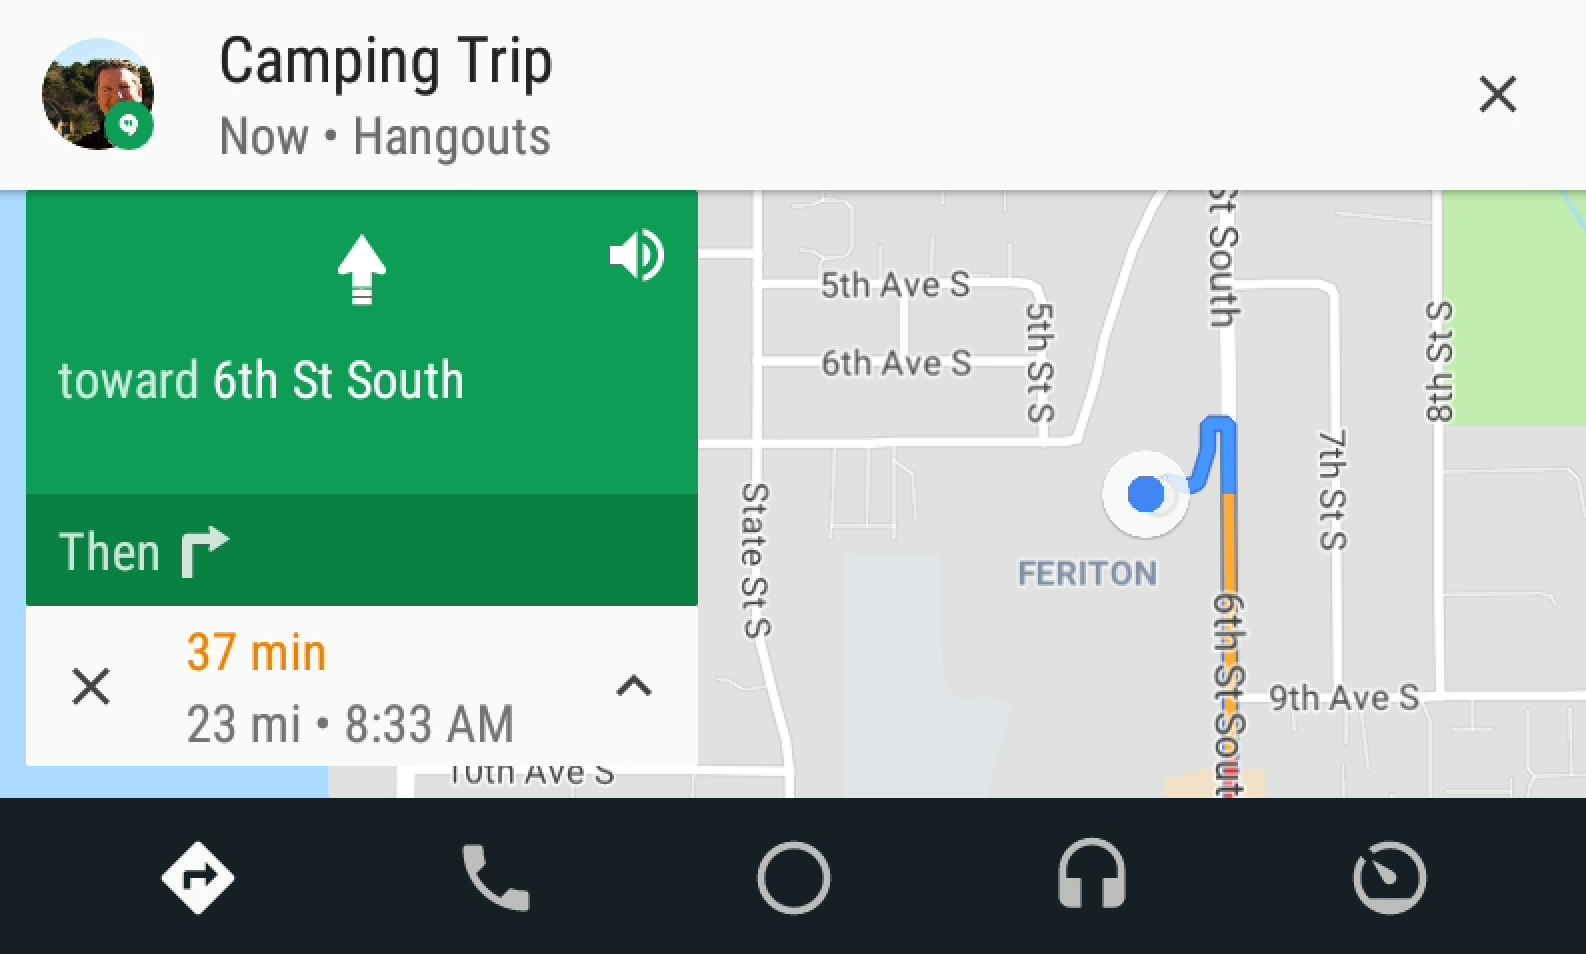
Notifications and smart reply

Android 9 makes notifications even more useful and more actionable. Messaging apps can take advantage of the new MessagingStyle APIs to show conversations, attach photos and stickers, and even suggest smart replies. You'll soon be able to use ML Kit to generate smart reply suggestions for your app.

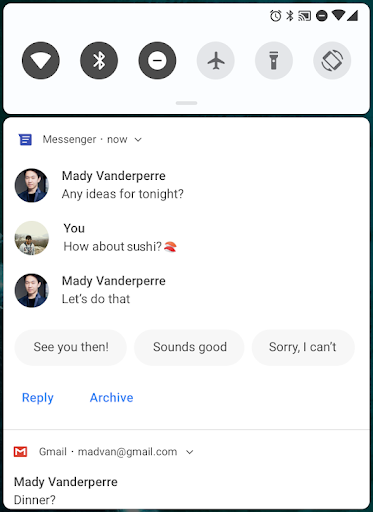
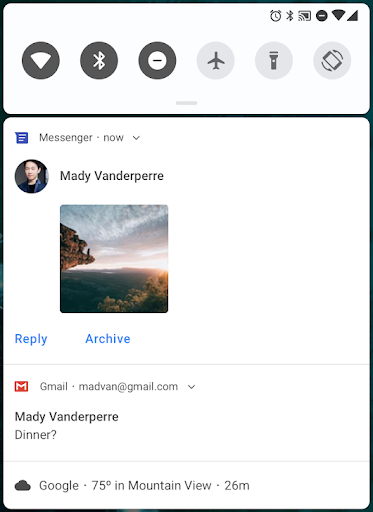
MessagingStyle notifications with conversations and smart replies [left], images and stickers [right].

Text Magnifier

In Android 9 we've added a Magnifier widget to improve the user experience of selecting text. The Magnifier widget lets users precisely position the cursor or the text selection handles by viewing zoomed text through a draggable pane. You can attach it to any view that is attached to a window, so you can use it in custom widgets or during custom text-rendering. The Magnifier widget can also provide a zoomed-in version of any view or surface, not just text.

Check out our recent blog post for more about this and other Text features, such as PrecomputedText and line height and baseline text alignment.

Security and privacy for users

Biometric prompt

With a range of biometric sensors in use for authentication, we've made the experience more consistent across sensor types and apps. Android 9 introduces a system-managed dialog to prompt the user for any supported type of biometric authentication. Apps no longer need to build their own dialog--instead they use the BiometricPrompt API to show the standard system dialog. In addition to Fingerprint (including in-display sensors), the API supports Face and Iris authentication.

If your app is drawing its own fingerprint auth dialogs, you should switch to using the BiometricPrompt API as soon as possible. See this post for more information.

Protected Confirmation

Android 9 introduces Android Protected Confirmation, which uses the Trusted Execution Environment (TEE) to guarantee that a given prompt string is shown and confirmed by the user. Only after successful user confirmation will the TEE then sign the prompt string, which the app can verify.

Stronger protection for private keys

We've added StrongBox as a new KeyStore type, providing API support for devices that provide key storage in tamper-resistant hardware with isolated CPU, RAM, and secure flash. You can set whether your keys should be protected by a StrongBox security chip in your KeyGenParameterSpec.

DNS over TLS

Android 9 adds built-in support for DNS over TLS, automatically upgrading DNS queries to TLS if a network's DNS server supports it. Users can manage DNS over TLS behavior in a new Private DNS Mode in Network & internet settings. Apps that perform their own DNS queries can use a new API, LinkProperties.isPrivateDnsActive(), to check the DNS mode. More in this post.

HTTPS by default

As part of a larger effort to move all network traffic away from cleartext (unencrypted HTTP) to websites secured with TLS (HTTPS), we're changing the defaults for Network Security Configuration to block all cleartext traffic. You'll now need to make connections over TLS, unless you explicitly opt-in to cleartext for specific domains. See the details here.

Compiler-based security mitigations

In Android 9 we've expanded our use of compiler-level mitigations to harden the platform through run-time detection of dangerous behavior. Control Flow Integrity (CFI) techniques help to prevent code-reuse attacks and arbitrary code execution. In Android 9 we've greatly expanded CFI usage within the media framework and other security-critical components, such as NFC and Bluetooth. We've also introduced CFI kernel support into the Android common kernel when building with LLVM.

We've also expanded our use of Integer overflow sanitizers to mitigate memory-corruption and information-disclosure vulnerabilities. We've prioritized sanitizers in libraries with past vulnerabilities or where complex untrusted input is processed, such as libui, libnl, libmediaplayerservice and others. See this post for details.

Privacy for users

Android 9 safeguards privacy in a number of new ways. The system now restricts access to mic, camera, and all SensorManager sensors from apps that are idle. While your app's UID is idle, the mic reports empty audio and sensors stop reporting events. Cameras used by your app are disconnected and will generate an error if the app tries to use them. In most cases, these restrictions should not introduce new issues for existing apps, but we recommend removing these requests from your apps.

Android 9 also gives the user control over access to the platform's build.serial identifier by putting it behind the READ_PHONE_STATE permission. To access the build.serial identifier, you should use the Build.getSerial() method.

Read more about all of the privacy changes here.

New experiences in camera, audio, and graphics

Multi-camera API and other camera updates

With Android 9 you can now open streams from two or more physical cameras simultaneously on devices that support the multi-camera API. On devices with either dual-front or dual-back cameras, you can create innovative features not possible with just a single camera, such as seamless zoom, bokeh, and stereo vision. The API also lets you call a logical or fused camera stream that automatically switches between two or more cameras.

Other improvements in camera include new Session parameters that help to reduce delays during initial capture, and Surface sharing that lets camera clients handle various use-cases without the need to stop and start camera streaming. We've also added APIs for display-based flash support and access to OIS timestamps for app-level image stabilization and special effects.

HDR VP9 Video and HEIF image compression

Android 9 adds built-in support for HDR VP9 Profile 2, so you can now deliver HDR-enabled movies to your users on HDR-capable devices.

We're excited to add HEIF (heic) image encoding to the platform. HEIF is a popular format for photos that improves compression to save on storage and network data. With platform support on Android 9 devices, it's easy to send and utilize HEIF images from your backend server. Once you've made sure that your app is compatible with this data format for sharing and display, give HEIF a try as an image storage format in your app. You can do a jpeg-to-heic conversion using ImageDecoder or BitmapFactory to obtain a bitmap from jpeg, and you can use HeifWriter in the AndroidX library to write HEIF still images from YUV byte buffer, Surface, or Bitmap.

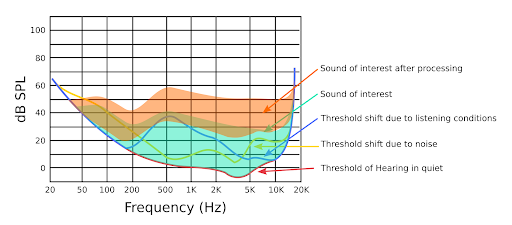
Enhanced audio with Dynamics Processing

The Dynamics Processing API lets you use a new audio effect to isolate specific frequencies and lower loud or increase soft sounds to enhance the acoustic quality of your app. For example, you can improve the sound of someone who speaks quietly in a loud, distant or otherwise acoustically challenging environment. The API gives you access to a multi-stage, multi-band dynamics processing effect that includes a pre-equalizer, a multi-band compressor, a post-equalizer and a linked limiter.

ImageDecoder for bitmaps and drawables

An ImageDecoder API gives you an easier way to decode images to bitmaps or drawables. You can create a bitmap or drawable from a byte buffer, file, or URI. The API offers several advantages over BitmapFactory, including support for exact scaling, single-step decoding to hardware memory, support for post-processing in decode, and decoding of animated images. You can read more here.

Connectivity and location

Wi-Fi RTT for indoor positioning

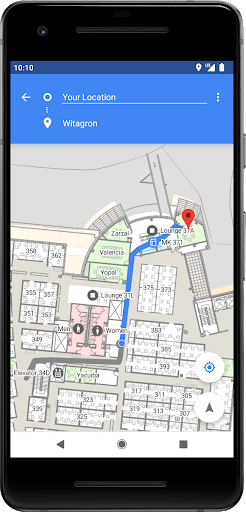
Android 9 lets you build indoor positioning features into your apps through platform support for the IEEE 802.11mc Wi-Fi protocol -- also known as Wi-Fi Round-Trip-Time (RTT). On Android 9 devices with hardware support, location permission, and location enabled, your apps can use RTT APIs to measure the distance to nearby Wi-Fi Access Points (APs). The device doesn't need to connect to the APs to use RTT, and to maintain privacy, only the phone is able to determine the distance, not the APs.

Knowing the distance to 3 or more APs, you can calculate the device position with an accuracy of 1 to 2 meters. With this accuracy you can support use-cases like in-building navigation; fine-grained location-based services such as disambiguated voice control (e.g. 'Turn on this light'); and location-based information (e.g. 'Are there special offers for this product?').

Data cost sensitivity in JobScheduler

JobScheduler is Android's central service to help you manage scheduled tasks or work across Doze, App Standby, and Background Limits. In Android 9, JobScheduler handles network-related jobs better for the user, coordinating with network status signals provided separately by carriers. Jobs can now declare their estimated data size, signal prefetching, and specify detailed network requirements—carriers can report networks as being congested or unmetered. JobScheduler then manages work according to the network status. For example, when a network is congested, JobScheduler might defer large network requests. When unmetered, it can run prefetch jobs to improve the user experience, such as prefetching headlines.

Open Mobile API for NFC payments and secure transactions

Android 9 adds an implementation of the GlobalPlatform Open Mobile API to Android. On supported devices, apps can use the OMAPI API to access secure elements (SE) to enable smart-card payments and other secure services. A hardware abstraction layer (HAL) provides the underlying API for enumerating the variety of Secure Elements (eSE, UICC, and others) available.

Performance for apps

ART performance

Android 9 brings performance and efficiency improvements to all apps through the ART runtime. We've expanded ART's use of execution profiles to optimize apps and reduce the in-memory footprint of compiled app code. ART now uses profile information for on-device rewriting of DEX files, with reductions up to 11% across a range of popular apps. We expect these to correlate closely with reductions in system DEX memory usage and faster startup times for your apps.

Optimized for Kotlin

Kotlin is a first-class language on Android, and if you haven't tried it yet, you should! We've made an enduring commitment to Kotlin in Android and continue to expand support including optimizing the performance of Kotlin code. In Android 9, you'll see the first results of this work--we've improved several compiler optimizations, especially those that target loops, to extract better performance. We're also continuing to work in partnership with JetBrains to optimize Kotlin's generated code. You can get all of the latest Kotlin performance improvements just by keeping Android Studio's Kotlin plugin up-to-date.

Today, we are also releasing an update to the Android 9 - API 28 SDK (rev. 6), which contains nullability annotations in some of the most frequently used APIs. We'll provide more details about this in an upcoming post.

Modern Android

As part of Android 9 we are modernizing the foundations of Android and the apps that run on it, as part of our deep, sustained investments in security, performance, and stability.

As we announced last year, Google Play will require all app updates to target Android Oreo (targetSdkVersion 26 or higher) by November 2018. In line with that, if your app targets a platform earlier than Android 4.2 (API level 17), users installing it will see a warning dialog after that day. Here's a checklist of resources for help and support as you migrate -- we're looking forward to seeing your apps getting the most from modern Android.

Get your apps ready for Android 9!

With Android 9 coming to Pixel users starting today, and to other devices in the months ahead, it's important to test your app for compatibility as soon as possible. Just install your current app from Google Play on a device or or emulator running Android 9. As you work through the flows, make sure your app runs and looks great, and that it handles the Android 9 behavior changes properly.

Also watch for uses of non-SDK interfaces in your app. Android 9 restricts access to selected non-SDK interfaces, so you should reduce your reliance on them. See our recent post for details.

After you've made any necessary updates, we recommend publishing to Google Play right away. without changing the app's platform targeting. This lets you ensure a great experience for Android 9 users while you work on enhancing your app with Android 9 APIs and targeting.

Enhance your app with Android 9 features and APIs

When you're ready, dive into Android 9 and build with the new features and APIs in Android 9.

To get started, just download the official API 28 SDK and the latest tools and emulator images into Android Studio 3.1, or use the latest version of Android Studio 3.2. Then update your project's compileSdkVersion and targetSdkVersion to API 28. When you change your targeting, make sure your app supports all of the applicable behavior changes.

As soon as you're ready, publish your APK updates to Google Play. A common strategy is to use Google Play's beta testing feature to get early feedback from a small group of users and then do a staged rollout to production.

Visit the Android 9 site for details and developer documentation. Also check out this video and the Google I/O Android Playlist for more on what's new in Android 9 for developers.

Coming to a device near you

Starting today, an over-the-air update to Android 9 will begin rolling out to Pixel phones. And devices that participated in the Beta program from Sony Mobile, Xiaomi, HMD Global, Oppo, Vivo, OnePlus, and Essential, as well as all qualifying Android One devices, will receive this update by the end of this fall! We are also working with a number of other partners to launch or upgrade devices to Android 9 this year.

As always, the system images for Pixel devices are available here for manual flash and download. If you're looking for the Android 9 source, you'll find it here in the Android Open Source Project repository under the Android 9 branches.

What's next?

Now that we've reached the official release, we're bringing the Developer Preview to a close. We'll soon be closing the Developer Preview issue tracker to new issues, so if you have feedback, feel free to file a new issue against Android 9 in the AOSP issue tracker.

Thanks again to the many developers and early adopters who participated in the Android 9 Developer Preview and public beta. Your contributions have been critical to making the Android 9 platform a great one for developers and consumers.

Supporting display cutouts on edge-to-edge screens

Posted By Megan Potoski, Product Manager, Android System UI

Smartphones are quickly moving towards smaller bezels and larger aspect ratios. On these devices, display cutouts are a popular way to achieve an edge-to-edge experience while providing space for important sensors on the front of the device. There are currently 16 cutout devices from 11 OEMs already released, including several Android P beta devices, with more on the way.

These striking displays present a great opportunity for you to showcase your app. They also mean it's more important than ever to make sure your app provides a consistently great experience across devices with one or two display cutouts, as well as devices with 18:9 and larger aspect ratios.

Examples of cutout devices: Essential PH-1 (left) and Huawei P20 (right).

Make your app compatible with display cutouts

With many popular and upcoming devices featuring display cutouts, what can you do to make sure your app is cutout-ready?

The good news is, for the most part your app should work as intended even on a cutout device. By default, in portrait mode with no special flags set, the status bar will be resized to be at least as tall as the cutout and your content will display in the window below. In landscape or fullscreen mode, your app window will be letterboxed so that none of your content is displayed in the cutout area.

However, there are a few areas where your app could have issues on cutout devices.

  • Watch out for any sort of hard-coding of status bar height -- this will likely cause problems. If possible, use WindowInsetsCompat to get status bar height.
  • In fullscreen, be careful to consider when to use window vs. screen coordinates, as your app will not take up the whole screen when letterboxed. For example, if you use MotionEvent.getRawX/Y() to get screen coordinates for touch events, make sure to transform them to the view's coordinates using getLocationOnScreen().
  • Pay special attention to transitions in and out of fullscreen mode.

Here are a few guidelines describing what issues to look out for and how to fix them.

Take advantage of the cutout area

Rendering your app content in the cutout area can be a great way to provide a more immersive, edge-to-edge experience for users, especially for content like videos, photos, maps, and games.

An example of an app that has requested layout in the display cutout.

In Android P we added APIs to let you manage how your app uses the display cutout area, as well as to check for the presence of cutouts and get their positions.

You can use layoutInDisplayCutoutMode, a new window layout mode, to control how your content is displayed relative to the cutout. By default, the app's window is allowed to extend into the cutout area if the cutout is fully contained within a system bar. Otherwise, the window is laid out such that it does not overlap with the cutout. You can also set layoutInDisplayCutoutMode to always or never render into the cutout. Using SHORT_EDGES mode to always render into the cutout is a great option if you want to take advantage of the full display and don't mind if a bit of content gets obscured by the cutout.

If you are rendering into the cutout, you can use getDisplayCutout() to retrieve a DisplayCutout that has the cutout's safe insets and bounding box(es). These let you check whether your content overlaps the cutout and reposition things if needed.

<style name="ActivityTheme">
  <item name="android:windowLayoutInDisplayCutoutMode">
    default/shortEdges/never
  </item>
</style>

Attribute for setting layoutInDisplayCutoutMode from the Activity's theme.

For devices running Android 8.1 (API 27), we've also back-ported the layoutInDisplayCutoutMode activity theme attribute so you can control the display of your content in the cutout area. Note that support on devices running Android 8.1 or lower is up to the device manufacturer, however.

To make it easier to manage your cutout implementation across API levels, we've also added DisplayCutoutCompat in the AndroidX library, which is now available through the SDK manager.

For more about the display cutout APIs, take a look at the documentation.

Test your app with cutout

We strongly recommend testing all screens and experiences of your app to make sure that they work well on cutout devices. We recommend using one of the Android P Beta Devices that features a cutout, such as the Essential PH-1.

If you don't have a device, you can also test using a simulated cutout on any device running Android P or in the Android Emulator. This should help you uncover any issues that your app may run into on devices with cutouts, whether they are running Android 8.1 or Android P.

What to expect on devices with display cutouts

Android P introduces official platform support for display cutouts, with APIs that you can use to show your content inside or outside of the cutout. To ensure consistency and app compatibility, we're working with our device manufacturer partners to mandate a few requirements.

First, devices must ensure that their cutouts do not negatively affect apps. There are two key requirements:

  • In portrait orientation, with no special flags set, the status bar must extend to at least the height of the cutout.
  • In fullscreen or landscape orientation, the entire cutout area must be letterboxed.

Second, devices may only have up to one cutout on each short edge of the device. This means that:

  • You won't see multiple cutouts on a single edge, or more than two cutouts on a device.
  • You won't see a cutout on the left or right long edge of the device.

Within these constraints, devices can place cutouts wherever they want.

Special mode

Some devices running Android 8.1 (API level 27) or earlier may optionally support a "special mode" that lets users extend a letterboxed fullscreen or landscape app into the cutout area. Devices would typically offer this mode through a toggle in the navigation bar, which would then bring up a confirmation dialog before extending the screen.

Devices that offer "special mode" allow users to optionally extend apps into the cutout area if supported by the app.

If your app's targetSdkVersion is 27 or higher, you can set the layoutInDisplayCutoutMode activity theme attribute to opt-out of special mode if needed.

Don't forget: larger aspect ratios too!

While you are working on cutout support, it's also a great time to make sure your app works well on devices with 18:9 or larger aspect ratios, especially since these devices are becoming increasingly common and can feature display cutouts.

We highly encourage you to support flexible aspect ratios so that your app can leverage the full display area, no matter what device it's on. You should test your app on different display ratios to make sure it functions properly and looks good.

Here are some guidelines on screens support to keep in mind as you are developing, also refer to our earlier post on larger aspect ratios for tips on optimizing. If your app can't adapt to the aspect ratios on long screens, you can choose to declare a max aspect ratio to request letterboxing on those screens.

Thanks for reading, and we hope this helps you deliver a delightful experience to all your users, whatever display they may have!

Final preview update, official Android P coming soon!

Posted By Dave Burke, VP of Engineering

Android P is almost here! As we put the finishing touches on the new platform, today we're bringing you Android P Beta 4.

Beta 4 is the last preview milestone before we launch the official Android P platform later this summer. Take this opportunity to test your apps and publish updates, to make sure you offer a great experience for users transitioning to Android P!

What's in this update?

Today's Beta 4 update includes a release candidate build with final system behaviors and the official Android P APIs (API level 28), available since Beta 2. It includes everything you need to wrap up your testing in time for the upcoming official Android P release.

Get your apps ready for Android P

With the consumer launch coming soon, it's important to test your app for compatibility with Android P. Just install your current app from Google Play on an Android P Beta device or emulator. As you work through the flows, make sure your app runs and looks great, and that it handles the Android P behavior changes properly.

Also watch for uses of non-SDK interfaces in your app. Android P restricts access to selected non-SDK interfaces, so you should reduce your reliance on them. See our recent post for details..

After you've made any necessary updates, we recommend publishing to Google Play right away without changing the app's platform targeting. This lets you ensure a great experience for Android P users while you work on enhancing your app with Android P APIs and targeting.

Enhance your app with Android P features and APIs

When you're ready, dive into Android P and learn about the new features and APIs that you can use in your apps, like multi-camera support, display cutout, enhanced notifications, ImageDecoder, TextClassifier, and others.

To build with the new APIs, just download the official API 28 SDK and tools into Android Studio 3.1, or use the latest version of Android Studio 3.2. Then update your project's compileSdkVersion and targetSdkVersion to API 28. When you change your targeting, make sure your app supports all of the applicable behavior changes.

As soon as you're ready, publish your APK updates that are compiled against, or optionally targeting, API 28. A common strategy is to use Google Play's beta testing feature to get early feedback from a small group of users and then do a staged rollout to production.

Visit the Developer Preview site for details and documentation. Also check out this video and the Google I/O Android playlist for more on what's new in Android P for developers.

How do I get Beta 4?

It's easy - you can get Android P Beta 4 on Pixel devices by enrolling here. If you're already enrolled in our Android Beta program, you'll automatically get the Beta 4 update soon. As always, downloadable system images for Pixel devices are also available. Partners who are participating in the Android P Beta program will also be updating their devices to Beta 4 over the coming weeks.

What's next?

Stay tuned for the official Android P launch coming soon! You can continue to share your feedback or requests in the meantime, and feel free to use our hotlists for platform issues, app compatibility issues, and third-party SDK issues.

Thanks for your feedback so far, and thank you to everyone who participated in our recent Reddit AMA on r/androiddev!

Congrats to the new Android Excellence apps and games on Google Play

Posted by Kacey Fahey, Developer Marketing, Google Play

Join us in congratulating the latest apps and games entering the Android Excellence program on Google Play. This diverse group of apps and games is recognized for their high quality, great user experience, and strong technical performance. Whether you're interested in learning meditation or a new language, or are looking for a game about butterflies or warships, we're excited to dive in to these new collections.

Winning apps image

Check out a few of our highlighted apps.

  • Beelinguapp: Learn a new language with this unique app. Read and listen to stories with side by side text of the language you're learning, while following along with your language as a reference.
  • Fortune City: If you're looking for a fun app to help manage your personal finances, learn how Fortune City teaches good budgeting habits as you build a prospering metropolis.
  • ShareTheMeal: Feed a child in need with one tap on your phone, or create a team to fight hunger together with your friends, using this app by the World Food Programme.

Test your skills with these highlighted games.

  • Animal Crossing™: Pocket Camp: Take on the role of campsite manager as you collect items to decorate and build your ultimate dream campsite. Meet animals, build friendships and invite your favorite animals over for a fun time.
  • Cash, Inc.: Be the big boss of your business empire in this fun game. Work your way up to join a community of business elites and become the most famous money tycoon.
  • Shadowgun Legends: Save humanity from an alien invader in an epic Story Campaign spanning over 200+ mission on 4 diverse planets. Along the way, customize your character, team up with friends, and become a celebrity of the Shadowgun Universe.

See the full list of Android Excellence apps and games.

New Android Excellence apps New Android Excellence games
Beelinguapp
BTFIT
Fortune City
Letras.mus.br
LingoDeer
Memrise
PicsArt
Pocket Casts
ShareTheMeal
The Mindfulness App
Tokopedia
Trello
VivaReal
Wynk Music
Animal Crossing™: Pocket Camp
Cash, Inc.
Flutter: Starlight
Shadow Fight 3
Shadowgun Legends
War Heroes
World of Warships Blitz

Explore other great apps and games in the Editors' Choice section on Google Play and discover best practices to help you build quality apps and games.

How useful did you find this blogpost?

Android P Beta 3 is now available

Posted by Dave Burke, VP of Engineering

Android P logo

Today we're rolling out Beta 3 of Android P, our next milestone in this year's Android P developer preview. With the developer APIs already finalized in the previous update, Beta 3 now takes us very close to what you'll see in the final version of Android P, due later this summer.

Android P Beta 3 includes the latest bug fixes and optimizations for stability and polish, together with the July 2018 security updates. It's a great way to test your apps now to make sure they are ready before the final release. Give Beta 3 a try and let us know what you think!

You can get Android P Beta 3 on Pixel devices by enrolling here. If you're already enrolled and received the Android P Beta 2 on your Pixel device, you'll automatically get the update to Beta 3. Partners who are participating in the Android P Beta program will also be updating their devices to Beta 3 over the coming weeks.

What's in this update?

Today's preview update includes the Beta 3 system images for Pixel devices and the Android Emulator, as well as an update to the Android Studio build tools to include D8 as independent tool. Beta 3 is an early release candidate build of Android with near-final system behaviors and the official Android P APIs (API level 28).

With the Beta 3 system images and updated build tools, you've got everything you need to test your apps or extend them with Android P features like multi-camera support, display cutout, enhanced notifications, ImageDecoder, TextClassifier, and many others. In your testing, make sure to account for App standby buckets, privacy restrictions, and restrictions on non-SDK interfaces.

Get started in a few simple steps

Android P preview

First, make your app compatible and give your users a seamless transition to Android P. Just install your current app from Google Play on an Android P Beta device or emulator and test -- the app should run and look great, and handle the Android P behavior changes properly. After you've made any necessary updates, we recommend publishing to Google Play right away without changing the app's platform targeting.

If you don't have a supported device, remember that you can instead set up an Android Virtual Device on the Android Emulator for your test environment. If you haven't tried the emulator recently, you'll find that it's incredibly fast, boots in under 6 seconds, and even lets you model next-gen screens -- such as long screens and screens with a display cutout.

Next, update your app's targetSdkVersion to 28 as soon as possible, so Android P users of your app can benefit from the platform's latest security, performance, and stability features. If your app is already targeting API 26+ in line with Google Play's upcoming policies, then changing to target API 28 should be a small jump. When you change your targeting, make sure your app supports all of the applicable behavior changes.

It's also important to test your apps for uses of non-SDK interfaces and reduce your reliance on them. As noted recently, Android P restricts access to selected non-SDK interfaces. Watch for logcat warnings that highlight direct uses of restricted non-SDK interfaces and try the new StrictMode method detectNonSdkApiUsage() to catch accesses programmatically. Where possible, you should move to using public equivalents from the Android SDK or NDK. If there's no public API that meets your use-case, please let us know.

When you're ready, dive into Android P and learn about the new features and APIs that you can use in your apps. To build with the new APIs, just download the official API 28 SDK and tools into Android Studio 3.1, or use the latest version of Android Studio 3.2. Then update your project's compileSdkVersion and targetSdkVersion to API 28.

Visit the Developer Preview site for details and documentation. Also check out this video and the Google I/O Android playlist for more on what's new in Android P for developers.

Publish to Google Play alpha, beta, or production channels

As soon as you're ready, publish your APK updates that are compiled against, or optionally targeting, API 28. Publishing an update to Google Play during the preview lets you push updates to existing users to test compatibility on their devices.

To make sure that your updated app runs well on Android P as well as older versions, a common strategy is to use Google Play's beta testing feature. With beta testing you can get early feedback from a small group of users -- including Beta 3 users — and then do a staged rollout to production.

What's next?

Thanks for all of your feedback so far. Please continue to share feedback or requests as we work towards the consumer release later this summer. Feel free to use our hotlists for platform issues, app compatibility issues, and third-party SDK issues.

Also, the Android engineering team will host a Reddit AMA on r/androiddev to answer your technical questions about Android P on July 19 from 11:30-1 PM (Pacific Time). Look out for an announcement on r/androiddev in the coming weeks. We look forward to addressing your questions!