Tag Archives: cloud

Partnering with Jio to help bring the promise of internet connectivity and affordability to everyone

From the infrastructure that facilitates widespread connectivity to the availability of truly affordable smartphones, we have been committed to finding ways to help bring ubiquitous access to information to people everywhere. With the pandemic resulting in greater dependency on online services and the need for timely information, access to the internet is especially crucial today. But hundreds of millions of Indians are yet to benefit from being connected, to utilize services and access information that can have a positive and immediate impact on their daily lives. Today we are excited to give you an update on our partnership with Jio in two key areas that can help bridge this gap.


Making the internet accessible to millions of more Indians with Jio


While millions of people across India who use feature phones want access to a full-fledged smartphone, there exists gaps in usability and affordability that prevent these aspirations from becoming reality.


Our Android teams across the globe have been hard at work in finding solutions to these challenges. A big milestone in this journey was our announcement last year to invest in Jio Platforms Ltd to address this gap by jointly creating a device based on optimizations to the Android operating system and the Play Store that serves the needs of many who have never used a smartphone before, while offering premium capabilities that have until now been associated with more powerful devices.

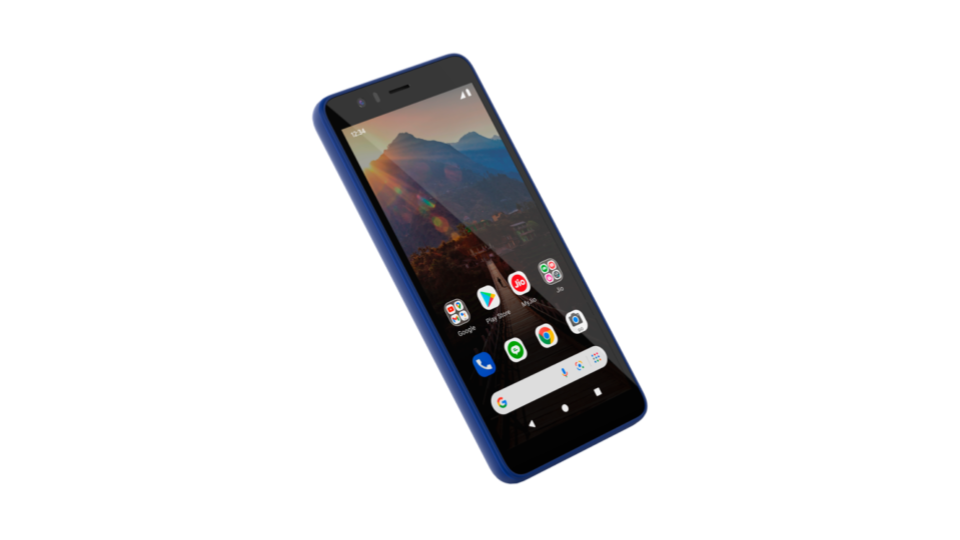
Along with Jio we are thrilled to share a preview of our made-for-India device that is built to address the unique needs of millions of new smartphone users across India. We have worked closely with the Jio team on engineering and product development on useful voice-first features that enable these users to consume content and navigate the phone in their own language, deliver a great camera experience, and get the latest Android feature and security updates.


Image 1: Use Google Assistant to get things done in popular Jio apps; Image 2: Listen to any content on your phone screen by tapping the ‘Listen’ button; Image 3: Quickly Translate any content -- on your phone screen or in the phone’s camera


Easily access and consume content in a choice of Indian languages: For users who might not be able to read content in their language, with a tap of a button they can now translate what’s on their screen, and even have it read back to them in their own language. Read Aloud and Translate Now are seamlessly integrated in the OS allowing these features to work with any text on their phone screen, including web pages, apps, messages, and even photos. We’ve also added App Actions that enable Google Assistant to deliver a great experience with many of the Jio apps on this device. In addition to asking for the latest cricket scores or a weather update, you can also ask Google Assistant to play music on Jio Saavn or check your balance on My Jio.


Image 1: Clearer photos in low light with Night mode; Image 2: Photos have wider dynamic range with HDR mode; Image 3: Snapchat lenses bring Indian-specific effects to your selfies


A great camera experience: A fast, high-quality camera is a must-have feature for today's smartphone users, so we partnered closely to build an optimized experience within the phone’s Camera module resulting in great photos and videos: from clearer photos at night and in low-light situations to HDR mode that brings out wider color and dynamic range in photos, these are firsts for affordable phones in India. We have also partnered with Snap to integrate Indian-specific Snapchat Lenses directly into the phone’s camera, and we will continue to update this experience.


Ongoing feature drops and the latest system updates: Along with support for the latest Android releases and security updates, this experience will keep getting better with new features and customizations, all delivered over-the-air. With Google Play Protect built in, it has Google’s world-class security and malware protection. And with the Google Play Store, you will have access to millions of apps that people across the world use and enjoy.


The smartphone being developed with Jio will be called JioPhone Next. It will be coming later this year, and will enable scores of new internet users to experience these best-in-class Android smartphone features at an affordable price. This is a momentous step in our Android mission for India, and is the first of many that our Android product and engineering teams will embark on in India. We are also actively expanding our engineering teams in India, as we continue to work on finding ways to answer the unique needs of India’s smartphone users.


Powering Jio’s services with a new Google Cloud Partnership


We’re delighted to share that Jio and Google Cloud are embarking on a new long-term, strategic partnership, independent of our investment in Jio Platforms Ltd, with a goal of powering 5G in enterprise and consumer segments in India. Jio will take advantage of Google Cloud’s scalable infrastructure and will also migrate many of their core businesses to Google Cloud.


Google Cloud’s deep expertise and innovation, combined with telco-specific capabilities for security, performance, and resilience, will help Jio’s 5G service to deliver high speed internet as demand for connectivity goes up. The two companies will collaborate to bring a portfolio of 5G edge computing solutions as Jio builds new services across many verticals including gaming, healthcare, education, and entertainment. These will be powered by Jio’s 5G network and Google Cloud’s innovations in AI/ML, data and analytics, and other cloud-native technologies. 


This new Cloud partnership will also see Reliance migrating its core retail businesses like Reliance Retail, JioMart, JioHealth, JioSaavn and others to Google Cloud’s infrastructure, taking advantage of Google’s AI/ML, ecommerce, and demand forecasting offerings. Leveraging the scalability of Google Cloud will increase reliability and performance, as well as enable these businesses to scale up to respond to customer demand.  


We are deeply privileged to play a role in the next phase of India’s digital transformation and we look forward to working closely with Jio to share more on these developments in the months ahead.


Posted by Ram Papatla GM & India Engineering Lead, Android, and Bikram Singh Bedi, Managing Director, Google Cloud India


Introducing "Serverless Migration Station" Learning Modules

Posted by Wesley Chun (@wescpy), Developer Advocate, Google Cloud
graphic showing movement with arrows,. settings, lines, and more

Helping users modernize their serverless apps

Earlier this year, the Google Cloud team introduced a series of codelabs (free, online, self-paced, hands-on tutorials) designed for technical practitioners modernizing their serverless applications. Today, we're excited to announce companion videos, forming a set of "learning modules" made up of these videos and their corresponding codelab tutorials. Modernizing your applications allows you to access continuing product innovation and experience a more open Google Cloud. The initial content is designed with App Engine developers in mind, our earliest users, to help you take advantage of the latest features in Google Cloud. Here are some of the key migrations and why they benefit you:

  • Migrate to Cloud NDB: App Engine's legacy ndb library used to access Datastore is tied to Python 2 (which has been sunset by its community). Cloud NDB gives developers the same NDB-style Datastore access but is Python 2-3 compatible and allows Datastore to be used outside of App Engine.
  • Migrate to Cloud Run: There has been a continuing shift towards containerization, an app modernization process making apps more portable and deployments more easily reproducible. If you appreciate App Engine's easy deployment and autoscaling capabilities, you can get the same by containerizing your App Engine apps for Cloud Run.
  • Migrate to Cloud Tasks: while the legacy App Engine taskqueue service is still available, new features and continuing innovation are going into Cloud Tasks, its standalone equivalent letting users create and execute App Engine and non-App Engine tasks.


The "Serverless Migration Station" videos are part of the long-running Serverless Expeditions series you may already be familiar with. In each video, Google engineer Martin Omander and I explore a variety of different modernization techniques. Viewers will be given an overview of the task at hand, a deeper-dive screencast takes a closer look at the code or configuration files, and most importantly, illustrates to developers the migration steps necessary to transform the same sample app across each migration.

Sample app

The baseline sample app is a simple Python 2 App Engine NDB and webapp2 application. It registers every web page visit (saving visiting IP address and browser/client type) and displays the most recent queries. The entire application is shown below, featuring Visit as the data Kind, the store_visit() and fetch_visits() functions, and the main application handler, MainHandler.


import os
import webapp2
from google.appengine.ext import ndb
from google.appengine.ext.webapp import template

class Visit(ndb.Model):
'Visit entity registers visitor IP address & timestamp'
visitor = ndb.StringProperty()
timestamp = ndb.DateTimeProperty(auto_now_add=True)

def store_visit(remote_addr, user_agent):
'create new Visit entity in Datastore'
Visit(visitor='{}: {}'.format(remote_addr, user_agent)).put()

def fetch_visits(limit):
'get most recent visits'
return (v.to_dict() for v in Visit.query().order(
-Visit.timestamp).fetch(limit))

class MainHandler(webapp2.RequestHandler):
'main application (GET) handler'
def get(self):
store_visit(self.request.remote_addr, self.request.user_agent)
visits = fetch_visits(10)
tmpl = os.path.join(os.path.dirname(__file__), 'index.html')
self.response.out.write(template.render(tmpl, {'visits': visits}))

app = webapp2.WSGIApplication([
('/', MainHandler),
], debug=True)

Baseline sample application code

Upon deploying this application to App Engine, users will get output similar to the following:

image of a website with text saying VisitMe example

VisitMe application sample output

This application is the subject of today's launch video, and the main.py file above along with other application and configuration files can be found in the Module 0 repo folder.

Next steps

Each migration learning module covers one modernization technique. A video outlines the migration while the codelab leads developers through it. Developers will always get a starting codebase ("START") and learn how to do a specific migration, resulting in a completed codebase ("FINISH"). Developers can hit the reset button (back to START) if something goes wrong or compare their solutions to ours (FINISH). The hands-on experience helps users build muscle-memory for when they're ready to do their own migrations.

All of the migration learning modules, corresponding Serverless Migration Station videos (when published), codelab tutorials, START and FINISH code, etc., can all be found in the migration repo. While there's an initial focus on Python 2 and App Engine, you'll also find content for Python 3 users as well as non-App Engine users. We're looking into similar content for other legacy languages as well so stay tuned. We hope you find all these resources helpful in your quest to modernize your serverless apps!

Modernizing your Google App Engine applications

Posted by Wesley Chun, Developer Advocate, Google Cloud

Modernizing your Google App Engine applications header

Next generation service

Since its initial launch in 2008 as the first product from Google Cloud, Google App Engine, our fully-managed serverless app-hosting platform, has been used by many developers worldwide. Since then, the product team has continued to innovate on the platform: introducing new services, extending quotas, supporting new languages, and adding a Flexible environment to support more runtimes, including the ability to serve containerized applications.

With many original App Engine services maturing to become their own standalone Cloud products along with users' desire for a more open cloud, the next generation App Engine launched in 2018 without those bundled proprietary services, but coupled with desired language support such as Python 3 and PHP 7 as well as introducing Node.js 8. As a result, users have more options, and their apps are more portable.

With the sunset of Python 2, Java 8, PHP 5, and Go 1.11, by their respective communities, Google Cloud has assured users by expressing continued long-term support of these legacy runtimes, including maintaining the Python 2 runtime. So while there is no requirement for users to migrate, developers themselves are expressing interest in updating their applications to the latest language releases.

Google Cloud has created a set of migration guides for users modernizing from Python 2 to 3, Java 8 to 11, PHP 5 to 7, and Go 1.11 to 1.12+ as well as a summary of what is available in both first and second generation runtimes. However, moving from bundled to unbundled services may not be intuitive to developers, so today we're introducing additional resources to help users in this endeavor: App Engine "migration modules" with hands-on "codelab" tutorials and code examples, starting with Python.

Migration modules

Each module represents a single modernization technique. Some are strongly recommended, others less so, and, at the other end of the spectrum, some are quite optional. We will guide you as far as which ones are more important. Similarly, there's no real order of modules to look at since it depends on which bundled services your apps use. Yes, some modules must be completed before others, but again, you'll be guided as far as "what's next."

More specifically, modules focus on the code changes that need to be implemented, not changes in new programming language releases as those are not within the domain of Google products. The purpose of these modules is to help reduce the friction developers may encounter when adapting their apps for the next-generation platform.

Central to the migration modules are the codelabs: free, online, self-paced, hands-on tutorials. The purpose of Google codelabs is to teach developers one new skill while giving them hands-on experience, and there are codelabs just for Google Cloud users. The migration codelabs are no exception, teaching developers one specific migration technique.

Developers following the tutorials will make the appropriate updates on a sample app, giving them the "muscle memory" needed to do the same (or similar) with their applications. Each codelab begins with an initial baseline app ("START"), leads users through the necessary steps, then concludes with an ending code repo ("FINISH") they can compare against their completed effort. Here are some of the initial modules being announced today:

  • Web framework migration from webapp2 to Flask
  • Updating from App Engine ndb to Google Cloud NDB client libraries for Datastore access
  • Upgrading from the Google Cloud NDB to Cloud Datastore client libraries
  • Moving from App Engine taskqueue to Google Cloud Tasks
  • Containerizing App Engine applications to execute on Cloud Run

Examples

What should you expect from the migration codelabs? Let's preview a pair, starting with the web framework: below is the main driver for a simple webapp2-based "guestbook" app registering website visits as Datastore entities:

class MainHandler(webapp2.RequestHandler):
'main application (GET) handler'
def get(self):
store_visit(self.request.remote_addr, self.request.user_agent)
visits = fetch_visits(LIMIT)
tmpl = os.path.join(os.path.dirname(__file__), 'index.html')
self.response.out.write(template.render(tmpl, {'visits': visits}))

A "visit" consists of a request's IP address and user agent. After visit registration, the app queries for the latest LIMIT visits to display to the end-user via the app's HTML template. The tutorial leads developers a migration to Flask, a web framework with broader support in the Python community. An Flask equivalent app will use decorated functions rather than webapp2's object model:

@app.route('/')
def root():
'main application (GET) handler'
store_visit(request.remote_addr, request.user_agent)
visits = fetch_visits(LIMIT)
return render_template('index.html', visits=visits)

The framework codelab walks users through this and other required code changes in its sample app. Since Flask is more broadly used, this makes your apps more portable.

The second example pertains to Datastore access. Whether you're using App Engine's ndb or the Cloud NDB client libraries, the code to query the Datastore for the most recent limit visits may look like this:

def fetch_visits(limit):
'get most recent visits'
query = Visit.query()
visits = query.order(-Visit.timestamp).fetch(limit)
return (v.to_dict() for v in visits)

If you decide to switch to the Cloud Datastore client library, that code would be converted to:

def fetch_visits(limit):
'get most recent visits'
query = DS_CLIENT.query(kind='Visit')
query.order = ['-timestamp']
return query.fetch(limit=limit)

The query styles are similar but different. While the sample apps are just that, samples, giving you this kind of hands-on experience is useful when planning your own application upgrades. The goal of the migration modules is to help you separate moving to the next-generation service and making programming language updates so as to avoid doing both sets of changes simultaneously.

As mentioned above, some migrations are more optional than others. For example, moving away from the App Engine bundled ndb library to Cloud NDB is strongly recommended, but because Cloud NDB is available for both Python 2 and 3, it's not necessary for users to migrate further to Cloud Datastore nor Cloud Firestore unless they have specific reasons to do so. Moving to unbundled services is the primary step to giving users more flexibility, choices, and ultimately, makes their apps more portable.

Next steps

For those who are interested in modernizing their apps, a complete table describing each module and links to corresponding codelabs and expected START and FINISH code samples can be found in the migration module repository. We are also working on video content based on these migration modules as well as producing similar content for Java, so stay tuned.

In addition to the migration modules, our team has also setup a separate repo to support community-sourced migration samples. We hope you find all these resources helpful in your quest to modernize your App Engine apps!

Solving for the Indian Public Sector with Google Cloud


At Google Cloud, our mission is to help enterprises digitally transform so they can better serve their customers, empower their employees, and build what’s next for their businesses. Businesses depend on Google Cloud to stay connected and get work done. No matter where they are on their cloud journey, we strive to accelerate every organisation’s ability to transform through data-powered innovation with leading infrastructure, industry solutions, and expertise. 

Today, many of the largest organisations in India trust Google Cloud, including Wipro, Sharechat,, TVS ASL, ICICI Prudential, Nobroker.com, Cleartrip and many others. We are also gearing up to launch our GCP region in Delhi this year, which will be our second cloud region in India since our technical infrastructure in Mumbai was launched in 2017. 

The next phase of our commitment to customers in India sees us working to deliver on the needs of public sector organisations. And so it gives me great pleasure to announce our achieving a full Cloud Service Provider (CSP) empanelment, successfully completing the STQC (Standardisation Testing and Quality Certification) audit from the Ministry of Electronics and Information Technology (MeitY). This empanelment will enable the Indian Public Sector to deploy on Google Cloud, including government agencies at the Central and state level, and PSUs across sectors like Power, BFSI, Transportation, Oil & Gas, Public Finance, etc.

Google Cloud is designed, built, and operated with security at its core. Government and Enterprises want to work with us because we’re focused on the best service and technologynot because they don’t have choice or agility. As we continue to invest in further evolving our infrastructure and expanding our reach into regulated industries; public sector organisations in India can now leverage the power of the cloud to accelerate digital services and to drive innovation.

-Bikram SIngh Bedi, Managing Director, Google Cloud India


Using MicroK8s with Anthos Config Management in the world of IoT

When dealing with large scale Kubernetes deployments, managing configuration and policy is often very complicated. We discussed why Kubernetes’ declarative approach to configuration as data has become the most popular choice for most users a few weeks ago. Today, we will discuss bringing this approach to your MicroK8 deployments using Anthos Config Management.
Image of Anthos Config Management + Cloud Source Repositories + MicroK8s
Anthos Config Management helps you easily create declarative security and operational policies and implement them at scale for your Kubernetes deployments across hybrid and multi-cloud environments. At a high level, you represent the desired state of your deployment as code committed to a central Git repository. Anthos Config Management will ensure the desired state is achieved and also maintained across all your registered clusters.

You can use Anthos Config Management for both your Kubernetes Engine (GKE) clusters as well as on Anthos attached clusters. Anthos attached clusters is a deployment option that extends Anthos’ reach into Kubernetes clusters running in other clouds as well as edge devices and the world of IoT, the Internet of Things. In this blog you will learn by experimenting with attached clusters with MicroK8s, a conformant Kubernetes platform popular in IoT and edge environments.

Consider an organization with a large number of distributed manufacturing facilities or laboratories that use MicroK8s to provide services to IoT devices. In such a deployment, Anthos can help you manage remote clusters directly from the Anthos Console rather than investing engineering resources to build out a multitude of custom tools.

Consider the diagram below.

Diagram of Anthos Config Management with MicroK8s on the Factory Floor with IoT
This diagram shows a set of “N” factory locations each with a MicroK8s cluster supporting IoT devices such as lights, sensors, or even machines. You register each of the MicroK8s clusters in an Anthos environ: a logical collection of Kubernetes clusters. When you want to deploy the application code to the MicroK8s clusters, you commit the code to the repository and Anthos Config Management takes care of the deployment across all locations. In this blog we will show you how you can quickly try this out using a MicroK8s test deployment.

We will use the following Google Cloud services:
  • Compute Engine provides an Ubuntu instance for a single-node MicroK8s cluster. Ubuntu will use cloud-init to install MicroK8s and generate shell scripts and other files to save time.
  • Cloud Source Repositories will provide the Git-based repository to which we will commit our workload.
  • Anthos Config Management will perform the deployment from the repository to the MicroK8s cluster.

Let’s start with a picture

Here’s a diagram of how these components fit together.

Diagram of how Anthos Config Management works together with MicroK8s
  • A workstation instance is created from which Terraform is used to deploy four components: (1) an IAM service account, (2) a Google Compute Engine Instance with MicroK8s using permissions provided by the service account, (3) a Kubernetes configuration repo provided by Cloud Source Repositories, and (4) a public/private key pair.
  • The GCE instance will use the service account key to register the MicroK8s cluster with an Anthos environ.
  • The public key from the public/ private key pair will be registered to the repository while the private key will be registered with the MicroK8s cluster.
  • Anthos Config Management will be configured to point to the repository and branch to poll for updates.
  • When a Kubernetes YAML document is pushed to the appropriate branch of the repository, Anthos Config Management will use the private key to connect to the repository, detect that a commit has been made against the branch, fetch the files and apply the document to the MicroK8s cluster.
Anthos Config Management enables you to deploy code from a Git repository to Kubernetes clusters that have been registered with Anthos. Google Cloud officially supports GKE, AKS, and EKS clusters, but you can use other conformant clusters such as MicroK8s in accordance with your needs. The repository below shows you how to register a single MicroK8s cluster to receive deployments. You can also scale this to larger numbers of clusters all of which can receive updates from commitments to the repository. If your organization has large numbers of IoT devices supported by Kubernetes clusters you can update all of them from the Anthos console to provide for consistent deployments across the organization regardless of the locations of the clusters, including the IoT edge. If you would like to learn more, you can build this project yourself. Please check out this Git repository and learn firsthand about how Anthos can help you manage Kubernetes deployments in the world of IoT.

By Jeff Levine, Customer Engineer – Google Cloud

Building a Google Workspace Add-on with Adobe

Posted by Jon Harmer, Product Manager, Google Cloud

We recently introduced Google Workspace, which seamlessly brings together messaging, meetings, docs, and tasks and is a great way for teams to create, communicate, and collaborate. Google Workspace has what you need to get anything done, all in one place. This includes giving developers the ability to extend Google Workspace’s standard functionality like with Google Workspace Add-ons, launched earlier this year.

Google Workspace Add-ons, at launch, allowed a developer to build a single integration for Google Workspace that surfaces across Gmail, Google Drive, and Google Calendar. We recently announced that we added to the functionality of Google Workspace Add-ons by enabling more of the Google Workspace applications with the newer add-on framework, Google Docs, Google Sheets, and Google Slides. With Google Workspace Add-ons, developers can scale their presence across multiple touchpoints in which users can engage, and simplifies processes for building and managing add-ons.

One of our early developers for Google Workspace Add-ons has been Adobe. Adobe has been working to integrate Creative Cloud Libraries into Google Workspace. Using Google Workspace Add-ons, Adobe was able to quickly design a Creative Cloud Libraries experience that felt native to Google Workspace. “With the new add-ons framework, we were able to improve the overall performance and unify our Google Workspace and Gmail Add-ons.” said Ryan Stewart, Director of Product Management at Adobe. “This means a much better experience for our customers and much higher productivity for our developers. We were able to quickly iterate with the updated framework controls and easily connect it to the Creative Cloud services.”

One of the big differences between the Gmail integration and the Google Workspace integration is how it lets users work with Libraries. With Gmail, they’re sharing links to Libraries, but with Docs and Slides, they can add Library elements to their document or presentation. So by offering all of this in a single integration, we are able to provide a more complete Libraries experience. Being able to offer that breadth of experiences in a consistent way for users is exciting for our team.

Adobe’s Creative Cloud Libraries API announced at Adobe MAX, was also integral to integrating Creative Cloud with Google Workspace, letting developers retrieve, browse, create, and get renditions of the creative elements in libraries.

Adobe’s new Add-on for Google Workspace lets you add brand colors, character styles and graphics from Creative Cloud Libraries to Google Workspace apps like Docs and Slides. You can also save styles and assets back to Creative Cloud.

With Google Workspace Add-ons, we understand that teams require many applications to get work done, and we believe that process should be simple, and those productivity applications should connect all of a company’s workstreams. With Google Workspace Add-ons, teams can bring their favorite workplace apps like Adobe Creative Cloud into Google Workspace, enabling a more productive day-to-day experience for design and marketing teams. With quick access to Creative Cloud Libraries, the Adobe Creative Cloud Add-on for Google Workspace lets eveyone easily access and share assets in Gmail and apply brand colors, character styles, and graphics to Google Docs and Slides to keep deliverables consistent and on-brand. There’s a phased rollout to users, first with Google Docs, then Slides, so if you don’t see it in the Add-on yet, stay tuned as it is coming soon.

For developers, Google Workspace Add-ons lets you build experiences that not only let your customers manage their work, but also simplify how they work.

To learn more about Google Workspace Add-ons, please visit our Google Workspace developer documentation.

OpenTelemetry’s First Release Candidates

OpenTelemetry has hit another milestone with the tracing specification reaching release candidate status.

With the specification now ready to go, expect to see tracing release candidates of the official APIs and SDKs over the next few weeks, along with updated exporters for Cloud Trace. In the coming months the same will follow for the metrics specification, followed by metrics release candidates of the APIs and SDKs and Cloud Monitoring exporters, followed by the project’s general availability. At this point we’ll switch our default application metrics and distributed tracing instrumentation from OpenCensus to OpenTelemetry.

This is exciting news for Google Cloud customers, as OpenTelemetry will enable even better observability experiences, both with Cloud Monitoring and Cloud Trace, or the third party monitoring and operations tools of your choice.

Originally posted on the on the OpenTelemetry blog.


As we’ve discussed in past announcements, we’re hard at work building OpenTelemetry’s first GA quality release. Today marks another milestone in this journey, with the freezing and first release candidate of the tracing specification.
Tracing Spec Release Candidate

The tracing specification is now considered to be a release candidate (RC) and is frozen, and the OpenTelemetry APIs and SDKs have a stable specification to build their own release candidates against. This means:
  • API, SDK, and Collector release candidates will appear within the next few weeks.
  • No breaking spec changes are allowed between now and the final GA specification, beyond any showstopper (P1) issues that are revealed in the RC period. We don’t expect any of these to appear, but the purpose of the RC period is for us to validate that we have a GA-worthy spec.
  • Some non-breaking changes will be allowed during the RC period. Most of these are clarifications of existing behaviour or are pure editorial updates.
The release candidate sections of the specification include all tracing related dependencies, specifically the following sections: Trace, Baggage, Resource, Context Propagation, Environment Variables, Exporters (for traces). You can view the progress of each OpenTelemetry component’s implementation in the project status matrix.

What’s Coming Next?

Achieving a release candidate of the tracing specification has been the top priority of OpenTelemetry since releasing our beta in March. With this completed, our focus now shifts to tracing release candidates of the APIs, SDKs, Collector, and auto instrumentation components, and producing a release candidate of the metrics specification.

RC Tracing Implementations

Most OpenTelemetry APIs and SDKs are close to completing their tracing RC implementations, and we expect the first wave of these to arrive within the next two weeks. Contributors who are looking to provide instrumentation (for various web frameworks, storage clients, etc.) can start building against release candidate APIs once they arrive. While the APIs may change in response to issues discovered during RC usage and testing (which will result in multiple pre-GA release candidates for these components), these will be extremely constrained.

Several SDKs will have two waves of release candidate milestones: the first will contain functionality from the tracing and context propagation sections of the specification, and the second will include release candidate implementations for baggage, exporters, resources, and environment variables.

Metrics

In parallel to the tracing RC component releases, we will apply the focus that we’ve had on tracing to the metrics specification. Starting this week, we will categorize which work items are required for GA, which can be optionally allowed in GA (non-breaking), and which will be shifted to post-GA. After completing this, we will track our burndown progress, and lock the metrics specification and publish a metrics specification release candidate once all P1 items are complete. Shortly after this, the APIs, SDKs, Collector, and other components will publish release candidates with RC-quality tracing and metrics functionality.

Productionization and GA Readiness Work

Once the metrics specification, SDKs, Collector, and other components reach release candidate status, we will focus on productionization tasks like writing documentation, producing a post-GA versioning strategy, building additional automated tests, etc. Once we are satisfied with each component’s adoptability and reliability, we will announce their general availability.

Overall Timeline

  1. Components (APIs, SDKs, Collector, auto instrumentation, etc.) issue release candidates with RC-quality tracing functionality.
  2. The metrics section of the specification achieves RC quality and is frozen.
  3. Components issue release candidates with RC-quality tracing and metrics functionality.
  4. Once we are satisfied with our metrics + tracing release candidates, OpenTelemetry goes GA.
  5. Logging enters beta, then issues an RC specification, followed by RC-quality logging functionality in each component, followed by a GA for logging.
We will have a better understanding of our GA release timeline in the coming weeks once outstanding work on the metrics specification is fully accounted for.

Tracking a Language’s Progress

As mentioned above, you can view the progress of a particular component (API, SDK, etc.) in the project status matrix. Each component’s implementation has their own timeline, though a core set (the JavaScript, Java, Go, Python, and .Net APIs + SDKs, the Collector, and Java auto instrumentation) are all tracking well. Each component has its own GA burndown board.

FAQ

I want to use OpenTelemetry on my production services; what’s the impact of today’s announcement?

SDKs with release candidate quality tracing support will be available in a few weeks. Release candidates are not recommended for critical production services, however they are functional and are intended to offer APIs that are compatible with their upcoming GA counterparts.

I want to write instrumentation for OpenTelemetry; what’s the impact of today’s announcement?

APIs with release candidate quality tracing support will be available shortly (prior to the SDKs). You can bind against these to produce traces that will be picked up by the OpenTelemetry SDKs or any other implementations that implement the OpenTelemetry APIs.

When will OpenTelemetry offer drop-in replacements for OpenCensus and OpenTracing?

Work is currently underway on bridge APIs that allow OpenTelemetry SDKs to seamlessly replace OpenCensus libraries or OpenTracing implementations. While the delivery date of this functionality is not tied to OpenTelemetry’s GA goals, we expect this to arrive between each API + SDK’s release candidate and GA milestones.

Wrapping Up

Producing a specification release candidate is an important milestone for the OpenTelemetry community, and it took significant effort on the part of our contributors to make this happen. We’d like to thank every person and every organization that was a part of this release, and to recognize that their contributions are laying the groundwork for the project's long term success.

If you haven’t been a part of the OpenTelemetry community but would like to join, now is the perfect time! OpenTelemetry is now in the top three CNCF projects by weekly and cumulative commits, and no matter your level of commitment (ha!) to the project, contributions are always welcome. If you have a particular area that you’re interested in (for example, the Python API + SDK), the best way to get involved is to join the relevant weekly SIG meetings or interact with other contributors on Gitter.

By Morgan McLean, Google Cloud

Assess the security of Cloud deployments with InSpec for GCP

InSpec-GCP version 1.0 is now generally available, and two new Chef InSpec™ profiles have been released under an open source software license. The InSpec profiles contain controls for the GCP Center for Internet Security (CIS) Benchmark version 1.1.0 and the Payment Card Industry Data Security Standard (PCI DSS) version 3.2.1.

The Cloud Security Challenge

Developers are embracing automated continuous integration and continuous delivery (CI/CD), committing many application and infrastructure changes frequently. But centralized security teams can't review every application and infrastructure change. Those teams might have to block deployments (which decreases velocity and undermines continuous delivery) or review changes in production, where misconfigurations are more harmful and changes are more expensive.

Security reviews need to "shift left,” earlier in the software development lifecycle. Security teams likewise need to shift their own efforts to defining policies and providing tools to automate how compliance is verified. When developers adopt these tools, security and compliance checks become part of CI/CD, in a similar fashion to unit, functional, and integration tests, and thus become a normal part of the development workflow. Empowering developers to participate in this process means organizations can achieve continuous compliance. This also reinforces the mindset that security is everyone's responsibility.

What is InSpec

InSpec is a popular DevSecOps framework that checks the configuration state of resources in virtual machines and containers, on cloud providers such as GCP, AWS, and Azure. InSpec's lightweight nature, approachable domain-specific language, and extensibility make it a valuable tool for:
  • Expressing compliance policies as code
  • Enabling development teams to add tests that assess their applications' compliance with security policies before pushing changes to build and release pipelines
  • Automating compliance verification in CI/CD pipelines and as part of the release process
  • Unifying compliance assessments across multiple cloud providers and on-premises environments

InSpec for GCP and compliance profiles

The InSpec GCP resource pack 1.0 provides a consistent way to audit GCP resources. This release unifies the user experience by adding consistent behavior between resources and documentation for available fields. This resource pack also adds support for GCP endpoints that let you audit fields that are in beta (for example, GKE cluster pod security policy configuration).

You can use the GCP CIS Benchmark and the PCI DSS InSpec profiles to assess compliance with CIS and PCI DSS policies. CIS Benchmarks are configuration guides used by governments, businesses, industry, and academia. We strongly recommend configuring the workloads to meet or exceed these standards. PCI DSS is required for all organizations that accept or process credit card payments. The Terraform PCI Starter, coupled with the PCI InSpec profile, allows deployment of PCI-compliant environments and verifies their ongoing compliance.

This work is released under an open source license and we look forward to your feedback and contributions.

Validating PCI DSS and CIS compliance in infrastructure build pipelines

You can use InSpec to validate infrastructure deployments for compliance with standards such as PCI DSS and CIS. An automated validation process of new builds is important to detect insecure and non-compliant configurations as early as possible while minimizing the impact on developer agility.

With Cloud Build you can create CI pipelines for infrastructure-as-code deployments. You can run InSpec as an additional build step against resources in the GCP project to detect compliance violations in the target infrastructure. While this method doesn't prevent non-compliant build configurations, it does detect compliance issues, fail the build execution, and log the error in Cloud Logging. Cloud Build publishes build messages to a Cloud Pub/Sub topic, which can trigger a Cloud Function to integrate with appropriate alerting systems in case of a failed build. To prevent non-compliant infrastructure in a production environment, run the pipeline in a staging environment before promoting the content to production.

Here is an example pipeline definition for Cloud Build, using InSpec, to validate a project against the PCI guidelines. To run the PCI profile from a container inside a Cloud Build pipeline, clone the Git repository Payment Card Industry Data Security Standard (PCI DSS) version 3.2.1, build the Docker container from the root directory of the repository using the Dockerfile, and push the image to the Google Container Registry. The Cloud Build pipeline will store InSpec reports in a predefined bucket in json and html formats.

Here's an example for executing the PCI DSS InSpec profile as a step in a Cloud Build pipeline:

#...Previous execution steps
#
    - id: 'Run PCI Profile on in-scope project'
        waitFor: ['Write InSpec input file']
        name: gcr.io/${_GCR_PROJECT_ID}/inspec-gcp-pci-profile:v3.2.1-3
        entrypoint: '/bin/sh'
args:
    - '-c'
    - |
        inspec exec /share/. -t gcp:// \
        --input-file /workspace/inputs.yml \
        --reporter cli json:/workspace/pci_report.json \
        html:/workspace/pci_report.html | tee out.json


Note that in this example a previous execution step writes all required input parameters into the file /workspace/inputs.yml to make them available to the InSpec run. A CI/CD pipeline has been implemented for the PCI-GKE-Blueprint using Cloud Build and can be referenced as an example.

Try it yourself

Ready to try InSpec? Use this Cloud Shell Walkthrough to quickly install InSpec in your Cloud Shell instance and scan infrastructure in your GCP projects against the CIS Benchmark:


Chances are that in the walkthrough the InSpec scan detected some misconfigurations in your project.

As a developer of the project, you now know how to quickly scan your deployments, and you can begin to learn more about configuring your resources securely. Our Cloud Foundation Toolkit provides Terraform and Deployment Manager templates for best-practice configurations of your projects and underlying resources.

Most large organizations have platform teams that can adopt our Cloud Foundation Toolkit templates, which automate well-configured resource provisioning, and make those available to their developers. These organizations can also include InSpec testing steps in their CI/CD pipelines to provide early feedback to developers and to prevent misconfigured resources from getting released to Production.

By Bakh Inamov – Security and Compliance Specialist Engineer, Sam Levenick – Software Engineer, and Konrad Schieban – Infrastructure Cloud Consultant

Cloud Spanner Emulator Reaches 1.0 Milestone!

The Cloud Spanner emulator provides application developers with the full set of APIs, including the full breadth of SQL and DDL features that can be run locally for prototyping, development and testing. This offline emulator is free and improves developer productivity for customers. Today, we are happy to announce that Cloud Spanner emulator is generally available (GA) with support for Partitioned APIs, Cloud Spanner client libraries, and SQL features.

Since Cloud Spanner emulator’s beta launch in April, 2020, we have seen strong adoption of the local emulator from customers of Cloud Spanner. Several new and existing customers adopted the emulator in their development & continuous test pipelines. They noticed significant improvements in developer productivity, speed of test execution, and error-free applications deployed to production. We also added several features in this release based on the valuable feedback we received from beta users. The full list of features is documented in the GitHub readme.

Partition APIs

When reading or querying large amounts of data from Cloud Spanner, it can be useful to divide the query into smaller pieces, or partitions, and use multiple machines to fetch the partitions in parallel. The emulator now supports Partition Read, Partition Query, and Partition DML APIs.

Cloud Spanner client libraries

With the GA launch, the latest versions of all the Cloud Spanner client libraries support the emulator. We have added support for C#, Node.js, PHP, Python, Ruby client libraries and the Cloud Spanner JDBC driver. This is in addition to C++, Go and Java client libraries that were already supported with the beta launch. Be sure to check out the minimum version for each of the client libraries that support the emulator.

Use the Getting Started guides to try the emulator with the client library of your choice.

SQL features

Emulator now supports the full set of SQL features provided by Cloud Spanner. Some of the notable additions being support for SQL functions JSON_VALUE, JSON_QUERY, CEILING, POWER, CHARACTER_LENGTH, and FORMAT. We now also support untyped parameter bindings in SQL statements which are used by our client libraries written in languages with dynamic typing e.g., Python, PHP, Node.js and Ruby.

Using Emulator in CI/CD pipelines

You may now point the majority of your existing CI/CD to the Cloud Spanner emulator instead of a real Cloud Spanner instance brought up on GCP. This will save you both cost and time, since an emulator instance comes up instantly and is free to use!

What’s even better is that you can bring up multiple instances in a single execution of the emulator, and of course multiple databases. Thus, tests that interact with a Cloud Spanner database can now run in parallel since each of them can have their own database, making tests hermetic. This can reduce flakiness in unit tests and reduce the number of bugs that can make their way to continuous integration tests or to production.

In case your existing CI/CD architecture assumes the existence of a Cloud Spanner test instance and/or test database against which the tests run, you can achieve similar functionality with the emulator as well. Note that the emulator doesn’t come up with a default instance or a default database as we expect users to create instances and databases as required in their tests for hermeticity as explained above. Below are two examples of how you can bring up an emulator with a default instance or database: 1) By using a docker image or 2) Programmatically.

Starting Emulator from Docker

The emulator can be started using Docker on Linux, MacOS, and Windows. As a prerequisite, you would need to install Docker on your system. To bring up an emulator with a default database/instance, you can execute a shell script in your docker file to do so. Such a script would make RPC calls to CreateInstance and CreateDatabase after bringing up the emulator server. You can also look at this example on how to put this together when using docker.
Run Emulator Programmatically

You can bring up the emulator binary in the same process as your test program. Then you can then create a default instance/database in your ‘Setup’ and clean up the same when the tests are over. Note that the exact procedure for bringing up an ‘in-process’ service may vary with the client library language and platform of your choice.

Other alternatives to start the emulator, including pre-built linux binaries, are listed here.
Try it now

Learn more about Google Cloud Spanner emulator and try it out now.

By Asheesh Agrawal, Google Open Source

Java zPages for OpenTelemetry

What is OpenTelemetry?

OpenTelemetry is an open source project aimed at improving the observability of our applications. It is a collection of cloud monitoring libraries and services for capturing distributed traces and metrics and integrates naturally with external observability tools, such as Prometheus and Zipkin. As of now, OpenTelemetry is in its beta stage and supports a few different languages.

What are zPages?

zPages are a set of dynamically generated HTML web pages that display trace and metrics data from the running application. The term zPages was coined at Google, where similar pages are used to view basic diagnostic data from a particular host or service. For our project, we built the Java /tracez and /traceconfigz zPages, which focus on collecting and displaying trace spans.

TraceZ

The /tracez zPage displays span data from the instrumented application. Spans are split into two groups: spans that are still running and spans that have completed.

TraceConfigZ

The /traceconfigz zPage displays the currently active tracing configuration and allows users to change the tracing parameters. Examples of such parameters include the sampling probability and the maximum number of attributes.

Using the zPages

This section describes how to start and use the Java zPages.

Add the dependencies to your project

First, you need to add OpenTelemetry as a dependency to your Java application.

Maven

For Maven, add the following to your pom.xml file:
<dependencies>
    <dependency>
        <groupId>io.opentelemetry</groupId>
        <artifactId>opentelemetry-api</artifactId>
        <version>0.7.0</version>
    </dependency>
    <dependency>
        <groupId>io.opentelemetry</groupId>
        <artifactId>opentelemetry-sdk</artifactId>
        <version>0.7.0</version>
    </dependency>
    <dependency>
        <groupId>io.opentelemetry</groupId>
        <artifactId>opentelemetry-sdk-extension-    zpages</artifactId>
        <version>0.7.0</version>
    </dependency>
</dependencies>

Gradle

For Gradle, add the following to your build.gradle dependencies:
implementation 'io.opentelemetry:opentelemetry-api:0.7.0'
implementation 'io.opentelemetry:opentelemetry-sdk:0.7.0'
implementation 'io.opentelemetry:opentelemetry-sdk-extension-zpages:0.7.0'

Register the zPages

To set-up the zPages, simply call startHttpServerAndRegisterAllPages(int port) from the ZPageServer class in your main function:
import io.opentelemetry.sdk.extensions.zpages.ZPageServer;

public class MyMainClass {
    public static void main(String[] args) throws Exception {
        ZPageServer.startHttpServerAndRegisterAllPages(8080);
        // ... do work
    }
}
Note that the package com.sun.net.httpserver is required to use the default zPages setup. Please make sure your version of the JDK includes this package if you plan to use the default server.

Alternatively, you can call registerAllPagesToHttpServer(HttpServer server) to register the zPages to a shared server:
import io.opentelemetry.sdk.extensions.zpages.ZPageServer;

public class MyMainClass {
    public static void main(String[] args) throws Exception {
        HttpServer server = HttpServer.create(new                     InetSocketAddress(8000), 10);
        ZPageServer.registerAllPagesToHttpServer(server);
        server.start();
        // ... do work
    }
}

Access the zPages

View all available zPages on the index page

The index page (at /) lists all available zPages with a link and description.


View trace spans on the /tracez zPage

The /tracez zPage displays information about running and completed spans, with completed spans further organized into latency and error buckets. The data is aggregated into a summary-level table:


You can click on each of the counts in the table cells to access the corresponding span details. For example, here are the details of the ChildSpan latency sample (row 1, col 4):


View and update the tracing configuration on the /traceconfigz zPage.

The /traceconfigz zPage provides an interface for users to modify the current tracing parameters:


Design

This section goes into the underlying design of our code.

Frontend


The frontend consists of two main parts: HttpHandler and HttpServer. The HttpHandler is responsible for rendering the HTML content, with each zPage implementing its own ZPageHandler. The HttpServer, on the other hand, is responsible for listening to incoming requests, obtaining the requested data, and then invoking the aforementioned ZPageHandlers. The HttpServer class from com.sun.net is used to construct the default server and to handle http requests on different routes.

Backend


The backend consists of two components as well: SpanProcessor and DataAggregator. The SpanProcessor watches the lifecycle of each span, invoking functions each time a span starts or ends. The DataAggregator, on the other hand, restructures the data from the SpanProcessor into an accessible format for the frontend to display. The class constructor requires a TracezSpanProcessor instance, so that the TracezDataAggregator class can access the spans collected by a specific TracezSpanProcessor. The frontend only needs to call functions in the DataAggregator to obtain information required for the web page.

Conclusion

We hope that this blog post has given you a little insight into the development and use cases of OpenTelemetry’s Java zPages. The zPages themselves are lightweight performance monitoring tools that allow users to troubleshoot and better understand their applications. Once OpenTelemetry is officially released, we hope that you try out and use the /tracez and /traceconfigz zPages!

By William Hu and Terry Wang – Software Engineering Interns, Core Compute Observability