Tag Archives: Android

Androidify: Building powerful AI-driven experiences with Jetpack Compose, Gemini and CameraX

Posted by Rebecca Franks – Developer Relations Engineer

The Android bot is a beloved mascot for Android users and developers, with previous versions of the bot builder being very popular - we decided that this year we’d rebuild the bot maker from the ground up, using the latest technology backed by Gemini. Today we are releasing a new open source app, Androidify, for learning how to build powerful AI driven experiences on Android using the latest technologies such as Jetpack Compose, Gemini through Firebase, CameraX, and Navigation 3.

a moving image of various droid bots dancing individually

Androidify app demo

Here’s an example of the app running on the device, showcasing converting a photo to an Android bot that represents my likeness:

moving image showing the conversion of an image of a woman in a pink dress holding na umbrella into a 3D image of a droid bot wearing a pink dress holding an umbrella

Under the hood

The app combines a variety of different Google technologies, such as:

    • Gemini API - through Firebase AI Logic SDK, for accessing the underlying Imagen and Gemini models.
    • Jetpack Compose - for building the UI with delightful animations and making the app adapt to different screen sizes.
    • Navigation 3 - the latest navigation library for building up Navigation graphs with Compose.
    • CameraX Compose and Media3 Compose - for building up a custom camera with custom UI controls (rear camera support, zoom support, tap-to-focus) and playing the promotional video.

This sample app is currently using a standard Imagen model, but we've been working on a fine-tuned model that's trained specifically on all of the pieces that make the Android bot cute and fun; we'll share that version later this year. In the meantime, don't be surprised if the sample app puts out some interesting looking examples!

How does the Androidify app work?

The app leverages our best practices for Architecture, Testing, and UI to showcase a real world, modern AI application on device.

Flow chart describing Androidify app flow
Androidify app flow chart detailing how the app works with AI

AI in Androidify with Gemini and ML Kit

The Androidify app uses the Gemini models in a multitude of ways to enrich the app experience, all powered by the Firebase AI Logic SDK. The app uses Gemini 2.5 Flash and Imagen 3 under the hood:

    • Image validation: We ensure that the captured image contains sufficient information, such as a clearly focused person, and assessing for safety. This feature uses the multi-modal capabilities of Gemini API, by giving it a prompt and image at the same time:

val response = generativeModel.generateContent(
   content {
       text(prompt)
       image(image)
   },
)

    • Text prompt validation: If the user opts for text input instead of image, we use Gemini 2.5 Flash to ensure the text contains a sufficiently descriptive prompt to generate a bot.

    • Image captioning: Once we’re sure the image has enough information, we use Gemini 2.5 Flash to perform image captioning., We ask Gemini to be as descriptive as possible,focusing on the clothing and its colors.

    • “Help me write” feature: Similar to an “I’m feeling lucky” type feature, “Help me write” uses Gemini 2.5 Flash to create a random description of the clothing and hairstyle of a bot.

    • Image generation from the generated prompt: As the final step, Imagen generates the image, providing the prompt and the selected skin tone of the bot.

The app also uses the ML Kit pose detection to detect a person in the viewfinder and enable the capture button when a person is detected, as well as adding fun indicators around the content to indicate detection.

Explore more detailed information about AI usage in Androidify.

Jetpack Compose

The user interface of Androidify is built using Jetpack Compose, the modern UI toolkit that simplifies and accelerates UI development on Android.

Delightful details with the UI

The app uses Material 3 Expressive, the latest alpha release that makes your apps more premium, desirable, and engaging. It provides delightful bits of UI out-of-the-box, like new shapes, componentry, and using the MotionScheme variables wherever a motion spec is needed.

MaterialShapes are used in various locations. These are a preset list of shapes that allow for easy morphing between each other—for example, the cute cookie shape for the camera capture button:


Androidify app UI showing camera button
Camera button with a MaterialShapes.Cookie9Sided shape

Beyond using the standard Material components, Androidify also features custom composables and delightful transitions tailored to the specific needs of the app:

    • There are plenty of shared element transitions across the app—for example, a morphing shape shared element transition is performed between the “take a photo” button and the camera surface.

      moving example of expressive button shapes in slow motion

    • Custom enter transitions for the ResultsScreen with the usage of marquee modifiers.

      animated marquee example

    • Fun color splash animation as a transition between screens.

      moving image of a blue color splash transition between Androidify demo screens

    • Animating gradient buttons for the AI-powered actions.

      animated gradient button for AI powered actions example

To learn more about the unique details of the UI, read Androidify: Building delightful UIs with Compose

Adapting to different devices

Androidify is designed to look great and function seamlessly across candy bar phones, foldables, and tablets. The general goal of developing adaptive apps is to avoid reimplementing the same app multiple times on each form factor by extracting out reusable composables, and leveraging APIs like WindowSizeClass to determine what kind of layout to display.

a collage of different adaptive layouts for the Androidify app across small and large screens
Various adaptive layouts in the app

For Androidify, we only needed to leverage the width window size class. Combining this with different layout mechanisms, we were able to reuse or extend the composables to cater to the multitude of different device sizes and capabilities.

    • Responsive layouts: The CreationScreen demonstrates adaptive design. It uses helper functions like isAtLeastMedium() to detect window size categories and adjust its layout accordingly. On larger windows, the image/prompt area and color picker might sit side-by-side in a Row, while on smaller windows, the color picker is accessed via a ModalBottomSheet. This pattern, called “supporting pane”, highlights the supporting dependencies between the main content and the color picker.

    • Foldable support: The app actively checks for foldable device features. The camera screen uses WindowInfoTracker to get FoldingFeature information to adapt to different features by optimizing the layout for tabletop posture.

    • Rear display: Support for devices with multiple displays is included via the RearCameraUseCase, allowing for the device camera preview to be shown on the external screen when the device is unfolded (so the main content is usually displayed on the internal screen).

Using window size classes, coupled with creating a custom @LargeScreensPreview annotation, helps achieve unique and useful UIs across the spectrum of device sizes and window sizes.

CameraX and Media3 Compose

To allow users to base their bots on photos, Androidify integrates CameraX, the Jetpack library that makes camera app development easier.

The app uses a custom CameraLayout composable that supports the layout of the typical composables that a camera preview screen would include— for example, zoom buttons, a capture button, and a flip camera button. This layout adapts to different device sizes and more advanced use cases, like the tabletop mode and rear-camera display. For the actual rendering of the camera preview, it uses the new CameraXViewfinder that is part of the camerax-compose artifact.

CameraLayout in Compose
CameraLayout composable that takes care of different device configurations, such as table top mode

CameraLayout in Compose
CameraLayout composable that takes care of different device configurations, such as table top mode

The app also integrates with Media3 APIs to load an instructional video for showing how to get the best bot from a prompt or image. Using the new media3-ui-compose artifact, we can easily add a VideoPlayer into the app:

@Composable
private fun VideoPlayer(modifier: Modifier = Modifier) {
    val context = LocalContext.current
    var player by remember { mutableStateOf<Player?>(null) }
    LifecycleStartEffect(Unit) {
        player = ExoPlayer.Builder(context).build().apply {
            setMediaItem(MediaItem.fromUri(Constants.PROMO_VIDEO))
            repeatMode = Player.REPEAT_MODE_ONE
            prepare()
        }
        onStopOrDispose {
            player?.release()
            player = null
        }
    }
    Box(
        modifier
            .background(MaterialTheme.colorScheme.surfaceContainerLowest),
    ) {
        player?.let { currentPlayer ->
            PlayerSurface(currentPlayer, surfaceType = SURFACE_TYPE_TEXTURE_VIEW)
        }
    }
}

Using the new onLayoutRectChanged modifier, we also listen for whether the composable is completely visible or not, and play or pause the video based on this information:

var videoFullyOnScreen by remember { mutableStateOf(false) }     

LaunchedEffect(videoFullyOnScreen) {
     if (videoFullyOnScreen) currentPlayer.play() else currentPlayer.pause()
} 

// We add this onto the player composable to determine if the video composable is visible, and mutate the videoFullyOnScreen variable, that then toggles the player state. 
Modifier.onVisibilityChanged(
                containerWidth = LocalView.current.width,
                containerHeight = LocalView.current.height,
) { fullyVisible -> videoFullyOnScreen = fullyVisible }

// A simple version of visibility changed detection
fun Modifier.onVisibilityChanged(
    containerWidth: Int,
    containerHeight: Int,
    onChanged: (visible: Boolean) -> Unit,
) = this then Modifier.onLayoutRectChanged(100, 0) { layoutBounds ->
    onChanged(
        layoutBounds.boundsInRoot.top > 0 &&
            layoutBounds.boundsInRoot.bottom < containerHeight &&
            layoutBounds.boundsInRoot.left > 0 &&
            layoutBounds.boundsInRoot.right < containerWidth,
    )
}

Additionally, using rememberPlayPauseButtonState, we add on a layer on top of the player to offer a play/pause button on the video itself:

val playPauseButtonState = rememberPlayPauseButtonState(currentPlayer)
            OutlinedIconButton(
                onClick = playPauseButtonState::onClick,
                enabled = playPauseButtonState.isEnabled,
            ) {
                val icon =
                    if (playPauseButtonState.showPlay) R.drawable.play else R.drawable.pause
                val contentDescription =
                    if (playPauseButtonState.showPlay) R.string.play else R.string.pause
                Icon(
                    painterResource(icon),
                    stringResource(contentDescription),
                )
            }

Check out the code for more details on how CameraX and Media3 were used in Androidify.

Navigation 3

Screen transitions are handled using the new Jetpack Navigation 3 library androidx.navigation3. The MainNavigation composable defines the different destinations (Home, Camera, Creation, About) and displays the content associated with each destination using NavDisplay. You get full control over your back stack, and navigating to and from destinations is as simple as adding and removing items from a list.

@Composable
fun MainNavigation() {
   val backStack = rememberMutableStateListOf<NavigationRoute>(Home)
   NavDisplay(
       backStack = backStack,
       onBack = { backStack.removeLastOrNull() },
       entryProvider = entryProvider {
           entry<Home> { entry ->
               HomeScreen(
                   onAboutClicked = {
                       backStack.add(About)
                   },
               )
           }
           entry<Camera> {
               CameraPreviewScreen(
                   onImageCaptured = { uri ->
                       backStack.add(Create(uri.toString()))
                   },
               )
           }
           // etc
       },
   )
}

Notably, Navigation 3 exposes a new composition local, LocalNavAnimatedContentScope, to easily integrate your shared element transitions without needing to keep track of the scope yourself. By default, Navigation 3 also integrates with predictive back, providing delightful back experiences when navigating between screens, as seen in this prior shared element transition:

CameraLayout in Compose

Learn more about Jetpack Navigation 3, currently in alpha.

Learn more

By combining the declarative power of Jetpack Compose, the camera capabilities of CameraX, the intelligent features of Gemini, and thoughtful adaptive design, Androidify is a personalized avatar creation experience that feels right at home on any Android device. You can find the full code sample at github.com/android/androidify where you can see the app in action and be inspired to build your own AI-powered app experiences.

Explore this announcement and all Google I/O 2025 updates on io.google starting May 22.


Engage users on Google TV with excellent TV apps

Posted by Shobana Radhakrishnan - Senior Director of Engineering, Google TV, and Paul Lammertsma - Developer Relations Engineer, Android

Over the past year, Google TV and Android TV achieved over 270 million monthly active devices, establishing one of the largest smart TV OS footprints. Building on this momentum, we are excited to share new platform features and developer tools designed to help you increase app engagement with our expanding user base.

Google TV with Gemini capabilities

Earlier this year, we announced that we’ll bring Gemini capabilities to Google TV, so users can speak more naturally and conversationally to find what to watch and get answers to complex questions.

A user pulls up Gemini on a TV asking for kid-friendly movie recommendations similar to Jurassic Park. Gemini responds with several movie recommendations

After each movie or show search, our new voice assistant will suggest relevant content from your apps, significantly increasing the discoverability of your content.

A user pulls up Gemini on a TV asking for help explaining the solar system to a first grader. Gemini responds with YouTube videos to help explain the solar system

Plus, users can easily ask questions about topics they're curious about and receive insightful answers with supporting videos.

We’re so excited to bring this helpful and delightful experience to users this fall.

Video Discovery API

Today, we’ve also opened partner enrollment for our Video Discovery API.

Video Discovery optimizes Resumption, Entitlements, and Recommendations across all Google TV form factors to enhance the end-user experience and boost app engagement.

    • Resumption: Partners can now easily display a user's paused video within the 'Continue Watching' row from the home screen. This row is a prime location that drives 60% of all user interactions on Google TV.
    • Entitlements: Video Discovery streamlines entitlement management, which matches app content to user eligibility. Users appreciate this because they can enjoy personalized recommendations without needing to manually update all their subscription details. This allows partners to connect with users across multiple discovery points on Google TV.
    • Recommendations: Video Discovery even highlights personalized content recommendations based on content that users watched inside apps.

Partners can begin incorporating the Video Discovery API today, starting with resumption and entitlement integrations. Check out g.co/tv/vda to learn more.

Jetpack Compose for TV

Compose for TV 1.0 expands on the core and Material Compose libraries

Last year, we launched Compose for TV 1.0 beta, which lets you build beautiful, adaptive UIs across Android, including Android TV OS.

Now, Compose for TV 1.0 is stable, and expands on the core and Material Compose libraries. We’ve even seen how the latest release of Compose significantly improves app startup within our internal benchmarking mobile sample, with roughly a 20% improvement compared with the March 2024 release. Because Compose for TV builds upon these libraries, apps built with Compose for TV should also see better app startup times.

New to building with Compose, and not sure where to start? Our updated Jetcaster audio streaming app sample demonstrates how to use Compose across form factors. It includes a dedicated module for playing podcasts on TV by combining separate view models with shared business logic.

Focus Management Codelab

We understand that focus management can be challenging at times. That’s why we’ve published a codelab that reviews how to set initial focus, prepare for unexpected focus traversal, and efficiently restore focus.

Memory Optimization Guide

We’ve released a comprehensive guide on memory optimization, including memory targets for low RAM devices as well. Combined with Android Studio's powerful memory profiler, this helps you understand when your app exceeds those limits and why.

In-App Ratings and Reviews

Ratings and reviews entry point forJetStream sample app on TV

Moreover, app ratings and reviews are essential for developers, offering quantitative and qualitative feedback on user experiences. Now, we're extending the In-App Ratings and Reviews API to TV to allow developers to prompt users for ratings and reviews directly from Google TV. Check out our recent blog post detailing how to easily integrate the In-App Ratings and Reviews API.

Android 16 for TV

Android 16 for TV

We're excited to announce the upcoming release of Android 16 for TV. Developers can begin using the latest beta today. With Android 16, TV developers can access several great features:

    • Platform support for the Eclipsa Audio codec enables creators to use the IAMF spatial audio format. For ExoPlayer support that includes previous platform versions, see ExoPlayer's IAMF decoder module.
    • There are various improvements to media playback speed, consistency and efficiency, as well as HDMI-CEC reliability and performance optimizations for 64-bit kernels.
    • Additional APIs and user experiences from Android 16 are also available. We invite you to explore the complete list from the Android 16 for TV release notes.

What's next

We're incredibly excited to see how these announcements will optimize your development journey, and look forward to seeing the fantastic apps you'll launch on the platform!

Explore this announcement and all Google I/O 2025 updates on io.google starting May 22.

Androidify: How Androidify leverages Gemini, Firebase and ML Kit

Posted by Thomas Ezan – Developer Relations Engineer, Rebecca Franks – Developer Relations Engineer, and Avneet Singh – Product Manager

We’re bringing back Androidify later this year, this time powered by Google AI, so you can customize your very own Android bot and share your creativity with the world. Today, we’re releasing a new open source demo app for Androidify as a great example of how Google is using its Gemini AI models to enhance app experiences.

In this post, we'll dive into how the Androidify app uses Gemini models and Imagen via the Firebase AI Logic SDK, and we'll provide some insights learned along the way to help you incorporate Gemini and AI into your own projects. Read more about the Androidify demo app.

App flow

The overall app functions as follows, with various parts of it using Gemini and Firebase along the way:

flow chart demonstrating Androidify app flow

Gemini and image validation

To get started with Androidify, take a photo or choose an image on your device. The app needs to make sure that the image you upload is suitable for creating an avatar.

Gemini 2.5 Flash via Firebase helps with this by verifying that the image contains a person, that the person is in focus, and assessing image safety, including whether the image contains abusive content.

val jsonSchema = Schema.obj(
   properties = mapOf("success" to Schema.boolean(), "error" to Schema.string()),
   optionalProperties = listOf("error"),
   )
   
val generativeModel = Firebase.ai(backend = GenerativeBackend.googleAI())
   .generativeModel(
            modelName = "gemini-2.5-flash-preview-04-17",
   	     generationConfig = generationConfig {
                responseMimeType = "application/json"
                responseSchema = jsonSchema
            },
            safetySettings = listOf(
                SafetySetting(HarmCategory.HARASSMENT, HarmBlockThreshold.LOW_AND_ABOVE),
                SafetySetting(HarmCategory.HATE_SPEECH, HarmBlockThreshold.LOW_AND_ABOVE),
                SafetySetting(HarmCategory.SEXUALLY_EXPLICIT, HarmBlockThreshold.LOW_AND_ABOVE),
                SafetySetting(HarmCategory.DANGEROUS_CONTENT, HarmBlockThreshold.LOW_AND_ABOVE),
                SafetySetting(HarmCategory.CIVIC_INTEGRITY, HarmBlockThreshold.LOW_AND_ABOVE),
    	),
    )

 val response = generativeModel.generateContent(
            content {
                text("You are to analyze the provided image and determine if it is acceptable and appropriate based on specific criteria.... (more details see the full sample)")
                image(image)
            },
        )

val jsonResponse = Json.parseToJsonElement(response.text)
val isSuccess = jsonResponse.jsonObject["success"]?.jsonPrimitive?.booleanOrNull == true
val error = jsonResponse.jsonObject["error"]?.jsonPrimitive?.content

In the snippet above, we’re leveraging structured output capabilities of the model by defining the schema of the response. We’re passing a Schema object via the responseSchema param in the generationConfig.

We want to validate that the image has enough information to generate a nice Android avatar. So we ask the model to return a json object with success = true/false and an optional error message explaining why the image doesn't have enough information.

Structured output is a powerful feature enabling a smoother integration of LLMs to your app by controlling the format of their output, similar to an API response.

Image captioning with Gemini Flash

Once it's established that the image contains sufficient information to generate an Android avatar, it is captioned using Gemini 2.5 Flash with structured output.

val jsonSchema = Schema.obj(
            properties = mapOf(
                "success" to Schema.boolean(),
                "user_description" to Schema.string(),
            ),
            optionalProperties = listOf("user_description"),
        )
val generativeModel = createGenerativeTextModel(jsonSchema)

val prompt = "You are to create a VERY detailed description of the main person in the given image. This description will be translated into a prompt for a generative image model..."

val response = generativeModel.generateContent(
content { 
       	text(prompt) 
             	image(image) 
	})
        
val jsonResponse = Json.parseToJsonElement(response.text!!) 
val isSuccess = jsonResponse.jsonObject["success"]?.jsonPrimitive?.booleanOrNull == true

val userDescription = jsonResponse.jsonObject["user_description"]?.jsonPrimitive?.content

The other option in the app is to start with a text prompt. You can enter in details about your accessories, hairstyle, and clothing, and let Imagen be a bit more creative.

Android generation via Imagen

We’ll use this detailed description of your image to enrich the prompt used for image generation. We’ll add extra details around what we would like to generate and include the bot color selection as part of this too, including the skin tone selected by the user.

val imagenPrompt = "A 3D rendered cartoonish Android mascot in a photorealistic style, the pose is relaxed and straightforward, facing directly forward [...] The bot looks as follows $userDescription [...]"

We then call the Imagen model to create the bot. Using this new prompt, we create a model and call generateImages:

// we supply our own fine-tuned model here but you can use "imagen-3.0-generate-002" 
val generativeModel = Firebase.ai(backend = GenerativeBackend.googleAI()).imagenModel(
            "imagen-3.0-generate-002",
            safetySettings =
            ImagenSafetySettings(
                ImagenSafetyFilterLevel.BLOCK_LOW_AND_ABOVE,
                personFilterLevel = ImagenPersonFilterLevel.ALLOW_ALL,
            ),
)

val response = generativeModel.generateImages(imagenPrompt)

val image = response.images.first().asBitmap()

And that’s it! The Imagen model generates a bitmap that we can display on the user’s screen.

Finetuning the Imagen model

The Imagen 3 model was finetuned using Low-Rank Adaptation (LoRA). LoRA is a fine-tuning technique designed to reduce the computational burden of training large models. Instead of updating the entire model, LoRA adds smaller, trainable "adapters" that make small changes to the model's performance. We ran a fine tuning pipeline on the Imagen 3 model generally available with Android bot assets of different color combinations and different assets for enhanced cuteness and fun. We generated text captions for the training images and the image-text pairs were used to finetune the model effectively.

The current sample app uses a standard Imagen model, so the results may look a bit different from the visuals in this post. However, the app using the fine-tuned model and a custom version of Firebase AI Logic SDK was demoed at Google I/O. This app will be released later this year and we are also planning on adding support for fine-tuned models to Firebase AI Logic SDK later in the year.

moving image of Androidify app demo turning a selfie image of a bearded man wearing a black tshirt and sunglasses, with a blue back pack into a green 3D bearded droid wearing a black tshirt and sunglasses with a blue backpack
The original image... and Androidifi-ed image

ML Kit

The app also uses the ML Kit Pose Detection SDK to detect a person in the camera view, which triggers the capture button and adds visual indicators.

To do this, we add the SDK to the app, and use PoseDetection.getClient(). Then, using the poseDetector, we look at the detectedLandmarks that are in the streaming image coming from the Camera, and we set the _uiState.detectedPose to true if a nose and shoulders are visible:

private suspend fun runPoseDetection() {
    PoseDetection.getClient(
        PoseDetectorOptions.Builder()
            .setDetectorMode(PoseDetectorOptions.STREAM_MODE)
            .build(),
    ).use { poseDetector ->
        // Since image analysis is processed by ML Kit asynchronously in its own thread pool,
        // we can run this directly from the calling coroutine scope instead of pushing this
        // work to a background dispatcher.
        cameraImageAnalysisUseCase.analyze { imageProxy ->
            imageProxy.image?.let { image ->
                val poseDetected = poseDetector.detectPersonInFrame(image, imageProxy.imageInfo)
                _uiState.update { it.copy(detectedPose = poseDetected) }
            }
        }
    }
}

private suspend fun PoseDetector.detectPersonInFrame(
    image: Image,
    imageInfo: ImageInfo,
): Boolean {
    val results = process(InputImage.fromMediaImage(image, imageInfo.rotationDegrees)).await()
    val landmarkResults = results.allPoseLandmarks
    val detectedLandmarks = mutableListOf<Int>()
    for (landmark in landmarkResults) {
        if (landmark.inFrameLikelihood > 0.7) {
            detectedLandmarks.add(landmark.landmarkType)
        }
    }

    return detectedLandmarks.containsAll(
        listOf(PoseLandmark.NOSE, PoseLandmark.LEFT_SHOULDER, PoseLandmark.RIGHT_SHOULDER),
    )
}
moving image showing the camera shutter button activating when an orange droid figurine is held in the camera frame
The camera shutter button is activated when a person (or a bot!) enters the frame.

Get started with AI on Android

The Androidify app makes an extensive use of the Gemini 2.5 Flash to validate the image and generate a detailed description used to generate the image. It also leverages the specifically fine-tuned Imagen 3 model to generate images of Android bots. Gemini and Imagen models are easily integrated into the app via the Firebase AI Logic SDK. In addition, ML Kit Pose Detection SDK controls the capture button, enabling it only when a person is present in front of the camera.

To get started with AI on Android, go to the Gemini and Imagen documentation for Android.

Explore this announcement and all Google I/O 2025 updates on io.google starting May 22.

What’s New in Jetpack Compose

Posted by Nick Butcher – Product Manager

At Google I/O 2025, we announced a host of features, performance, stability, libraries, and tools updates for Jetpack Compose, our recommended Android UI toolkit. With Compose you can build excellent apps that work across devices. Compose has matured a lot since it was first announced (at Google I/O 2019!) and we're now seeing 60% of the top 1,000 apps in the Play Store such as MAX and Google Drive use and love it.

New Features

Since I/O last year, Compose Bill of Materials (BOM) version 2025.05.01 adds new features such as:

    • Autofill support that lets users automatically insert previously entered personal information into text fields.
    • Auto-sizing text to smoothly adapt text size to a parent container size.
    • Visibility tracking for when you need high-performance information on a composable's position in its root container, screen, or window.
    • Animate bounds modifier for beautiful automatic animations of a Composable's position and size within a LookaheadScope.
    • Accessibility checks in tests that let you build a more accessible app UI through automated a11y testing.

LookaheadScope {
    Box(
        Modifier
            .animateBounds(this@LookaheadScope)
            .width(if(inRow) 100.dp else 150.dp)
            .background(..)
            .border(..)
    )
}
moving image of animate bounds modifier in action

For more details on these features, read What’s new in the Jetpack Compose April ’25 release and check out these talks from Google I/O:

If you’re looking to try out new Compose functionality, the alpha BOM offers new features that we're working on including:

    • Pausable Composition (see below)
    • Updates to LazyLayout prefetch
    • Context Menus
    • New modifiers: onFirstVisible, onVisbilityChanged, contentType
    • New Lint checks for frequently changing values and elements that should be remembered in composition

Please try out the alpha features and provide feedback to help shape the future of Compose.

Material Expressive

At Google I/O, we unveiled Material Expressive, Material Design’s latest evolution that helps you make your products even more engaging and easier to use. It's a comprehensive addition of new components, styles, motion and customization options that help you to build beautiful rich UIs. The Material3 library in the latest alpha BOM contains many of the new expressive components for you to try out.

moving image of material expressive design example

Learn more to start building with Material Expressive.

Adaptive layouts library

Developing adaptive apps across form factors including phones, foldables, tablets, desktop, cars and Android XR is now easier with the latest enhancements to the Compose adaptive layouts library. The stable 1.1 release adds support for predictive back gestures for smoother transitions and pane expansion for more flexible two pane layouts on larger screens. Furthermore, the 1.2 (alpha) release adds more flexibility for how panes are displayed, adding strategies for reflowing and levitating.

moving image of compose adaptive layouts updates in the Google Play app
Compose Adaptive Layouts Updates in the Google Play app

Learn more about building adaptive android apps with Compose.

Performance

With each release of Jetpack Compose, we continue to prioritize performance improvements. The latest stable release includes significant rewrites and improvements to multiple sub-systems including semantics, focus and text optimizations. Best of all these are available to you simply by upgrading your Compose dependency; no code changes required.

bar chart of internal benchmarks for performance run on a Pixel 3a device from January to May 2023 measured by jank rate
Internal benchmark, run on a Pixel 3a

We continue to work on further performance improvements, notable changes in the latest alpha BOM include:

    • Pausable Composition allows compositions to be paused, and their work split up over several frames.
    • Background text prefetch enables text layout caches to be pre-warmed on a background thread, enabling faster text layout.
    • LazyLayout prefetch improvements enabling lazy layouts to be smarter about how much content to prefetch, taking advantage of pausable composition.

Together these improvements eliminate nearly all jank in an internal benchmark.

Stability

We've heard from you that upgrading your Compose dependency can be challenging, encountering bugs or behaviour changes that prevent you from staying on the latest version. We've invested significantly in improving the stability of Compose, working closely with the many Google app teams building with Compose to detect and prevent issues before they even make it to a release.

Google apps develop against and release with snapshot builds of Compose; as such, Compose is tested against the hundreds of thousands of Google app tests and any Compose issues are immediately actioned by our team. We have recently invested in increasing the cadence of updating these snapshots and now update them daily from Compose tip-of-tree, which means we’re receiving feedback faster, and are able to resolve issues long before they reach a public release of the library.

Jetpack Compose also relies on @Experimental annotations to mark APIs that are subject to change. We heard your feedback that some APIs have remained experimental for a long time, reducing your confidence in the stability of Compose. We have invested in stabilizing experimental APIs to provide you a more solid API surface, and reduced the number of experimental APIs by 32% in the last year.

We have also heard that it can be hard to debug Compose crashes when your own code does not appear in the stack trace. In the latest alpha BOM, we have added a new opt-in feature to provide more diagnostic information. Note that this does not currently work with minified builds and comes at a performance cost, so we recommend only using this feature in debug builds.

class App : Application() {
   override fun onCreate() {
        // Enable only for debug flavor to avoid perf impact in release
        Composer.setDiagnosticStackTraceEnabled(BuildConfig.DEBUG)
   }
}

Libraries

We know that to build great apps, you need Compose integration in the libraries that interact with your app's UI.

A core library that powers any Compose app is Navigation. You told us that you often encountered limitations when managing state hoisting and directly manipulating the back stack with the current Compose Navigation solution. We went back to the drawing-board and completely reimagined how a navigation library should integrate with the Compose mental model. We're excited to introduce Navigation 3, a new artifact designed to empower you with greater control and simplify complex navigation flows.

We're also investing in Compose support for CameraX and Media3, making it easier to integrate camera capture and video playback into your UI with Compose idiomatic components.

@Composable
private fun VideoPlayer(
    player: Player?, // from media3
    modifier: Modifier = Modifier
) {
    Box(modifier) {
        PlayerSurface(player) // from media3-ui-compose
        player?.let {
            // custom play-pause button UI
            val playPauseButtonState = rememberPlayPauseButtonState(it) // from media3-ui-compose
            MyPlayPauseButton(playPauseButtonState, Modifier.align(BottomEnd).padding(16.dp))
        }
    }
}
To learn more, see the media3 Compose documentation and the CameraX samples.

Tools

We continue to improve the Android Studio tools for creating Compose UIs. The latest Narwhal canary includes:

    • Resizable Previews instantly show you how your Compose UI adapts to different window sizes
    • Preview navigation improvements using clickable names and components
    • Studio Labs 🧪: Compose preview generation with Gemini quickly generate a preview
    • Studio Labs 🧪: Transform UI with Gemini change your UI with natural language, directly from preview.
    • Studio Labs 🧪: Image attachment in Gemini generate Compose code from images.

For more information read What's new in Android development tools.

moving image of resizable preview in Jetpack Compose
Resizable Preview

New Compose Lint checks

The Compose alpha BOM introduces two new annotations and associated lint checks to help you to write correct and performant Compose code. The @FrequentlyChangingValue annotation and FrequentlyChangedStateReadInComposition lint check warns in situations where function calls or property reads in composition might cause frequent recompositions. For example, frequent recompositions might happen when reading scroll position values or animating values. The @RememberInComposition annotation and RememberInCompositionDetector lint check warns in situations where constructors, functions, and property getters are called directly inside composition (e.g. the TextFieldState constructor) without being remembered.

Happy Composing

We continue to invest in providing the features, performance, stability, libraries and tools that you need to build excellent apps. We value your input so please share feedback on our latest updates or what you'd like to see next.

Explore this announcement and all Google I/O 2025 updates on io.google starting May 22.


On-device GenAI APIs as part of ML Kit help you easily build with Gemini Nano

Posted by Caren Chang - Developer Relations Engineer, Chengji Yan - Software Engineer, Taj Darra - Product Manager

We are excited to announce a set of on-device GenAI APIs, as part of ML Kit, to help you integrate Gemini Nano in your Android apps.

To start, we are releasing 4 new APIs:

    • Summarization: to summarize articles and conversations
    • Proofreading: to polish short text
    • Rewriting: to reword text in different styles
    • Image Description: to provide short description for images

Key benefits of GenAI APIs

GenAI APIs are high level APIs that allow for easy integration, similar to existing ML Kit APIs. This means you can expect quality results out of the box without extra effort for prompt engineering or fine tuning for specific use cases.

GenAI APIs run on-device and thus provide the following benefits:

    • Input, inference, and output data is processed locally
    • Functionality remains the same without reliable internet connection
    • No additional cost incurred for each API call

To prevent misuse, we also added safety protection in various layers, including base model training, safety-aware LoRA fine-tuning, input and output classifiers and safety evaluations.

How GenAI APIs are built

There are 4 main components that make up each of the GenAI APIs.

  1. Gemini Nano is the base model, as the foundation shared by all APIs.
  2. Small API-specific LoRA adapter models are trained and deployed on top of the base model to further improve the quality for each API.
  3. Optimized inference parameters (e.g. prompt, temperature, topK, batch size) are tuned for each API to guide the model in returning the best results.
  4. An evaluation pipeline ensures quality in various datasets and attributes. This pipeline consists of: LLM raters, statistical metrics and human raters.

Together, these components make up the high-level GenAI APIs that simplify the effort needed to integrate Gemini Nano in your Android app.

Evaluating quality of GenAI APIs

For each API, we formulate a benchmark score based on the evaluation pipeline mentioned above. This score is based on attributes specific to a task. For example, when evaluating the summarization task, one of the attributes we look at is “grounding” (ie: factual consistency of generated summary with source content).

To provide out-of-box quality for GenAI APIs, we applied feature specific fine-tuning on top of the Gemini Nano base model. This resulted in an increase for the benchmark score of each API as shown below:

Use case in English Gemini Nano Base Model ML Kit GenAI API
Summarization 77.2 92.1
Proofreading 84.3 90.2
Rewriting 79.5 84.1
Image Description 86.9 92.3

In addition, this is a quick reference of how the APIs perform on a Pixel 9 Pro:

Prefix Speed
(input processing rate)
Decode Speed
(output generation rate)
Text-to-text 510 tokens/second 11 tokens/second
Image-to-text 510 tokens/second + 0.8 seconds for image encoding 11 tokens/second

Sample usage

This is an example of implementing the GenAI Summarization API to get a one-bullet summary of an article:

val articleToSummarize = "We are excited to announce a set of on-device generative AI APIs..."

// Define task with desired input and output format
val summarizerOptions = SummarizerOptions.builder(context)
    .setInputType(InputType.ARTICLE)
    .setOutputType(OutputType.ONE_BULLET)
    .setLanguage(Language.ENGLISH)
    .build()
val summarizer = Summarization.getClient(summarizerOptions)

suspend fun prepareAndStartSummarization(context: Context) {
    // Check feature availability. Status will be one of the following: 
    // UNAVAILABLE, DOWNLOADABLE, DOWNLOADING, AVAILABLE
    val featureStatus = summarizer.checkFeatureStatus().await()

    if (featureStatus == FeatureStatus.DOWNLOADABLE) {
        // Download feature if necessary.
        // If downloadFeature is not called, the first inference request will 
        // also trigger the feature to be downloaded if it's not already
        // downloaded.
        summarizer.downloadFeature(object : DownloadCallback {
            override fun onDownloadStarted(bytesToDownload: Long) { }

            override fun onDownloadFailed(e: GenAiException) { }

            override fun onDownloadProgress(totalBytesDownloaded: Long) {}

            override fun onDownloadCompleted() {
                startSummarizationRequest(articleToSummarize, summarizer)
            }
        })    
    } else if (featureStatus == FeatureStatus.DOWNLOADING) {
        // Inference request will automatically run once feature is      
        // downloaded.
        // If Gemini Nano is already downloaded on the device, the   
        // feature-specific LoRA adapter model will be downloaded very  
        // quickly. However, if Gemini Nano is not already downloaded, 
        // the download process may take longer.
        startSummarizationRequest(articleToSummarize, summarizer)
    } else if (featureStatus == FeatureStatus.AVAILABLE) {
        startSummarizationRequest(articleToSummarize, summarizer)
    } 
}

fun startSummarizationRequest(text: String, summarizer: Summarizer) {
    // Create task request  
    val summarizationRequest = SummarizationRequest.builder(text).build()

    // Start summarization request with streaming response
    summarizer.runInference(summarizationRequest) { newText -> 
        // Show new text in UI
    }

    // You can also get a non-streaming response from the request
    // val summarizationResult = summarizer.runInference(summarizationRequest)
    // val summary = summarizationResult.get().summary
}

// Be sure to release the resource when no longer needed
// For example, on viewModel.onCleared() or activity.onDestroy()
summarizer.close()

For more examples of implementing the GenAI APIs, check out the official documentation and samples on GitHub:

Use cases

Here is some guidance on how to best use the current GenAI APIs:

For Summarization, consider:

    • Conversation messages or transcripts that involve 2 or more users
    • Articles or documents less than 4000 tokens (or about 3000 English words). Using the first few paragraphs for summarization is usually good enough to capture the most important information.

For Proofreading and Rewriting APIs, consider utilizing them during the content creation process for short content below 256 tokens to help with tasks such as:

    • Refining messages in a particular tone, such as more formal or more casual
    • Polishing personal notes for easier consumption later

For the Image Description API, consider it for:

    • Generating titles of images
    • Generating metadata for image search
    • Utilizing descriptions of images in use cases where the images themselves cannot be displayed, such as within a list of chat messages
    • Generating alternative text to help visually impaired users better understand content as a whole

GenAI API in production

Envision is an app that verbalizes the visual world to help people who are blind or have low vision lead more independent lives. A common use case in the app is for users to take a picture to have a document read out loud. Utilizing the GenAI Summarization API, Envision is now able to get a concise summary of a captured document. This significantly enhances the user experience by allowing them to quickly grasp the main points of documents and determine if a more detailed reading is desired, saving them time and effort.

side by side images of a mobile device showing a document on a table on the left, and the results of the scanned document on the right showing details providing the what, when, and where as written in the document

Supported devices

GenAI APIs are available on Android devices using optimized MediaTek Dimensity, Qualcomm Snapdragon, and Google Tensor platforms through AICore. For a comprehensive list of devices that support GenAI APIs, refer to our official documentation.

Learn more

Start implementing GenAI APIs in your Android apps today with guidance from our official documentation and samples on GitHub: AI Catalog GenAI API Samples with Compose, ML Kit GenAI APIs Quickstart.

Android Design at Google I/O 2025

Posted by Ivy Knight – Senior Design Advocate

Here’s your guide to the essential Android Design sessions, resources, and announcements for I/O ‘25:

Check out the latest Android updates

The Android Show: I/O Edition

The Android Show had a special I/O edition this year with some exciting announcements like Material Expressive!

Learn more about the new Live Update Notification templates in the Android Notifications & Live Updates for an in-depth look at what they are, when to use them, and why. You can also get the Live Update design template in the Android UI Kit, read more in the updated Notification guidance, and get hands-on with the Jetsnack Live Updates and Widget case study.

Make your apps more expressive

Get a jump on the future of Google’s UX design: Material 3 Expressive. Learn how to use new emotional design patterns to boost engagement, usability, and desire for your product in the Build Next-Level UX with Material 3 Expressive session and check out the expressive update on Material.io.

Stay up to date with Android Accessibility Updates, highlighting accessibility features launching with Android 16: enhanced dark themes, options for those with motion sickness, a new way to increase text contrast, and more.

Catch the Mastering text input in Compose session to learn more about how engaging robust text experiences are built with Jetpack Compose. It covers Autofill integration, dynamic text resizing, and custom input transformations. This is a great session to watch to see what’s possible when designing text inputs.

Thinking across form factors

These design resources and sessions can help you design across more Android form factors or update your existing experiences.

Preview Gemini in-car, imagining seamless navigation and personalized entertainment in the New In-Car App Experiences session. Then explore the new Car UI Design Kit to bring your app to Android Car platforms and speed up your process with the latest Android form factor kit.

Engaging with users on Google TV with excellent TV apps session discusses new ways the Google TV experience is making it easier for users to find and engage with content, including improvement to out-of-box solutions and updates to Android TV OS.

Want a peek at how to bring immersive content, like 3D models, to Android XR with the Building differentiated apps for Android XR with 3D Content session.

Plus WearOS is releasing an updated design kit @AndroidDesign Figma and learning Pathway.

Tip top apps

We’ve also released the following new Android design guidance to help you design the best Android experiences:

In-app Settings

Read up on the latest suggested patterns to build out your app’s settings.

Help and Feedback

Along with settings, learn about adding help and feedback to your app.

Widget Configuration

Does your app need setup? New guidance to help guide in adding configuration to your app’s widgets.

Edge-to-edge design

Allow your apps to take full advantage of the entire screen with the latest guidance on designing for edge-to-edge.

Check out figma.com/@androiddesign for even more new and updated resources.

Visit the I/O 2025 website, build your schedule, and engage with the community. If you are at the Shoreline come say hello to us in the Android tent at our booths.

We can't wait to see what you create with these new tools and insights. Happy I/O!

Explore this announcement and all Google I/O 2025 updates on io.google starting May 22.


Androidify: Building delightful UIs with Compose

Posted by Rebecca Franks - Developer Relations Engineer

Androidify is a new sample app we built using the latest best practices for mobile apps. Previously, we covered all the different features of the app, from Gemini integration and CameraX functionality to adaptive layouts. In this post, we dive into the Jetpack Compose usage throughout the app, building upon our base knowledge of Compose to add delightful and expressive touches along the way!

Material 3 Expressive

Material 3 Expressive is an expansion of the Material 3 design system. It’s a set of new features, updated components, and design tactics for creating emotionally impactful UX.


It’s been released as part of the alpha version of the Material 3 artifact (androidx.compose.material3:material3:1.4.0-alpha10) and contains a wide range of new components you can use within your apps to build more personalized and delightful experiences. Learn more about Material 3 Expressive's component and theme updates for more engaging and user-friendly products.

Material Expressive Component updates

In addition to the new component updates, Material 3 Expressive introduces a new motion physics system that's encompassed in the Material theme.

In Androidify, we’ve utilized Material 3 Expressive in a few different ways across the app. For example, we’ve explicitly opted-in to the new MaterialExpressiveTheme and chosen MotionScheme.expressive() (this is the default when using expressive) to add a bit of playfulness to the app:

@Composable
fun AndroidifyTheme(
   content: @Composable () -> Unit,
) {
   val colorScheme = LightColorScheme


   MaterialExpressiveTheme(
       colorScheme = colorScheme,
       typography = Typography,
       shapes = shapes,
       motionScheme = MotionScheme.expressive(),
       content = {
           SharedTransitionLayout {
               CompositionLocalProvider(LocalSharedTransitionScope provides this) {
                   content()
               }
           }
       },
   )
}

Some of the new componentry is used throughout the app, including the HorizontalFloatingToolbar for the Prompt type selection:

moving example of expressive button shapes in slow motion

The app also uses MaterialShapes in various locations, which are a preset list of shapes that allow for easy morphing between each other. For example, check out the cute cookie shape for the camera capture button:

Material Expressive Component updates
Camera button with a MaterialShapes.Cookie9Sided shape

Animations

Wherever possible, the app leverages the Material 3 Expressive MotionScheme to obtain a themed motion token, creating a consistent motion feeling throughout the app. For example, the scale animation on the camera button press is powered by defaultSpatialSpec(), a specification used for animations that move something across a screen (such as x,y or rotation, scale animations):

val interactionSource = remember { MutableInteractionSource() }
val animationSpec = MaterialTheme.motionScheme.defaultSpatialSpec<Float>()
Spacer(
   modifier
       .indication(interactionSource, ScaleIndicationNodeFactory(animationSpec))
       .clip(MaterialShapes.Cookie9Sided.toShape())
       .size(size)
       .drawWithCache {
           //.. etc
       },
)

Camera button scale interaction

Shared element animations

The app uses shared element transitions between different screen states. Last year, we showcased how you can create shared elements in Jetpack Compose, and we’ve extended this in the Androidify sample to create a fun example. It combines the new Material 3 Expressive MaterialShapes, and performs a transition with a morphing shape animation:

moving example of expressive button shapes in slow motion

To do this, we created a custom Modifier that takes in the target and resting shapes for the sharedBounds transition:

@Composable
fun Modifier.sharedBoundsRevealWithShapeMorph(
   sharedContentState: 
SharedTransitionScope.SharedContentState,
   sharedTransitionScope: SharedTransitionScope = 
LocalSharedTransitionScope.current,
   animatedVisibilityScope: AnimatedVisibilityScope = 
LocalNavAnimatedContentScope.current,
   boundsTransform: BoundsTransform = 
MaterialTheme.motionScheme.sharedElementTransitionSpec,
   resizeMode: SharedTransitionScope.ResizeMode = 
SharedTransitionScope.ResizeMode.RemeasureToBounds,
   restingShape: RoundedPolygon = RoundedPolygon.rectangle().normalized(),
   targetShape: RoundedPolygon = RoundedPolygon.circle().normalized(),
)

Then, we apply a custom OverlayClip to provide the morphing shape, by tying into the AnimatedVisibilityScope provided by the LocalNavAnimatedContentScope:

val animatedProgress =
   animatedVisibilityScope.transition.animateFloat(targetValueByState = targetValueByState)


val morph = remember {
   Morph(restingShape, targetShape)
}
val morphClip = MorphOverlayClip(morph, { animatedProgress.value })


return this@sharedBoundsRevealWithShapeMorph
   .sharedBounds(
       sharedContentState = sharedContentState,
       animatedVisibilityScope = animatedVisibilityScope,
       boundsTransform = boundsTransform,
       resizeMode = resizeMode,
       clipInOverlayDuringTransition = morphClip,
       renderInOverlayDuringTransition = renderInOverlayDuringTransition,
   )

View the full code snippet for this Modifer on GitHub.

Autosize text

With the latest release of Jetpack Compose 1.8, we added the ability to create text composables that automatically adjust the font size to fit the container’s available size with the new autoSize parameter:

BasicText(text,
style = MaterialTheme.typography.titleLarge,
autoSize = TextAutoSize.StepBased(maxFontSize = 220.sp),
)

This is used front and center for the “Customize your own Android Bot” text:

Text reads Customize your own Android Bot with an inline moving image
“Customize your own Android Bot” text with inline GIF

This text composable is interesting because it needed to have the fun dancing Android bot in the middle of the text. To do this, we use InlineContent, which allows us to append a composable in the middle of the text composable itself:

@Composable
private fun DancingBotHeadlineText(modifier: Modifier = Modifier) {
   Box(modifier = modifier) {
       val animatedBot = "animatedBot"
       val text = buildAnnotatedString {
           append(stringResource(R.string.customize))
           // Attach "animatedBot" annotation on the placeholder
           appendInlineContent(animatedBot)
           append(stringResource(R.string.android_bot))
       }
       var placeHolderSize by remember {
           mutableStateOf(220.sp)
       }
       val inlineContent = mapOf(
           Pair(
               animatedBot,
               InlineTextContent(
                   Placeholder(
                       width = placeHolderSize,
                       height = placeHolderSize,
                       placeholderVerticalAlign = PlaceholderVerticalAlign.TextCenter,
                   ),
               ) {
                   DancingBot(
                       modifier = Modifier
                           .padding(top = 32.dp)
                           .fillMaxSize(),
                   )
               },
           ),
       )
       BasicText(
           text,
           modifier = Modifier
               .align(Alignment.Center)
               .padding(bottom = 64.dp, start = 16.dp, end = 16.dp),
           style = MaterialTheme.typography.titleLarge,
           autoSize = TextAutoSize.StepBased(maxFontSize = 220.sp),
           maxLines = 6,
           onTextLayout = { result ->
               placeHolderSize = result.layoutInput.style.fontSize * 3.5f
           },
           inlineContent = inlineContent,
       )
   }
}

Composable visibility with onLayoutRectChanged

With Compose 1.8, a new modifier, Modifier.onLayoutRectChanged, was added. This modifier is a more performant version of onGloballyPositioned, and includes features such as debouncing and throttling to make it performant inside lazy layouts.

In Androidify, we’ve used this modifier for the color splash animation. It determines the position where the transition should start from, as we attach it to the “Let’s Go” button:

var buttonBounds by remember {
   mutableStateOf<RelativeLayoutBounds?>(null)
}
var showColorSplash by remember {
   mutableStateOf(false)
}
Box(modifier = Modifier.fillMaxSize()) {
   PrimaryButton(
       buttonText = "Let's Go",
       modifier = Modifier
           .align(Alignment.BottomCenter)
           .onLayoutRectChanged(
               callback = { bounds ->
                   buttonBounds = bounds
               },
           ),
       onClick = {
           showColorSplash = true
       },
   )
}

We use these bounds as an indication of where to start the color splash animation from.

moving image of a blue color splash transition between Androidify demo screens

Learn more delightful details

From fun marquee animations on the results screen, to animated gradient buttons for the AI-powered actions, to the path drawing animation for the loading screen, this app has many delightful touches for you to experience and learn from.

animated marquee example

animated gradient button for AI powered actions example

animated loading screen example

Check out the full codebase at github.com/android/androidify and learn more about the latest in Compose from using Material 3 Expressive, the new modifiers, auto-sizing text and of course a couple of delightful interactions!

Explore this announcement and all Google I/O 2025 updates on io.google starting May 22.

What’s new in Watch Faces

Posted by Garan Jenkin – Developer Relations Engineer

Wear OS has a thriving watch face ecosystem featuring a variety of designs that also aims to minimize battery impact. Developers have embraced the simplicity of creating watch faces using Watch Face Format – in the last year, the number of published watch faces using Watch Face Format has grown by over 180%*.

Today, we’re continuing our investment and announcing version 4 of the Watch Face Format, available as part of Wear OS 6. These updates allow developers to express even greater levels of creativity through the new features we’ve added. And we’re supporting marketplaces, which gives flexibility and control to developers and more choice for users.

In this blog post we'll cover key new features, check out the documentation for more details of changes introduced in recent versions.

Supporting marketplaces with Watch Face Push

We’re also announcing a completely new API, the Watch Face Push API, aimed at developers who want to create their own watch face marketplaces.

Watch Face Push, available on devices running Wear OS 6 and above, works exclusively with watch faces that use the Watch Face Format watch faces.

We’ve partnered with well-known watch face developers – including Facer, TIMEFLIK, WatchMaker, Pujie, and Recreative – in designing this new API. We’re excited that all of these developers will be bringing their unique watch face experiences to Wear OS 6 using Watch Face Push.

Three mobile devices representing watch face marketplace apps for watches running Wear OS 6
From left to right, Facer, Recreative and TIMEFLIK watch faces have been developing marketplace apps to work with watches running Wear OS 6.

Watch faces managed and deployed using Watch Face Push are all written using Watch Face Format. Developers publish these watch faces in the same way as publishing through Google Play, though there are some additional checks the developer must make which are described in the Watch Face Push guidance.

A flow diagram demonstrating the flow of information from Cloud-based storage to the user's phone where the app is installed, then transferred to be installed on a wearable device using the Wear OS App via the Watch Face Push API

The Watch Face Push API covers only the watch part of this typical marketplace system diagram - as the app developer, you have control and responsibility for the phone app and cloud components, as well as for building the Wear OS app using Watch Face Push. You’re also in control of the phone-watch communications, for which we recommend using the Data Layer APIs.

Adding Watch Face Push to your project

To start using Watch Face Push on Wear OS 6, include the following dependency in your Wear OS app:

// Ensure latest version is used by checking the repository
implementation("androidx.wear.watchface:watchface-push:1.3.0-alpha07")

Declare the necessary permission in your AndroidManifest.xml:

<uses-permission android:name="com.google.wear.permission.PUSH_WATCH_FACES" />

Obtain a Watch Face Push client:

val manager = WatchFacePushManagerFactory.createWatchFacePushManager(context)

You’re now ready to start using the Watch Face Push API, for example to list the watch faces you have already installed, or add a new watch face:

// List existing watch faces, installed by this app
val listResponse = manager.listWatchFaces()

// Add a watch face
manager.addWatchFace(watchFaceFileDescriptor, validationToken)

Understanding Watch Face Push

While the basics of the Watch Face Push API are easy to understand and access through the WatchFacePushManager interface, it’s important to consider several other factors when working with the API in practice to build an effective marketplace app, including:

To learn more about using Watch Face Push, see the guidance and reference documentation.

Updates to Watch Face Format

Photos

Available from Watch Face Format v4

The new Photos element allows the watch face to contain user-selectable photos. The element supports both individual photos and a gallery of photos. For a gallery of photos, developers can choose whether the photos advance automatically or when the user taps the watch face.

a wearable device and small screen mobile device side by side demonstrating how a user may configure photos for the watch face through the Companion app on the mobile device
Configuring photos through the watch Companion app

The user is able to select the photos of their choice through the companion app, making this a great way to include true personalization in your watch face. To use this feature, first add the necessary configuration:

<UserConfigurations>
  <PhotosConfiguration id="myPhoto" configType="SINGLE"/>
</UserConfigurations>

Then use the Photos element within any PartImage, in the same way as you would for an Image element:

<PartImage ...>
  <Photos source="[CONFIGURATION.myPhoto]"
          defaultImageResource="placeholder_photo"/>
</PartImage>

For details on how to support multiple photos, and how to configure the different change behaviors, refer to the Photos section of the guidance and reference, as well as the GitHub samples.

Transitions

Available from Watch Face Format v4

Watch Face Format now supports transitions when exiting and entering ambient mode.

moving image demonstrating an overshoot effect adjusting the time on a watch face to reveal the seconds digit
State transition animation: Example using an overshoot effect in revealing the seconds digits

This is achieved through the existing Variant tag. For example, the hours and minutes in the above watch face are animated as follows:

<DigitalClock ...>
  <Variant mode="AMBIENT" target="x" value="100" interpolation="OVERSHOOT" />

   <!-- Rest of "hh:mm" clock definition here -->
</DigitalClock>

By default, the animation takes the full extent of allowed time for the transition. The new interpolation attribute controls the animation effect - in this case the use of OVERSHOOT adds a playful experience.

The seconds are implemented in a separate DigitalClock element, which shows the use of the new duration attribute:

<DigitalClock ...>
  <Variant mode="AMBIENT" target="alpha" value="0" duration="0.5"/>
   <!-- Rest of "ss" clock definition here -->
</DigitalClock>

The duration attribute takes a value between 0.0 and 1.0, with 1.0 representing the full extent of the allowed time. In this example, by using a value of 0.5, the seconds animation is quicker - taking half the allowed time, in comparison to the hours and minutes, which take the entire transition period.

For more details on using transitions, see the guidance documentation, as well as the reference documentation for Variant.

Color Transforms

Available from Watch Face Format v4

We’ve extended the usefulness of the Transform element by allowing color to be transformed on the majority of elements where it is an attribute, and also allowing tintColor to be transformed on Group and Part* elements such as PartDraw and PartText.

The main exceptions to this addition are the clock elements, DigitalClock and AnalogClock, and also ComplicationSlot, which do not currently support Transform.

In addition to extending the list of transformable attributes to include colors, we’ve also added a handful of useful functions for manipulating color:

To see these in action, let’s consider an example.

The Weather data source provides the current UV index through [WEATHER.UV_INDEX]. When representing the UV index, these values are typically also assigned a color:

moving image demonstrating an overshoot effect adjusting the time on a watch face to reveal the seconds digit

We want to represent this information as an Arc, not only showing the value, but also using the appropriate color. We can achieve this as follows:

<Arc centerX="0" centerY="0" height="420" width="420"
  startAngle="165" endAngle="165" direction="COUNTER_CLOCKWISE">
  <Transform target="endAngle"
    value="165 - 40 * (clamp(11, 0.0, 11.0) / 11.0)" />
  <Stroke thickness="20" color="#ffffff" cap="ROUND">
    <Transform target="color"
      value="extractColorFromWeightedColors(#97d700 #FCE300 #ff8200 #f65058 #9461c9, 3 3 2 3 1, false, clamp([WEATHER.UV_INDEX] + 0.5, 0.0, 12.0) / 12.0)" />
  </Stroke>
</Arc>

Let’s break this down:

    • The first Transform restricts the UV index to the range 0.0 to 11.0 and adjusts the sweep of the Arc according to that value.
    • The second Transform uses the new extractColorFromWeightedColors function.
        • The first argument is our list of colors
        • The second argument is a list of weights - you can see from the chart above that green covers 3 values, whereas orange only covers 2, so we use weights to represent this.
        • The third argument is whether or not to interpolate the color values. In this case we want to stick strictly to the color convention for UV index, so this is false.
        • Finally in the fourth argument we coerce the UV value into the range 0.0 to 1.0, which is used as an index into our weighted colors.

The result looks like this:

side by side quadrants of watch face examples showing using the new color functions in applying color transforms to a Stroke in an Arc
Using the new color functions in applying color transforms to a Stroke in an Arc.

As well as being able to provide raw colors and weights to these functions, they can also be used with values from complications, such as HR, temperature or steps goal. For example, to use the color range specified in a goal complication:

<Transform target="color"
    value="extractColorFromColors(
        [COMPLICATION.GOAL_PROGRESS_COLORS],
        [COMPLICATION.GOAL_PROGRESS_COLOR_INTERPOLATE],
        [COMPLICATION.GOAL_PROGRESS_VALUE] /    
            [COMPLICATION.GOAL_PROGRESS_TARGET_VALUE]
)"/>

Introducing the Reference element

Available from Watch Face Format v4

The new Reference element allows you to refer to any transformable attribute from one part of your watch face scene in other parts of the scene tree.

In our UV index example above, we’d also like the text labels to use the same color scheme.

We could perform the same color transform calculation as on our Arc, using [WEATHER.UV_INDEX], but this is duplicative work which could lead to inconsistencies, for example if we change the exact color hues in one place but not the other.

Returning to the Arc definition, let’s create a Reference to the color:

<Arc centerX="0" centerY="0" height="420" width="420"
  startAngle="165" endAngle="165" direction="COUNTER_CLOCKWISE">
  <Transform target="endAngle"
    value="165 - 40 * (clamp(11, 0.0, 11.0) / 11.0)" />
  <Stroke thickness="20" color="#ffffff" cap="ROUND">
    <Reference source="color" name="uv_color" defaultValue="#ffffff" />
    <Transform target="color"
      value="extractColorFromWeightedColors(#97d700 #FCE300 #ff8200 #f65058 #9461c9, 3 3 2 3 1, false, clamp([WEATHER.UV_INDEX] + 0.5, 0.0, 12.0) / 12.0)" />
  </Stroke>
</Arc>

The color of the Arc is calculated from the relatively complex extractColorFromWeightedColors function. To avoid repeating this elsewhere in our watch face, we have added a Reference element, which takes as its source the Stroke color.

Let’s now look at how we can consume this value in a PartText elsewhere in the watch face. We gave the Reference the name uv_color, so we can simply refer to this in any expression:

<PartText x="0" y="225" width="450" height="225">
  <TextCircular centerX="225" centerY="0" width="420" height="420"
    startAngle="120" endAngle="90"
    align="START" direction="COUNTER_CLOCKWISE">
    <Font family="SYNC_TO_DEVICE" size="24">
      <Transform target="color" value="[REFERENCE.uv_color]" />
      <Template>%d<Parameter expression="[WEATHER.UV_INDEX]" /></Template>
    </Font>
  </TextCircular>
</PartText>
<!-- Similar PartText here for the "UV:" label -->

As a result, the color of the Arc and the UV numeric value are now coordinated:

side by side quadrants of watch face examples showing Coordinating colors across elements using the Reference element
Coordinating colors across elements using the Reference element

For more details on how to use the Reference element, refer to the Reference guidance.

Text autosizing

Available from Watch Face Format v3

Sometimes the exact length of the text to be shown on the watch face can vary, and as a developer you want to balance being able to display text that is both legible, but also complete.

Auto-sizing text can help solve this problem, and can be enabled through the isAutoSize attribute introduced to the Text element:

<Text align="CENTER" isAutoSize="true">

Having set this attribute, text will then automatically fit the available space, starting at the maximum size specified in your Font element, and with a minimum size of 12.

As an example, step count could range from tens or hundreds through to many thousands, and the new isAutoSize attribute enables best use of the available space for every possible value:

side by side examples of text sizing adjustments on watch face using isAutosize
Making the best use of the available text space through isAutoSize

For more details on isAutoSize, see the Text reference.

Android Studio support

For developers working in Android Studio, we’ve added support to make working with Watch Face Format easier, including:

    • Run configuration support
    • Auto-complete and resource reference
    • Lint checking

This is available from Android Studio Canary version 2025.1.1 Canary 10.

Learn More

To learn more about building watch faces, please take a look at the following resources:

We’ve also recently launched a codelab for Watch Face Format and have updated samples on GitHub to showcase new features. The issue tracker is available for providing feedback.

We're excited to see the watch face experiences that you create and share!

Explore this announcement and all Google I/O 2025 updates on io.google starting May 22.


* Google Play data for period 2025-03-24 to 2025-03-23

In-App Ratings and Reviews for TV

Posted by Paul Lammertsma – Developer Relations Engineer
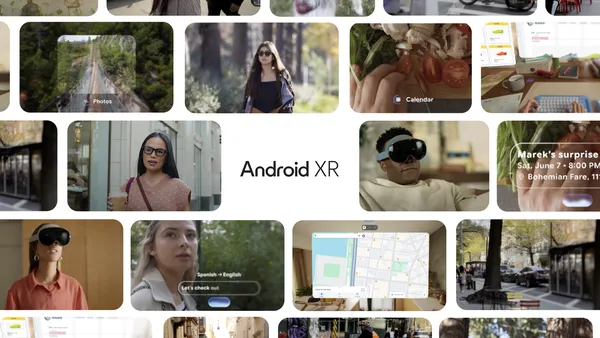
Ratings and reviews are essential for developers, offering quantitative and qualitative feedback on user experiences. In 2022, we enhanced the granularity of this feedback by segmenting these insights by countries and form factors.

Now, we're extending the In-App Ratings and Reviews API to TV to allow developers to prompt users for ratings and reviews directly from Google TV.

Ratings and reviews on Google TV

Ratings and reviews entry point forJetStream sample app on TV

Users can now see rating averages, browse reviews, and leave their own review directly from an app's store listing on Google TV.

Ratings and written reviews input screen on TV

Users can interact with in-app ratings and reviews on their TVs by doing the following:

    • Select ratings using the remote control D-pad.
    • Provide optional written reviews using Gboard’s on-screen voice input, or by easily typing from their phone.
    • Send mobile notifications to themselves to complete their TV app review directly on their phone.

User instructions for submitting TV app ratings and reviews on mobile

Additionally, users can leave reviews for other form factors directly from their phone by simply selecting the device chip when submitting an app rating or writing a review.

We've already seen a considerable lift in app ratings on TV since bringing these changes to Google TV, and now, we're making it possible for developers to trigger a ratings prompt as well.

Before we look at the integration, let's first carefully consider the best time to request a review prompt. First, identify optimal moments within your app to request user feedback, ensuring prompts appear only when the UI is idle to prevent interruption of ongoing content.

In-App Review API

Integrating the Google Play In-App Review API is the same as on mobile and it's only a couple of method calls:

val manager = ReviewManagerFactory.create(context)
manager.requestReviewFlow().addOnCompleteListener { task ->
    if (task.isSuccessful) {
        // We got the ReviewInfo object
        val reviewInfo = task.result
        manager.launchReviewFlow(activity, reviewInfo)
    } else {
        // There was some problem, log or handle the error code
        @ReviewErrorCode val reviewErrorCode =
            (task.getException() as ReviewException).errorCode
    }
}

First, invoke requestReviewFlow() to obtain a ReviewInfo object which is used to launch the review flow. You must include an addOnCompleteListener() not just to obtain the ReviewInfo object, but also to monitor for any problems triggering this flow, such as the unavailability of Google Play on the device. Note that ReviewInfo does not offer any insights on whether or not a prompt appeared or which action the user took if a prompt did appear.

The challenge is to identify when to trigger launchReviewFlow(). Track user actions—identifying successful journeys and points where users encounter issues—so you can be confident they had a delightful experience in your app.

For this method, you may optionally also include an addOnCompleteListener() to ensure it resumes when the returned task is completed.

Note that due to throttling of how often users are presented with this prompt, there are no guarantees that the ratings dialog will appear when requesting to start this flow. For best practices, check this guide on when to request an in-app review.

Get started with In-App Reviews on Google TV

You can get a head start today by following these steps:

    1. Identify successful journeys for users, like finishing a movie or TV show season.
    2. Identify poor experiences that should be avoided, like buffering or playback errors.
    3. Integrate the Google Play In-App Review API to trigger review requests at optimal moments within the user journey.
    4. Test your integration by following the testing guide.
    5. Publish your app and continuously monitor your ratings by device type in the Play Console.

We're confident this integration enables you to elevate your Google TV app ratings and empowers your users to share valuable feedback.

Play Console Ratings graphic

Resources

Explore this announcement and all Google I/O 2025 updates on io.google starting May 22.