Category Archives: Google Cloud Platform Blog

Product updates, customer stories, and tips and tricks on Google Cloud Platform

Building scalable web applications with Cloud Datastore — new solution


If you manage database systems for large web applications, your job can be quite challenging. When unforeseen situations arise, making configuration changes can be complex and risky due to the stateful nature of those database systems. And before launching a new application, you have to do a lot of capacity planning, such as the number of virtual machines (VMs), the amount of disk storage, and the optimal network configuration, while contending with unknown factors such as the volume and frequency of open database connections and evolving usage patterns. You also need to do regular maintenance work to upgrade database software and scale resources to meet growing demand.

All of this planning and maintenance takes time, money, and attention away from developing new application features, so it is important to find a balance between provisioning enough resources to handle heavy loads and overspending on unused resources.

Cloud Datastore can help minimize these challenges by providing a scalable, highly available, high-performance, and fully-managed NoSQL database system.

We recently published an article that presents an overview of how to build large web applications with Cloud Datastore. The article includes scenarios of full-fledged web applications that use Cloud Datastore jointly with other products in the Google Cloud Platform (GCP) ecosystem.

Check out the article for all the details and next steps for building your own scalable solutions using Cloud Datastore!

GCP arrives in the Nordics with a new region in Finland


Click here for the Finnish version, thank you!

Our sixteenth Google Cloud Platform (GCP) region, located in Finland, is now open for you to build applications and store your data.

The new Finland region, europe-north1, joins the Netherlands, Belgium, London, and Frankfurt in Europe and makes it easier to build highly available, performant applications using resources across those geographies.

Hosting applications in the new region can improve latencies by up to 65% for end-users in the Nordics and by up to 88% for end-users in Eastern Europe, compared to hosting them in the previously closest region. You can visit www.gcping.com to see for yourself how fast the Finland region is from your location.

Services


The Nordic region has everything you need to build the next great application, and three zones that allow you to distribute applications and storage across multiple zones to protect against service disruptions.

You can also access our Multi-Regional services in Europe (such as BigQuery) and all the other GCP services via the Google Network, the largest cloud network as measured by number of points of presence. Please visit our Service Specific Terms to get detailed information on our data storage capabilities.

Build sustainably


The new region is located in our existing data center in Hamina. This facility is one of the most advanced and efficient data centers in the Google fleet. Our high-tech cooling system, which uses sea water from the Gulf of Finland, reduces energy use and is the first of its kind anywhere in the world. This means that when you use this region to run your compute workloads, store your data, and develop your applications, you are doing so sustainably.

Hear from our customers


“The road to emission-free and sustainable shipping is a long and challenging one, but thanks to exciting innovation and strong partnerships, Rolls-Royce is well-prepared for the journey. For us being able to train machine learning models to deliver autonomous vessels in the most effective manner is key to success. We see the Google Cloud for Finland launch as a great advantage to speed up our delivery of the project.”
– Karno Tenovuo, Senior Vice President Ship Intelligence, Rolls-Royce

“Being the world's largest producer of renewable diesel refined from waste and residues, as well as being a technologically advanced refiner of high-quality oil products, requires us to take advantage of leading-edge technological possibilities. We have worked together with Google Cloud to accelerate our journey into the digital future. We share the same vision to leave a healthier planet for our children. Running services on an efficient and sustainably operated cloud is important for us. And even better that it is now also available physically in Finland.”
– Tommi Touvila, Chief Information Officer, Neste

“We believe that technology can enhance and improve the lives of billions of people around the world. To do this, we have joined forces with visionary industry leaders such as Google Cloud to provide a platform for our future innovation and growth. We’re seeing tremendous growth in the market for our operations, and it’s essential to select the right platform. The Google Cloud Platform cloud region in Finland stands for innovation.”
– Anssi Rönnemaa, Chief Finance and Commercial Officer, HMD Global

“Digital services are key growth drivers for our renewal of a 108-year old healthcare company. 27% of our revenue is driven by digital channels, where modern technology is essential. We are moving to a container-based architecture running on GCP at Hamina. Google has a unique position to provide services within Finland. We also highly appreciate the security and environmental values of Google’s cloud operations.”
– Kalle Alppi, Chief Information Officer, Mehiläinen

Partners in the Nordics


Our partners in the Nordics are available to help design and support your deployment, migration and maintenance needs.


"Public cloud services like those provided by Google Cloud help businesses of all sizes be more agile in meeting the changing needs of the digital era—from deploying the latest innovations in machine learning to cost savings in their infrastructure. Google Cloud Platform's new Finland region enables this business optimization and acceleration with the help of cloud-native partners like Nordcloud and we believe Nordic companies will appreciate the opportunity to deploy the value to their best benefit.”
– Jan Kritz, Chief Executive Officer, Nordcloud

Nordic partners include: Accenture, Adapty, AppsPeople, Atea, Avalan Solutions, Berge, Cap10, Cloud2, Cloudpoint, Computas, Crayon, DataCenterFinland, DNA, Devoteam, Doberman, Deloitte, Enfo, Evry, Gapps, Greenbird, Human IT Cloud, IIH Nordic, KnowIT, Koivu Solutions, Lamia, Netlight, Nordcloud, Online Partners, Outfox Intelligence AB, Pilvia, Precis Digital, PwC, Quality of Service IT-Support, Qvik, Skye, Softhouse, Solita, Symfoni Next, Soprasteria, Tieto, Unifoss, Vincit, Wizkids, and Webstep.

If you want to learn more or wish to become a partner, visit our partners page.

Getting started


For additional details on the region, please visit our Finland region page where you’ll get access to free resources, whitepapers, the "Cloud On-Air" on-demand video series and more. Our locations page provides updates on the availability of additional services and regions. Contact us to request access to new regions and help us prioritize what we build next.

Partner Interconnect now generally available


We are happy to announce that Partner Interconnect, launched in beta in April, is now generally available. Partner Interconnect lets you connect your on-premises resources to Google Cloud Platform (GCP) from the partner location of your choice, at a data rate that meets your needs.

With general availability, you can now receive an SLA for Partner Interconnect connections if you use one of the recommended topologies. If you were a beta user with one of those topologies, you will automatically be covered by the SLA. Charges for the service start with GA (see pricing).

Partner Interconnect is ideal if you want physical connectivity to your GCP resources but cannot connect at one of Google’s peering locations, or if you want to connect with an existing service provider. If you need help understanding the connection options, the information here can help.

In this blog we will walk through how you can start using Partner Interconnect, from choosing a partner that works best for you all the way through how you can deploy and start using your interconnect.


Choosing a partner


If you already have a service provider partner for network connectivity, you can check the list of supported service providers to see if they offer Partner Interconnect service. If not, you can select a partner from the list based on your data center location.

Some critical factors to consider are:
  • Make sure the partner can offer the availability and latency you need between your on-premises network and their network.
  • Check whether the partner offers Layer 2 connectivity, Layer 3 connectivity, or both. If you choose a Layer 2 Partner, you have to configure and establish a BGP session between your Cloud Routers and on-premises routers for each VLAN attachment that you create. If you choose a Layer 3 partner, they will take care of the BGP configuration.
  • Please review the recommended topologies for production-level and non-critical applications. Google provides a 99.99% (with Global Routing) or 99.9% availability SLA, and that only applies to the connectivity between your VPC network and the partner's network.

Bandwidth options and pricing


Partner Interconnect provides flexible options for bandwidth between 50 Mbps and 10 Gbps. Google charges on a monthly basis for VLAN attachments depending on capacity and egress traffic (see options and pricing).

Setting up Partner Interconnect VLAN attachments


Once you’ve established network connectivity with a partner, and they have set up interconnects with Google, you can set up and activate VLAN attachments using these steps:
  1. Create VLAN attachments.
  2. Request provisioning from the partner.
  3. If you have a Layer 2 partner, complete the BGP configuration and then activate the attachments for traffic to start. If you have a Layer 3 partner, simply activate the attachments, or use the pre-activation option.
With Partner Interconnect, you can connect to GCP where and how you want to. Follow these steps to easily access your GCP compute resources from your on-premises network.

Related content


Try full-stack monitoring with Stackdriver on us


In advance of the new simplified Stackdriver pricing that will go into effect on June 30, we want to make sure everyone gets a chance to try Stackdriver. That’s why we’ve decided to offer the full power of Stackdriver, including premium monitoring, logging and application performance management (APM), to all customers—new and existing—for free until the new pricing goes into effect. This offer will be available starting June 18.

Stackdriver, our full-stack logging and monitoring tool, collects logs and metrics, as well as other data from your cloud apps and other sources, then generates useful dashboards, charts and alerts to let you act on information as soon as you get it. Here’s what’s included when you try Stackdriver:
  • Out-of-the-box observability across the entire Google Cloud Platform (GCP) and Amazon Web Services (AWS) services you use
  • Platform, system, application and custom metrics on demand with Metrics Explorer
  • Uptime checks to monitor the availability of the internet-facing endpoints you depend on
  • Alerting policies to let you know when something is wrong. Alerting and notification options, previously available only on the premium tier, are now available for free during this limited time
  • Access to logging and APM features like logs-based metrics, using Trace to understand application health, debugging live with debugger and more
Want to estimate your usage once the new pricing goes into effect? Check out our earlier blog post on viewing and managing your costs. You’ll see the various ways you can estimate usage to plan for the best use of Stackdriver monitoring in your environment. And if you are not already a Stackdriver user, you can sign up to try Stackdriver now!

Related content:

Behind the scenes with the Dragon Ball Legends GCP backend


Dragon Ball Legends, a new mobile game from Bandai Namco Entertainment (BNE), is based on its popular Dragon Ball Z franchise, and is rolling out to gamers around the world as we speak. But planning the cloud infrastructure to power the game dates back to February 2017, when BNE approached Google Cloud to talk about the interesting challenges they were facing, and how we could help.

Based on their anticipated demand, BNE had three ambitious requirements for their game:
  1. Extreme scalability. The game would be launched globally, so it needed backend that could scale with millions of players and still perform well.
  2. Global network. Because the game allows real-time player versus player battles, it needs a reliable and low-latency network across regions.
  3. Real-time data analytics. The game is designed to evolve with players in real-time, so it was critical to have a data analytics pipeline to stream data to a data warehouse. Then the operation team can measure and evaluate how people are playing the game and adjust it on-the-fly.
All three of these are areas where we have a lot of experience. Google has multiple global services with more than a billion users, and we use the data those services generate to improve them over time. And because Google Cloud Platform (GCP) runs on the same infrastructure as these Google services, GCP customers can take advantage of the same enabling technologies.

Let’s take a look at how BNE worked with Google Cloud to build the infrastructure for Dragon Ball Legends.


Challenge #1: Extreme scalability

MySQL is extensively used by gaming companies in Japan because engineers are used to working with relational databases with schema, SQL queries and strong consistency. This simplifies a lot on the application side that doesn’t have to handle any database limitations like eventual consistency or schema enforcement. MySQL is a widely used even outside gaming and most backend engineers already have strong experience using this database.

While MySQL offers many advantages, it has one big limitation: scalability. Indeed, as a scale-up database if you want to increase MySQL performance, you need to add more CPU, RAM or disk. And when a single instance of MySQL can’t handle the load anymore, you can divide the load by sharding—splitting users into groups and assigning them to multiple independent instances of MySQL. Sharding has a number of drawbacks, however. Most gaming developers calculate the number of shards they’ll need for the database before the game launches since resharding is labor-intensive and error-prone. That causes gaming companies tend to overprovision the database to eventually handle more players than they expect. If the game is as popular as expected, everything is fine. But what if the game is a runaway hit and exceeds the anticipated demand? And what about the long tail representing a gradual decrease in active players? What if it’s an out-and-out flop? MySQL sharding is not dynamically scalable, and adjusting its size requires maintenance as well as risk.

In an ideal world, databases can scale in and out without downtime while offering the advantages of a relational database. When we first heard that BNE was considering MySQL sharding to handle the massive anticipated traffic for Dragon Ball Legends, we suggested they consider Cloud Spanner instead.


Why Cloud Spanner?

Cloud Spanner is a fully managed relational database that offers horizontal scalability and high availability while keeping strong consistency with a schema that is similar to MySQL’s. Better yet, as a managed service, it’s looked after by Google SREs, removing database maintenance and minimizing the risk of downtime. We thought Cloud Spanner would be able to help BNE make their game global.


Evaluation to implementation

Before adopting a new technology, engineers should always test it to confirm its expected performance in a real world scenario. Before replacing MySQL, BNE created a new Cloud Spanner instance in GCP, including a few tables with a similar schema to what they used in MySQL. Since their backend developers were writing in Scala, they chose the Java client library for Cloud Spanner and wrote some sample code to load-test Cloud Spanner and see if it could keep up with their queries per second (QPS) requirements for writes—around 30,000 QPS at peak. Working with our customer engineer and the Cloud Spanner engineering team, they met this goal easily. They even developed their own DML (Data Manipulation Language) wrapper to write SQL commands like INSERT, UPDATE and DELETE.


Game release

With the proof of concept behind them, they could start their implementation. Based on the expected daily active users (DAU), BNE calculated how many Cloud Spanner nodes they needed—enough for the 3 million pre-registered players they were expecting. To prepare the release, they organized two closed beta tests to validate their backend, and didn’t have a single issue with the database! In the end, over 3 million participants worldwide pre-registered for Dragon Ball Legends, and even with this huge number, the official game release went flawlessly.

Long story short, BNE can focus on improving the game rather than spending time operating their databases.


Challenge #2: Global network

Let’s now talk about BNE’s second challenge: building a global real-time player-vs-player (PvP) game. BNE’s goal for Dragon Ball Legends was to let all its players play against one another, anywhere in the world. If you know anything about networking, you understand the challenge around latency. Round-trip time (RTT) ( between Tokyo and San Francisco, for example, is on average around 100 ms. To address that, they decided to divide every game second into 250 ms intervals. So while the game looks like it’s real-time to users, it’s actually a really fast turn-based game at its core (you can read more about the architecture here). And while some might say that 250ms offers plenty of room for latency, it’s extremely hard to predict the latency when communicating across the Internet.


Why Cloud Networking?

Here’s what it looks like for a game client to access the game server on GCP over the internet. Since the number of hops can vary every time, this means that playing PvP can sometimes feel fast, sometimes slow.

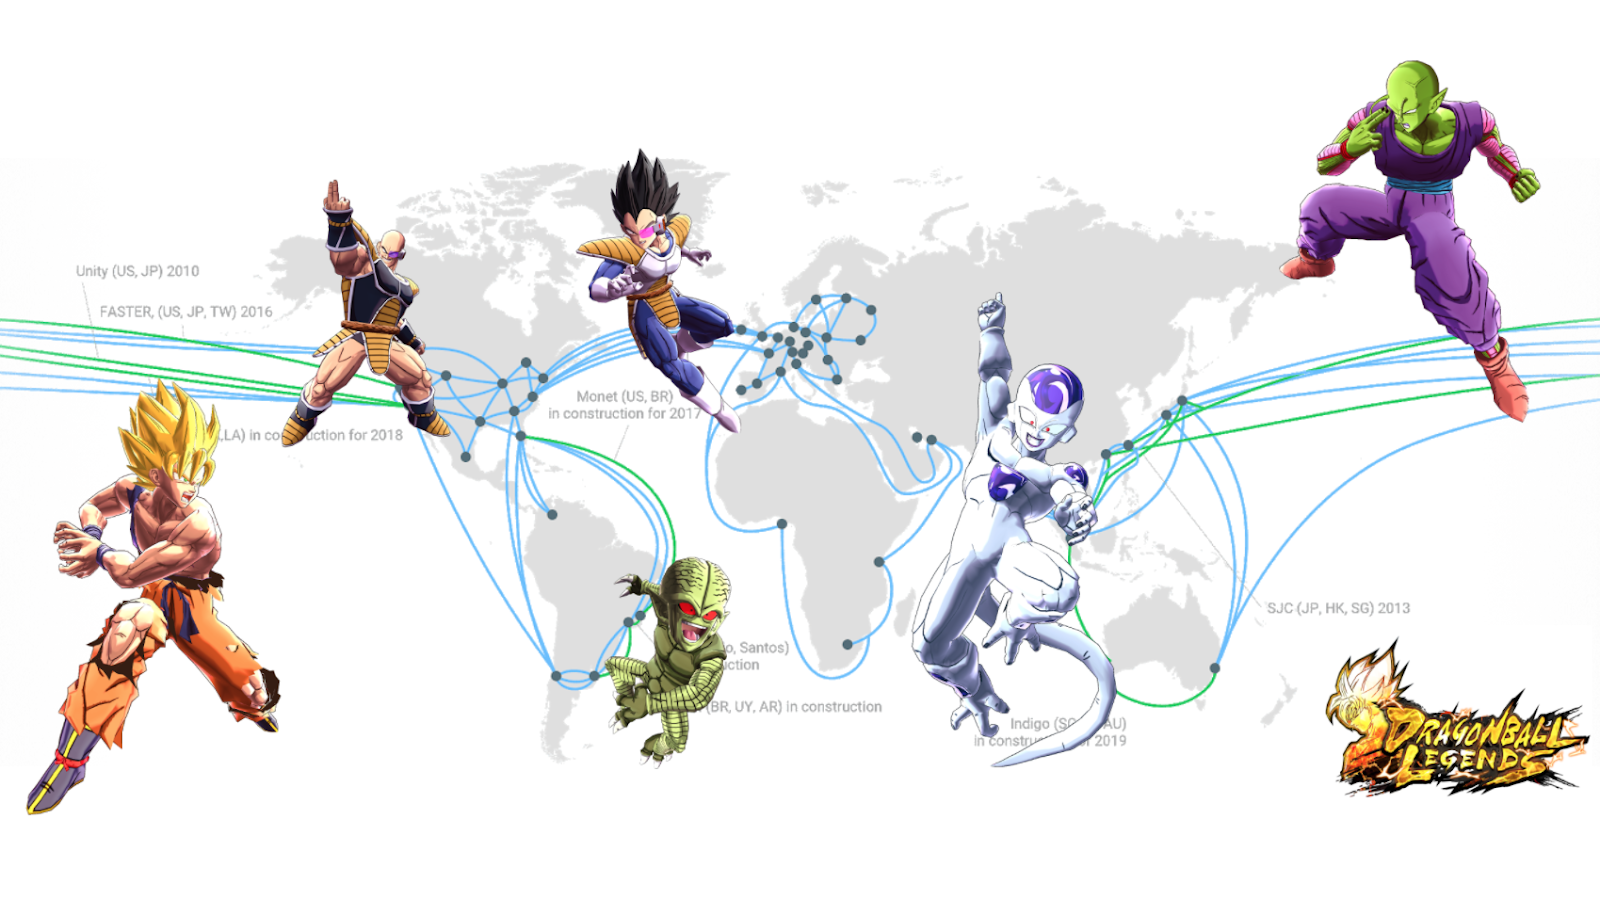
Once of the main reasons BNE decided to use GCP for the Dragon Ball Legends backend was the Google dedicated network. As you can see in the picture below, when using GCP, once the game client accesses one of the hundreds of GCP Point Of Presence (POP) around the world, it’s on the Google dedicated network. That means none unpredictable hops, for predictable and lowest possible latency.


Taking advantage of the Google Cloud Network

Usually, gaming companies implement PvP by connecting two players directly or through a dedicated game server. Usually combat games that require low latency between players will prefer P2P communication. In general, when two players are geographically close, P2P works very well, but it’s often unreliable when trying to communicate across regions (some carriers even block P2P protocols). For two players from two different continents to communicate through Google’s dedicated network, players first try to communicate through P2P, and if that fails, they failover to an open source implementation of STUN/TURN Server called coturn, which acts as a relay between the two players.. That way, cross continent battles leverage the low-latency and reliable Google network as much as possible.


Challenge #3: Real-time data analytics

BNE’s last challenge was around real-time data analytics. BNE wanted to offer the best user experience to their fans and one of the ways to do that is through live game operations, or LiveOps, in which operators make constant changes to the game so it always feels fresh. But to understand players’ needs, they needed data— usually users’ actions log data. And if they could get this data in near real-time, they could then make decisions on what changes to apply to the game to increase users’ satisfaction and engagement.

To gather this data, BNE used a combination of Cloud Pub/Sub, Cloud Dataflow to transform in users’ data in real-time and insert it into BigQuery.
  • Cloud Pub/Sub offers a globally reliable messaging system that buffers the logs until they can be handled by Cloud Dataflow.
  • Cloud Dataflow is a fully managed parallel processing service that lets you execute ETL in real-time and in parallel.
  • BigQuery is the fully managed data warehouse where all the game logs are stored. Since BigQuery offers petabyte-scale storage, scaling was not a concern. Thanks to heavy parallel processing when querying the logs, BNE can get a response to a query, scanning terabytes of data in a few seconds.
This system lets a game producer visualize a player’s behavior in near real-time and take decision on what new features to bring to the game or what to change inside the game to satisfy all their fans.


Takeaways

Using Cloud Spanner, BNE could focus on developing an amazing game instead of spending time on database capacity planning and scaling. Operations-wise, by using a fully managed scalable database, they drastically reduced risks related to human error as well as an operational overhead.

Using Cloud Networking, they leveraged Google’s dedicated network to offer the best user experience to their fans, even when fighting across regions.

And finally, using Google’s analytics stack (Cloud PubSub, Cloud Dataflow and BigQuery), BNE was able to analyze players’ behaviors in near real-time and make decisions about how to adjust the game to make their fans even happier!

If you want to hear more details about how they evaluated and adopted Cloud Spanner for their game, please join them at their Google Cloud NEXT’18 session in San Francisco.

Introducing QUIC support for HTTPS load balancing


For four years now, Google has been using QUIC, a UDP-based encrypted transport protocol optimized for HTTPS, to deliver traffic for our products – from Google Web Search, to YouTube, to this very blog. If you’re reading this in Chrome, you’re probably using QUIC right now. QUIC makes the web faster, particularly for slow connections, and now your cloud services can enjoy that speed: today, we’re happy to be the first major public cloud to offer QUIC support for our HTTPS load balancers.

QUIC’s key features include establishing connections faster, stream-based multiplexing, improved loss recovery, and no head-of-line blocking. QUIC is designed with mobility in mind, and supports migrating connections from WiFi to Cellular and back.

Benefits of QUIC


If your service is sensitive to latency, QUIC will make it faster because of the way it establishes connections. When a web client uses TCP and TLS, it requires two to three round trips with a server to establish a secure connection before the browser can send a request. With QUIC, if a client has talked to a given server before, it can start sending data without any round trips, so your web pages will load faster. How much faster? On a well-optimized site like Google Search, connections are often pre-established, so QUIC’s faster connections can only speed up some requests—but QUIC still improves mean page load time by 8% globally, and up to 13% in regions where latency is higher.

Cedexis benchmarked our Cloud CDN performance using a Google Cloud project. Here’s what happened when we enabled QUIC.

Encryption is built into QUIC, using AEAD algorithms such as AES-GCM and ChaCha20 for both privacy and integrity. QUIC authenticates the parts of its headers that it doesn’t encrypt, so attackers can’t modify any part of a message.

Like HTTP/2, QUIC multiplexes multiple streams into one connection, so that a connection can serve several HTTP requests simultaneously. But HTTP/2 uses TCP as its transport, so all of its streams can be blocked when a single TCP packet is lost—a problem called head-of-line blocking. QUIC is different: Loss of a UDP packet within a QUIC connection only affects the streams contained within that packet. In other words, QUIC won’t let a problem with one request slow the others down, even on an unreliable connection.

Enabling QUIC

You can enable QUIC in your load balancer with a single setting in the GCP Console. Just edit the frontend configuration for your load balancer and enable QUIC negotiation for the IP and port you want to use, and you’re done.

You can also enable QUIC using gcloud:
gcloud compute target-https-proxies update proxy-name 
--quic_override=ENABLE
Once you’ve enabled QUIC, your load balancer negotiates QUIC with clients that support it, like Google Chrome and Chromium. Clients that do not support QUIC continue to use HTTPS seamlessly. If you distribute your own mobile client, you can integrate Cronet to gain QUIC support. The load balancer translates QUIC to HTTP/1.1 for your backend servers, just like traffic with any other protocol, so you don’t need to make any changes to your backends—all you need to do is enable QUIC in your load balancer.

The Future of QUIC

We’re working to help QUIC become a standard for web communication, just as we did with HTTP/2. The IETF formed a QUIC working group in November 2016, which has seen intense engagement from IETF participants, and is scheduled to complete v1 drafts this November. QUIC v1 will support HTTP over QUIC, use TLS 1.3 as the cryptographic handshake, and support migration of client connections. At the working group’s most recent interop event, participants presented over ten independent implementations.

QUIC is designed to evolve over time. A client and server can negotiate which version of QUIC to use, and as the IETF QUIC specifications become more stable and members reach clear consensus on key decisions, we’ve used that version negotiation to keep pace with the current IETF drafts. Future planned versions will also include features such as partial reliability, multipath, and support for non-HTTP applications like WebRTC.

QUIC works across changing network connections. QUIC can migrate client connections between cellular and Wifi networks, so requests don’t time out and fail when the current network degrades. This migration reduces the number of failed requests and decreases tail latency, and our developers are working on making it even better. QUIC client connection migration will soon be available in Cronet.

Try it out today

Read more about QUIC in the HTTPS load balancing documentation and enable it for your project(s) by editing your HTTP(S) load balancer settings. We look forward to your feedback!

Labelling and grouping your Google Cloud Platform resources


Do you run and administer applications on Google Cloud Platform (GCP)? Do you need to group or classify your GCP resources to satisfy compliance demands? Do you need to manage traffic going to and from a VM, monitor specific resources, or see those resources by billing account? If you answered yes to any of these questions, you’ll be glad to know that GCP provides multiple ways to annotate your resources, to make them easier to track: security marks, labels and network tags.

While each annotation has different functionality and scope, they are not mutually exclusive and you will often use a combination of them to meet your requirements. To help you choose which annotation, when, take a look at this flowchart.

Let’s take a deeper look at each of these types of annotations.

Annotation type: Security marks

Security marks, or marks, provide you a way to annotate assets and then search, select, or filter using the mark via Cloud Security Command Center (Cloud SCC)

Use cases:
Here are the main use cases for security marks:
  • classifying and organizing assets and findings independent of resource-level labelling mechanisms, including multi-parented groupings
  • enabling tracking of violation severity and priority
  • integrating with workflow systems for assignment and resolution of incidents
  • enabling differentiated policy enforcement on resources, projects or groups of projects
  • enhancing security focused insights into your resources, e.g., clarifying which publicly accessible buckets are within policy and which are not
Note that Cloud Labels and Tags for the associated supported resources also appear and are indexed by Cloud SCC, so that you can use automation logic to create/modify marks based on the values of existing resource labels and tags.

How to use:
Marks are key-value pairs that are supported by a number of resources. They provide a security-focused view of the supported resources and are only visible from Cloud SCC. Edit or view access to the inventory of resources in Cloud SCC and their associated marks requires the securityCenter.editor IAM role, independently of the roles and permissions on the underlying resource. You can set marks at the org level, project level or for individual resources that support marks. To work with marks you can use, cURL, REST API, the Cloud SCC python library or the Cloud SCC asset inventory page by selecting the resources you wish to apply a mark to, then adding the key-value pair items.

What you can annotate:
A valid mark meets the following criteria:
  • While in Alpha, keys must have a minimum length of 1 character and a maximum length of 63 characters, and cannot be empty. In the Beta and GA releases keys will be extended to support up to 256 characters and value can then have a maximum of 4096 characters.
  • Keys and values can contain only lowercase letters, numeric characters, underscores, and dashes. All characters must use UTF-8 encoding, and can include international characters.
You can find an up-to-date list of resources that can be annotated using marks here.

Annotation type: Labels

Labels are key-value pairs that are supported by a number of GCP resources. You can use labels to track your spend in exported billing data. You can also use labels to filter and group resources for other use cases, for example, to identify all those resources that are in a test environment, as opposed to those in production.

Here’s a list of all the things you can do with labels:
  • Identify resources used by individual teams or cost centers
  • Distinguish deployment environments (prod,stage, qa, test)
  • Identify owners, state labels.
  • Use for cost allocation and billing breakdowns.
  • Monitor resource groups via Stackdriver, which can use labels accessible in the resource metadata
How to use:
A valid label meets the following criteria:
  • Each label must be a key-value pair.
  • Keys must have a minimum length of 1 character and a maximum length of 63 characters, and cannot be empty. Values can be empty, and have a maximum length of 63 characters.
  • Keys and values can contain only lowercase letters, numeric characters, underscores, and dashes. All characters must use UTF-8 encoding, and can include international characters.
  • The key portion of a label must be unique. However, you can use the same key with multiple resources. Keys must start with a lowercase letter or international character.
Check the supported resources to learn how to apply labels and to what you can apply them. For instance, BigQuery lets you add labels to your datasets, tables, and views, while Cloud Storage allows you to add labels to buckets. You can add labels to projects but not to folders.

The permissions you need to add labels to resources are determined on a product-by-product basis. For example, BigQuery requires the bigquery.datasets.update permission to modify labels on datasets. The owner of the dataset has this permission by default but you can also assign at the project level the predefined IAM roles bigquery.dataOwner and bigquery.admin, which include this permission. You can also add labels to tables and views; this action requires the bigquery.tables.update permission. Assigning the predefined IAM roles at project level bigquery.dataOwner, bigquery.dataEditor or bigquery.admin grants this permission. The owner of the dataset has full permissions over the tables and views that the dataset contains.

What you can label:
An up-to-date list of GCP products that support labels can be found here. Then, drill down into each product’s documentation for more details.

Note that you can label instances, but if you are annotating these to manage network traffic, you should use tags instead (see below).

Annotation type: Network tags

Network tags apply to instances and are the means for controlling network traffic to and from a VM instance. On GCP networks, tags identify which VM instances are subject to firewall rules and network routes. You can use the tags as source and destination values in firewall rules. For routes, tags are used to identify to which instances a certain route applies.

How to use:
Using tags means you can create additional isolation between subnetworks by selectively allowing only certain instances to communicate. If you arrange for all instances in a subnetwork to share the same tag, you can specify that tag in firewall rules to simulate a per-subnetwork firewall. For example if you have a subnet called ‘subnet-a’, you can tag all instances in subnet-a with the tag ‘my-subnet-a’, and use that tag in firewall rules as a source or destination.

Tags can be added or removed from an instance using gcloud commands, Cloud Console or API calls. The following gcloud command will add the tags ‘production’ and ‘web’ to an instance
gcloud compute instances add-tags [INSTANCE_NAME] --tags production,web
You can set firewall rules using gcloud commands and the Console. The following gcloud command sets a firewall rule using tags in the source and destination.It allows traffic from instances tagged web-production to instances tagged log-data via tcp port 443
gcloud compute firewall-rules create web-logdata \
    --network logging-network \
    --allow TCP:443 \
    --source-tags web-production \
    --target-tags log-data
For routes, tags are used to identify which instances a certain route applies to. For example, you might create a route that applies to all VM instances that have been tagged with the string vpn. You can set routes using gcloud commands or the Console. The following gcloud command creates a route called my-route in a network called my-network that restricts the route to only apply to instances tagged ‘web-prod’ or ‘api-gate-prod’.

gcloud compute routes create my-route --destination-range 10.0.0.0/16 \
--network my-network [--tags=web-prod,api-gate-prod]
Network tags can however be modified by anyone in your org who has the Compute InstanceAdmin role in the project the network was created in. You can create a custom role with more restricted permissions that disable the ability to set tags on instances by removing the compute.instances.setTag permission from the Compute InstanceAdmin role. Instead of using tags and custom roles to prevent developers from adjusting tags (and thus enabling a firewall rule on their instances), use service accounts; Unless they have access to the appropriate centrally managed service accounts they will be unable to modify the rule. Refer to service accounts vs tags to determine whether the restrictions when using service accounts for firewall rules are acceptable.

Tags values have to meet the following criteria:
  • Can be no longer than 63 characters each
  • Can only contain lowercase letters, numeric characters, and dashes
  • Must start and end with either a number or a lowercase character.

Marks, labels and network tags at a glance

To recap, here’s a table that summarizes common use cases and their associated annotations.

Use Case
Annotation(s) required
Notes
Taking inventory of GCP resources
Security marks
Labels
Labels currently support a wider range of resources than Security marks. The Cloud SCC view of your resources includes, as properties of the resource, the labels and tags you’ve applied; you can then further apply ACL’d security marks to control the organization and filtering of the super set of resources, tags and labels.
Classifying or grouping GCP resources and data into logical groups such as dev or production environments for non-ACL’d use cases
Labels

Classify or grouping GCP resources and data into logical groups such as dev or production environments for security use cases
Security marks
Use these when you want the control of the groups to be at either an organization level or specifically not in the control of the resource owner.
Grouping and classifying sensitive resources and/or organize resources for attribution in security use cases
Security marks
Reading & setting marks is restricted to the Cloud SCC specific roles
Billing break down and cost allocation
Labels

Network traffic management to and from instances
Tags
Network tags can be modified by anyone in your org who has the Compute InstanceAdmin role
Monitoring groupings of related resources for Operational tasks
Labels

Used with Stackdriver resource groups
Monitoring of groupings of related resources and/or findings for security risk assessments, vulnerability management and threat detection
Security marks
Used in Cloud SCC

On your mark, get set, go

If you manage a big, complex environment, you know how hard it can be to keep track of all your GCP resources. We hope that security marks, labels and network tags can make that task a little bit easier. For more information on tracking resources in GCP, check out this how-to guide on creating and managing labels. And watch this space for more insider tips on managing GCP resources like a pro.

Now, you can deploy your Node.js app to App Engine standard environment


Developers love Google App Engine’s zero-config deployments, zero server management and auto-scaling capabilities. At Google Cloud, our goal is to help you be more productive by supporting more popular programming languages. Starting today, you can now deploy your Node.js 8 applications to App Engine standard environment. App Engine is a fully-managed application platform that lets you deploy web and mobile applications without worrying about the underlying infrastructure.

Support for Node.js in App Engine standard environment brings a number of benefits:
  • Fast deployments and automatic scaling - With App Engine standard environment, you can expect short deployment times. For example, it takes under a minute to deploy a basic Express.js application. Further, your Node.js apps will scale instantaneously depending on web traffic; App Engine automatically scales to zero when there are no incoming requests and quickly scales up the number of instances when traffic increases.
  • Idiomatic developer experience - When designing the new runtime, we focused on providing a delightful and idiomatic developer experience. For example, the new Node.js runtime has no language or API restrictions. You can use your favorite Node.js modules, including native ones, by simply declaring your npm dependencies in your package.json, and App Engine installs them in the cloud after deploying your app. Out of the box, you will find your application logs and key performance indicators in Stackdriver. Finally, the base image contains the OS packages you need to run headless Chrome, which you can easily control using the Puppeteer module. Read more in the documentation.
  • Strong security - With our automated one-click certificate generation, you can serve your application under a secure HTTPS URL with your own custom domain. In addition, we take care of security updates so that you don't have to, automatically updating the operating system and Node.js minor and patch versions.

Node.js and Google Cloud Platform

We’ve also crafted our Node.js client libraries so you can easily use Google Cloud Platform (GCP) products from your Node.js application. For example, Cloud Datastore is a great match for App Engine, and you can easily set up live production debugging or tracing by importing the modules. These client libraries are made possible by direct code contributions that our engineers make to Node.js.

Of course, Google's relationship with Node.js goes beyond GCP: Node.js is based on V8, Google's open source high-performance JavaScript engine. And as of last year, Google is a Platinum Sponsor of the Node.js foundation.

Try it now

Node.js has become a very popular runtime environment, and App Engine customers are excited by its availability on the platform.

"Once we deploy to node.js standard, we never have to manage that deployment again. It is exactly the kind of minimal configuration, zero maintenance experience we love about the rest of App Engine."
- Ben Kraft, senior engineer, Khan Academy.
“Node.js has offered Monash University a very flexible framework to build and develop rapid prototypes and minimal viable products that provide our stakeholders and users with scalable solutions for their needs. The launch of Node.js on App Engine standard has added the bonus of being a fully managed platform, ensuring our teams can focus their efforts on developing products.”
-Eric Jiang, Monash University

App Engine is ready and waiting to host your Node.js apps, with very minimal changes. You can even try it out using the App Engine free tier—just follow our Quickstart to learn how to deploy your app, or check out this short video:


Introducing improved pricing for Preemptible GPUs


Not everyone needs the extra performance that GPUs bring to a compute workload, but those who do, really do. Earlier this year, we announced that you could attach GPUs to Preemptible VMs on Google Compute Engine and Google Kubernetes Engine, lowering the price of using GPUs by 50%. Today, Preemptible GPUs are generally available (GA) and we’ve lowered preemptible prices on our entire GPU portfolio to be 70% cheaper than GPUs attached to on-demand VMs.

Preemptible GPUs are ideal for customers with short-lived, fault-tolerant and batch workloads such as machine learning (ML) and high-performance computing (HPC). Customers get access to large-scale GPU infrastructure, predictable low pricing, without having to bid on capacity. GPUs attached to Preemptible VMs are the same as equivalent on-demand resources with two key differences: Compute Engine may shut them down after providing you a 30-second warning, and you can use them for a maximum of 24 hours. Any GPUs attached to a Preemptible VM instance will be considered Preemptible and will be billed at the lower rate.

We offer three different GPU platforms to choose from, making it easy to pick the right GPU for your workload.


GPU Hourly Pricing *
GPU
Standard
(Prices vary by location)
Previous Preemptible
(All Locations)
New Preemptible
(All Locations)
$2.48
$1.24
$0.74
$1.46
$0.73
$0.43
$0.45
$0.22
$0.135
* GPU prices listed as hourly rate, per GPU attached to a VM that are billed by the second. Prices listed are for US regions. Prices for other regions may be different. Additional Sustained Use Discounts of up to 30% apply to GPU non-preemptible usage only.


Combined with custom machine types, Preemptible VMs with Preemptible GPUs let you build your compute stack with exactly the resources you need—and no more. Attaching Preemptible GPUs to custom Preemptible VMs allows you to reduce the amount of vCPU or host memory for your GPU VM, to save even further over  pre-defined VM shapes. Additionally, customers can use Preemptible Local SSD for a low-cost, high-performance storage option with our Preemptible GPUs. Check out this pricing calculator to configure your own preemptible environment.

The use-case for Preemptible GPUs
Hardware-accelerated infrastructure is in high demand among innovators, researchers, and academics doing machine learning research, particularly when coupled with the low, predictable pricing of Preemptible GPUs.

“Preemptible GPUs have been instrumental in enabling our research group to process large video collections at scale using our Scanner open-source platform. The predictable low cost makes it feasible for a single grad student to repeatedly deploy hundreds of GPUs in ML-based analyses of 100,000 hours of TV news video. This price drop enables us to perform twice the amount of processing with the same budget."
- Kayvon Fatahalian, Assistant Professor, Stanford University

Machine Learning Training and Preemptible GPUs
Training ML workloads is a great fit for Preemptible VMs with GPUs. Kubernetes Engine and  Compute Engine’s managed instance groups allow you to create dynamically scalable clusters of Preemptible VMs with GPUs for your large compute jobs. To help deal with Preemptible VM terminations, Tensorflow’s checkpointing feature can be used to save and restore work progress. An example and walk-through is provided here.

Getting Started
To get started with Preemptible GPUs in Google Compute Engine, simply append --preemptible to your instance create command in gcloud, specify scheduling.preemptible to true in the REST API or set Preemptibility to "On" in the Google Cloud Platform Console, and then attach a GPU as usual. You can use your regular GPU quota to launch Preemptible GPUs or, alternatively, you can request a special Preemptible GPUs quota that only applies to GPUs attached to Preemptible VMs. Check out our documentation to learn more. To learn how to use Preemptible GPUs with Google Kubernetes Engine, head over to our Kubernetes Engine GPU documentation.

For a certain class of workloads, Google Cloud GPUs provide exceptional compute performance. Now, with new low Preemptible GPU pricing, we invite you to see for yourself how easy it is to get the performance you need, at the low, predictable price that you want.

Doing DevOps in the cloud? Help us serve you better by taking this survey


The promise of higher service availability, reduced costs, and faster delivery is driving organizations to adopt public cloud services at a rapid pace. This includes organizations in highly regulated domains like financial services, healthcare, and government. However, the benefits promised by a well-designed cloud platform cannot be achieved with poor implementations that simply move traditional data center operations to the cloud, with no other changes in practices or systems architecture.

But we can’t improve what we don’t understand, and to this end we’re working with DevOps Research (DORA) on a project to help us all level up. To get better as an industry, we have to understand the use of cloud services and the impact of these practices on our ability to deliver high-quality software with speed and stability. Many of us have seen this first-hand. To get involved in the project, please take our survey.

I love working with developers and operators because I’ve seen how DevOps and Continuous Delivery practices work across multiple industries. How changing tooling can change culture, and create an environment of respect, accountability, and truth-telling. In so many organizations, the migration to the cloud isn’t just about changing where a workload runs. It’s an attempt to change IT culture, and DevOps practices are at the center of that transformation.

And now, we’d like to hear from you: what’s important to you when it comes to implementing and managing cloud services? We’ve teamed with DORA to research the impact of DevOps practices on organizations. And we need your insights and expertise to help shape this work. (Also, by participating, you could win some great prizes from DevOps.)

In collaboration with DORA, this program will study development and delivery practices that help make cloud computing reliable, available, and secure. We’re asking for 20 minutes of your time so we can better understand which practices are most effective for delivering software on cloud infrastructure. Click here to take the survey.