Posted by Ken Nevarez, Industry Solutions Lead at GoogleGPS is the workhorse of location based services, but there are use cases where you may want to avoid the cost and power consumption of GPS hardware or locate devices in places where GPS lacks accuracy, such as in urban environments or buildings.
We've seen recent growth in Internet of Things (IoT) applications using the
Google Maps Geolocation API instead of GPS for asset tracking, theft prevention, usage optimization, asset servicing, and more. As part of my 20 percent project at Industry Solutions, I created a prototype IoT device that can locate itself using surrounding WiFi networks and the Google Maps Geolocation API. In this post, I’ll discuss some interesting implementation features and outline how you can create the prototype yourself.
I built a device that scans for local WiFi and writes results (WiFi hotspots and their signal strength) to a
Firebase Realtime Database. A back-end service then reads this data and uses the Google Maps Geolocation API to turn this into a real-world location, which can be plotted on a map.
Set up the Device & Write Locally
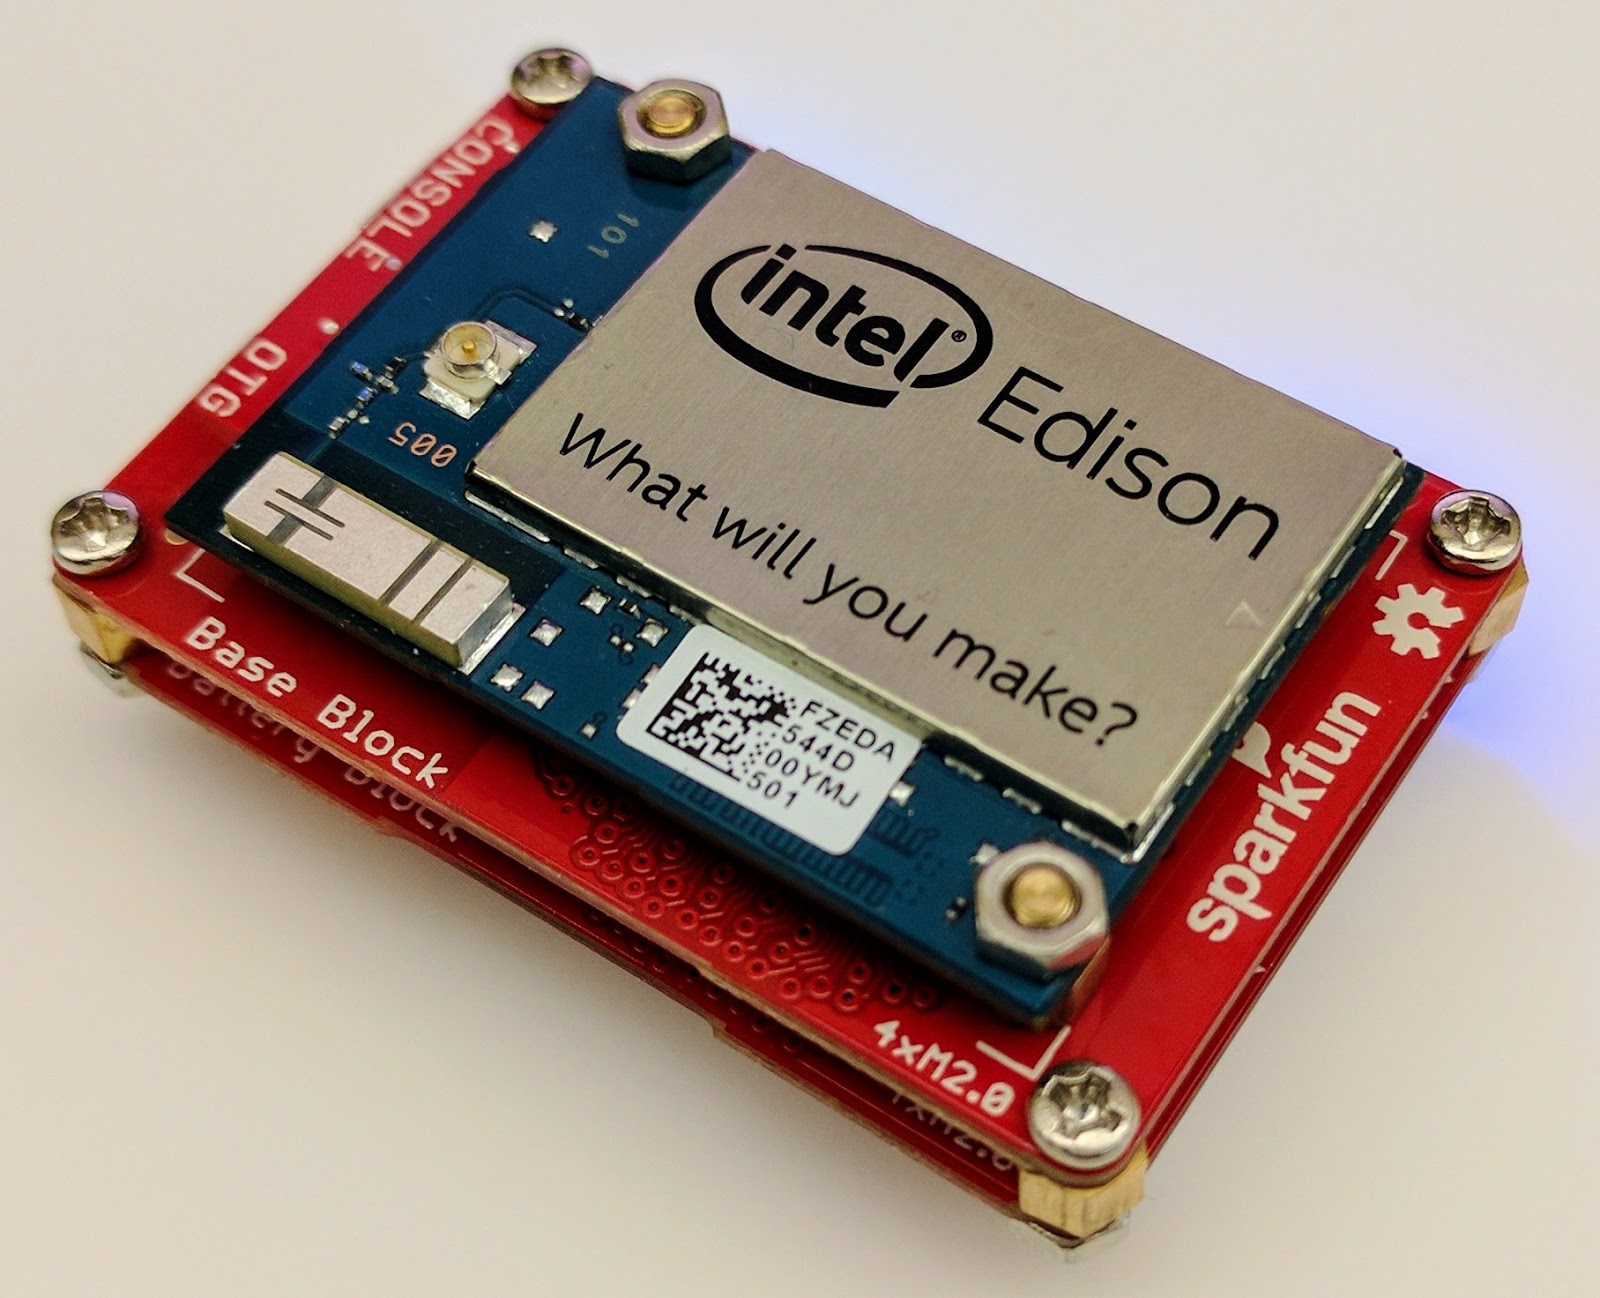
For this proof of concept, I used the
Intel Edison as a Linux-based computing platform and augmented it with
Sparkfun’s Edison Blocks. To build the device, you will need an
Intel Edison, a
Base Block, a
Battery Block and a
Hardware pack.
Developing for the Edison is straightforward using the
Intel XDK IDE. We will be creating a simple Node.js application in JavaScript. I relied on 3 libraries:
Firebase for the database connection,
wireless-tools/iwlist to capture WiFi networks, and
macaddress to capture the device MAC. Installation instructions can be found on the linked pages.
Step 1: get the device MAC address and connect to Firebase:
function initialize() {
    macaddress.one('wlan0', function (err, mac) {
        mac_address = mac;
        if (mac === null) {
            console.log('exiting due to null mac Address');
            process.exit(1);
        }
        firebase.initializeApp({
            serviceAccount: '/node_app_slot/<service-account-key>.json',
            databaseURL: 'https://<project-id>.firebaseio.com/'
        });
        var db = firebase.database();
        ref_samples = db.ref('/samples');
        locationSample();
    });
}
The above code contains two placeholders:
- The service-account-key is a private key you create in the Firebase Console. Follow the gear icon in the upper left of console, select “settings”, and click Generate New Private Key. Place this key on your Edison in the directory /node_app_slot/. See this Firebase documentation for more information.
- The project-id in the database URL is found in the Firebase console database page after you have linked your Google project with Firebase.
Step 2: scan for WiFi networks every 10 seconds and write locally:
function locationSample() {
    var t = new Date();
    iwlist.scan('wlan0', function(err, networks) {
        if(err === null) {
            ref_samples.push({
                mac: mac_address,
                t_usec: t.getTime(),
                t_locale_string: t.toLocaleString(),
                networks: networks,
            });
        } else {
            console.log(err);
        }
    });
    setTimeout(locationSample, 10000);
}
Write to the cloud
The locationSample() function above writes detectable WiFi networks to a Firebase database that syncs to the cloud when connected to a network.
Caveat: To configure access rights and authentication to Firebase, I set up the device as a “server”. Instructions for this configuration are on the
Firebase website. For this proof of concept, I made the assumption that the device was secure enough to house our credentials. If this is not the case for your implementation you should instead follow the instructions for
setting up the client JavaScript SDK.
The database uses 3 queues to manage workload: a WiFi samples queue, a geolocation results queue and a visualization data queue. The workflow will be: samples from the device go into a samples queue, which gets consumed to produce geolocations that are put into a geolocations queue. Geolocations are consumed and formatted for presentation, organized by device, and the output is stored in a visualizations bucket for use by our front end website.
Below is an example of a sample, a geolocation, and our visualization data written by the device and seen in the Firebase Database Console.
Processing the Data with Google App Engine
To execute the processing of the sample data I used a long running Google App Engine Backend Module and a custom version of the
Java Client for Google Maps Services.
Caveat: To use Firebase with App Engine, you must use manual scaling. Firebase uses background threads to listen for changes and App Engine only allows long-lived background threads on manually scaled backend instances.
The
Java Client for Google Maps Services takes care of a lot of the communications code required to use the Maps APIs and follows our
published best practices for error handling and retry strategies that respect rate limits. The
GeolocateWifiSample() function below is registered as an event listener with Firebase. It loops over each network reported by the device and incorporates it into the geolocation request.
private void GeolocateWifiSample(DataSnapshot sample,  Firebase db_geolocations, Firebase db_errors) {
    // initalize the context and request
    GeoApiContext context = new GeoApiContext(new GaeRequestHandler()).setApiKey("");
    GeolocationApiRequest request = GeolocationApi.newRequest(context)
            .ConsiderIp(false);
    // for every network that was reported in this sample...
    for (DataSnapshot wap : sample.child("networks").getChildren()) {
        // extract the network data from the database so it’s easier to work with
        String wapMac = wap.child("address").getValue(String.class);
        int wapSignalToNoise = wap.child("quality").getValue(int.class);
        int wapStrength = wap.child("signal").getValue(int.class);
        // include this network in our request
        request.AddWifiAccessPoint(new WifiAccessPoint.WifiAccessPointBuilder()
                .MacAddress(wapMac)
                .SignalStrength(wapStrength)
                .SignalToNoiseRatio(wapSignalToNoise)
                .createWifiAccessPoint());
    }
    ...
    try {
        // call the api
        GeolocationResult result = request.CreatePayload().await();
        ...
        // write results to the database and remove the original sample
    } catch (final NotFoundException e) {
        ...
    } catch (final Throwable e) {
        ...
    }
}
Register the
GeolocateWifiSample() function as an event handler. The other listeners that process geolocation results and create the visualization data are built in a similar pattern.
ChildEventListener samplesListener = new ChildEventListener() {
    @Override
    public void onChildAdded(DataSnapshot dataSnapshot, String previousChildName) {
        // geolocate and write to new location
        GeolocateWifiSample(dataSnapshot, db_geolocations, db_errors);
    }
    ...
};
db_samples.addChildEventListener(samplesListener);
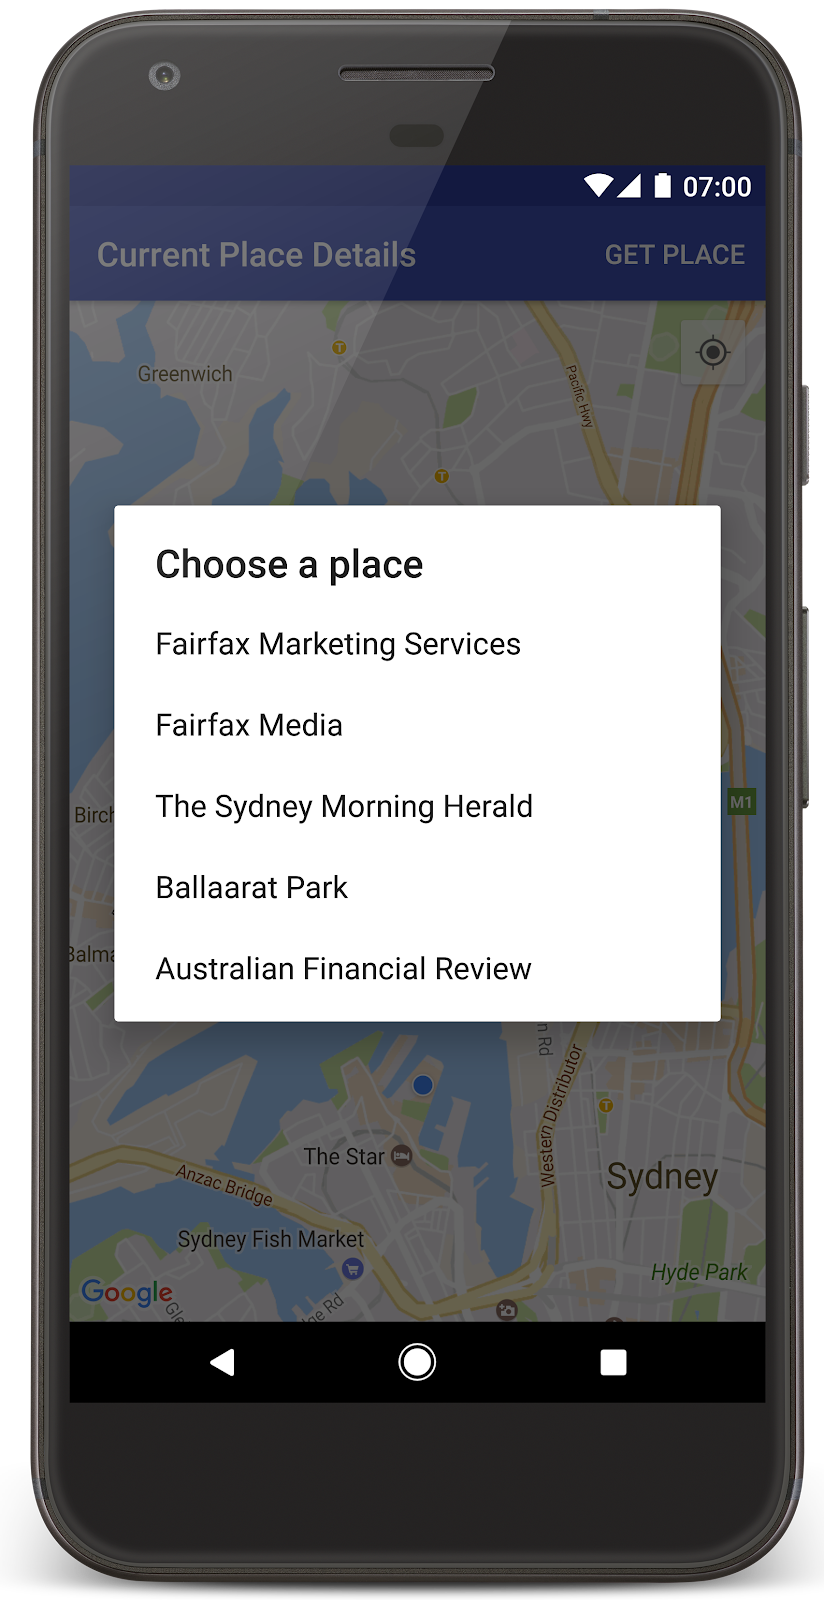
Visualize the Data
To visualize the device locations I used Google App Engine to serve stored data from Firebase and the Google Maps JavaScript API to create a simple web page that displays the results. The index.html page contains an empty <div> with id “map”. I initialized this <div> to contain the Google Map object. I also added “child_added” and “child_removed” event handlers to update the map as the data changes over time.
function initMap() {
// attach listeners
firebase.database().ref('/visualization').on('child_added', function(data) {
...
data.ref.on('child_added', function(vizData) {
circles[vizData.key]= new CircleRoyale(map,
vizData.val().lat,
vizData.val().lng,
vizData.val().accuracy,
color);
set_latest_position(data.key, vizData.val().lat, vizData.val().lng);
});
data.ref.on('child_removed', function(data) {
circles[data.key].removeFromMap();
});
});
// create the map
map = new google.maps.Map(document.getElementById('map'), {
center: get_next_device(),
zoom: 20,
scaleControl: true,
});
...
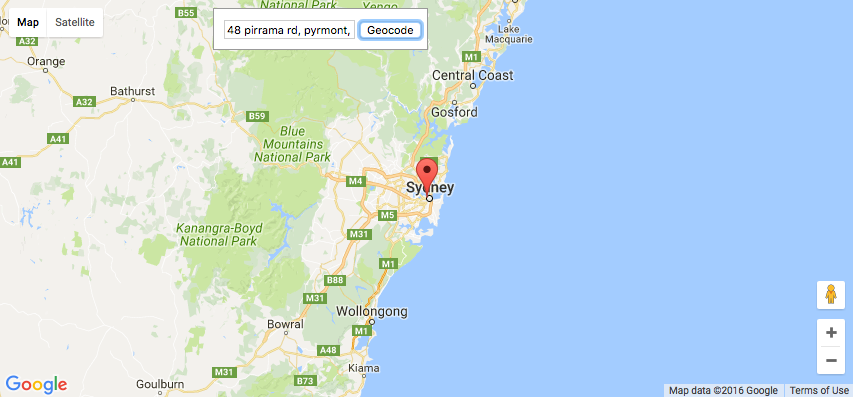
}Since the API returns not only a location but also an indication of accuracy, I’ve created a custom marker that has a pulsing radius to indicate the accuracy component.
 |
| Two devices (red and blue) and their last five known positions |
What’s next?
In this post I’ve outlined how you can build an IoT device that uses Google Maps Geolocation API to track any internet-connected device - from robotics to wearables. The App Engine processing module can be expanded to use other Google Maps APIs
Web Services providing geographic data such as
directions,
elevation,
place or
time zone information. Happy building!
As an alternative, you can achieve a similar solution using Google Cloud Platform as a replacement for Firebase—
this article shows you how.
| About Ken: Ken is a Lead on the Industry Solutions team. He works with customers to bring innovative solutions to market. |